|
| Author |
Message |
paulz
Member
|
# Posted: 31 Mar 2021 03:02pm
Reply
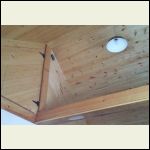
In doing the paneling and trim in the cabin it's necessary that I do something about the top of the T&G cedar I put up a couple of years ago. I suppose I should have started there and worked towards the walls instead of the other way, oh well. I have extra boards. I tried ripping off the T&G on the test piece in the photo and nailing it overlapping, doesn't look to good. I suppose I could rip to fit between the existing boards, or bevel cut an overlapping piece.
Whatcha think?
|
|
Steve_S
Member
|
# Posted: 31 Mar 2021 03:40pm - Edited by: Steve_S
Reply
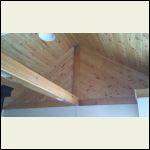
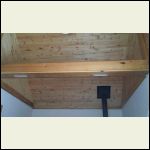
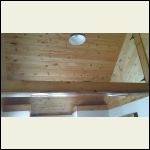
A few pics from mine.
I decided to use an 8"wide Pine Plank as the centre which matches the beam covers etc. It was a perfect place to run the wire for the main area light which is installed in a manner that it could also be replaced by a fan should I ever need one.
It isn't the easiest to see at a glance because it does blend in fairly well with the rest of the pine up there. I attached it with 2-1/2" Brads into the rafters, brown wood screws at the end which are hidden by teh Rising 8" wide plans. I'm also showing you the "border band" which ties the T&G down to the wall and connects the beams.
Cove Molding between the Gable Faces & Ceiling ties it all up quite nicely as well.
FYI, the T&G of course os smooth & varnished.
The 8" is all Mill Cut with the saw marks showing (slightly sanded to remove "fuzzies"and also varnished. The rough cut sawed lumber actually makes everything pop quite nicely.
Hope that tickles up an idea or two.
Ceiling @ Loft 1
| 
East gable end ceiling & wall
| 
North Ceiling View
| 
SW ceiling view
|
|
|
paulz
Member
|
# Posted: 31 Mar 2021 04:34pm
Reply
Thanks Steve. I too want to run wire so rather than butt up and nail to the beam I tried cutting off the t and g at 45s. Butts up well to the other boards and leaves me a gap for wire. Looks like a plan.
|
|
Steve_S
Member
|
# Posted: 31 Mar 2021 05:32pm
Reply
Because of the width of my planks, I had to make small bridge pieces connected between the rafters and that gave me a nice easy place to run the wire. As well, where the light is, the box is mounted so that it can handle a pretty aggressive Ceiling Fan if needed. I figured I would never want to reopen the ceiling to accommodate such if I ever wanted it.
Best to tinker around with a few scrap pieces first to see how it works out. Luckily my Gable ends also being the same T&G it let me use Cove Moldings which makes it all quite nice & tidy. The Loft space behind that door is not finished in pine as it is only a storage space.
|
|
Brettny
Member
|
# Posted: 31 Mar 2021 08:04pm
Reply
I would cut an angle on each side of a rather wide board. Cut blocks to space it down from actualy touching the ceiling and put led light strips behind the board facing down the angle of the ceiling. Those light strips are extremely cheap now. It would give the place a little mood lighting.
|
|
paulz
Member
|
# Posted: 31 Mar 2021 09:13pm
Reply
Oh man, what an idea! I have the two boards cut (25') at an angle and still wide enough pretty sure. I even have a string of those lights I think. Stayed tuned. Thanks Brett!
|
|
mj1angier
Member
|
# Posted: 1 Apr 2021 05:36am
Reply
We had a gap where the T&G meet. I covered it with a 1x3 and made some boxes to cover light outlet.
|
|
|

