| << . 1 . 2 . |
| Author |
Message |
Mushroom Man
Member
|
# Posted: 17 Apr 2017 02:53pm
Reply
ICC
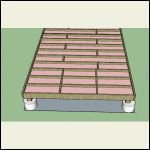
I slightly changed the bracers to accompany the subfloor boards so I can nail them down. I was coming up short a couple of inches (subfloor) so I adjusted so I could change direction of the layout. I can't imagine it will cause any problems for me or my floors.
I think I will lay down the Rat Mesh as I place each section of the 2x4x10' floor joist. I should have an easier time then crawling under the entire floor structure after it's built. I just better do a damn good job the first time because its not likely I'll be crawling under it in the future.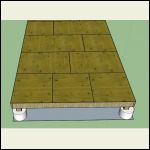
measurement_12.jpg
| 
measurement_13.jpg
|  |  |
|
|
ICC
Member
|
# Posted: 17 Apr 2017 03:39pm - Edited by: ICC
Reply
Quoting: Mushroom Man coming up short a couple of inches (subfloor) so I adjusted so I could change direction of the layout. I can't imagine it will cause any problems for me or my floors.
Your picture above has the wood grain running sideways across the 4 foot dimension, that is incorrect. I know it is only a drawing but it is a wrong detail, you want the grain if it was plywood, to run that way but that would be down the 8 foot length.
FYI, OSB subflooring is stamped with the direction to be laid across the joists, as well as the approved joist spans, It is made to be laid long direction across the joists for best stiffness just like plywood is much stiffer when the face grain is laid across the joists. It may not look like it, but the seemingly random scattering of wood strands is not random, they are spread in a pattern to afford more bending resistance in the long direction. The "O" in OSB stands for oriented and the "S" stands for strands. Here's a link with some info on a GP page They make the product so I think they know a thing or two about it. Clicking on the link may cause the page to be downloaded and you may have to open it manually, instead of it automatically opening in a window.
If that is not enough, the IRC , your building code, states in section 503.2.1.1(1) footnote (b) that panels must be placed over 2 or more joists with the long dimension perpendicular to the supports, or joists. There are sound engineering reasons for these rules.
On the one hand you state you want this to last for 30 years, and I assume that means you want it to be a sound structure, then you turn around and decide you know better. But it is your floor to do with whatever you decide.
I'll add a caution about installing insulation between or under joists and subfloor before the walls are up, the roof on and the building dried in. It has been know for it to rain between the start of the floor framing and the roof being done. That has happened to me practically every time I build more than a dog house. There nearly always seems to be some place water finds its way through and I find drips in the crawlspace even though I use adhesive and a good nail pattern. Maybe your luck will be better than mine. And speaking of rain there is a super subfloor material called Advantech, made by Huber Engineered Wood, the best subflooring I have ever used.
|
|
ICC
Member
|
# Posted: 17 Apr 2017 03:50pm - Edited by: ICC
Reply
In that IRC link you can also find drawings that show details. When you use T&G subflooring and lay it longways across the joists you do not need all those nailer strips you so nicely included in your picture. The T&G edges hold the sections together, keep them from moving and rubbing each other. If you were using plain edge, non T&G panels you would need blocking. That info is also in the footnotes in that section I linked to. Always read the footnotes
You do nail to a joist wherever there is one and the ends of each panel must fall over a joist, so measure and install the joists properly. Be very careful placing the first panel before carrying. There is also information for nail sizing, nail spacing and a notation to not overdrive the nails too deep, that takes away strength. Also don't make the error of using a sledgehammer to force the T&G panels together too tightly there is to be a space by design.
|
|
Mushroom Man
Member
|
# Posted: 17 Apr 2017 07:59pm - Edited by: Mushroom Man
Reply
Thank you guys. And ICC, about not putting insulation before drying it in. My thought is to do the foundation, insulation and subfloor in one week and place a plastic tarp over it until I am ready to come back with walls, roof and wrap.
I'm getting 8 days at a time to work on it.
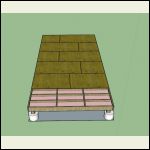
Also the subfloor that the grain is running the oppisite way. that is where the bathroom and kitchen is going so very little of it will actually be walked on. HOWEVER I did correct the joist.
ONE LAST THING!!! I start building in about 30 days. I started a YOUTUBE page to doc. the project while I get ready for retirement on a 1 acre homestead. Please following along...I'm going to need your expertise I'm sure. https://www.youtube.com/channel/UC1O05WiOSU2T6Y6OQTOZoKA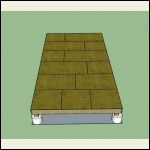
measurement_14.jpg
| 
measurement_15.jpg
|  |  |
|
|
DaveBell
Moderator
|
# Posted: 17 Apr 2017 09:00pm - Edited by: DaveBell
Reply
I'm confused by your subfloor 4x8 layout on 12x24. Every edge needs support.
|
|
DaveBell
Moderator
|
# Posted: 17 Apr 2017 09:05pm
Reply
Is the picture on your YouTube link a picture of the acre? Have you thought about building east of a good tree to get shade during the summer?
|
|
DaveBell
Moderator
|
# Posted: 17 Apr 2017 09:16pm
Reply
For 12x24...
Glazing, you need 23 sq ft of glass.
Ventilation, you need 12 sq ft of openable windows.
The screen door counts towards the ventilation requirement if it opens onto a covered patio.
I found basement windows that mounted vertically, will fit between the 16" OC studs. (physical security by design) I also plan on a metal door and metal frame with anti-jamb spread reinforcing. They might break in, but they better pack a lunch.
|
|
ICC
Member
|
# Posted: 17 Apr 2017 09:24pm
Reply
MM, l don't do youtube unless in town and on free wifi, it uses too much of the cellhone bandwidth.
Dave, if T&G edged subfloor is used the T&G edges that are perpendicular to the joists do not need blocking. It's an exception because of the T&G joint. the other side edge that are parallel to the joists should fall over the joist though. Check the IRC floor section. The panels are still oriented the wrong way though.
|
|
|
Mushroom Man
Member
|
# Posted: 17 Apr 2017 09:25pm
Reply
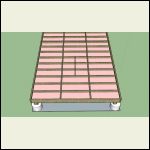
Hey DaveBell here is an updated picture of the sub floor layout. I wanted the sub floor to start at the very outside edge of the rim joust instead of center. The caused a slight measurement change. I have to turn the last 3 pc of sub floor in the opposite direction to get it to fit just right and not have a 1" strip to cut and try to fix.
Oh...I can't get the house behind the tree because it will be too close to the property line. However, I will be creating a dick that will be growing vines for shade during the summer yet allow sun in during the winter.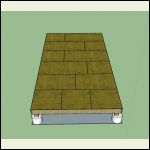
measurement_14.jpg
| 
measurement_16.jpg
|  |  |
|
|
DaveBell
Moderator
|
# Posted: 17 Apr 2017 09:35pm
Reply
Quoting: ICC Dave, if T&G edged subfloor is used the T&G edges that are perpendicular to the joists do not need blocking.
Quoting: ICC Check the IRC floor section.
That's fine, but not at my cabin.
|
|
DaveBell
Moderator
|
# Posted: 17 Apr 2017 09:38pm
Reply
Why not build it so the rim joists fall within 12x24?
|
|
DaveBell
Moderator
|
# Posted: 17 Apr 2017 09:44pm - Edited by: DaveBell
Reply
Quoting: ICC The panels are still oriented the wrong way though.
You mean they should look like this on an exact 12x24 so no cutting needed?
Please excuse the sloppy joist work. I'm using the North Korean Shed of Doom template.
|
|
Mushroom Man
Member
|
# Posted: 17 Apr 2017 09:54pm - Edited by: Mushroom Man
Reply
Oh...I have to turn ALL of the panels. Geeessss! I totally misunderstood.
DaveBell The sub floor is not exactly 4x8. It is more like
Actual Width (Feet) 3.98'
Actual Length (Feet) 7.98'
However, now that I'm turning them the correct way I'll see how it comes out.
|
|
ICC
Member
|
# Posted: 17 Apr 2017 10:34pm
Reply
yes, all long sides perpendicular to the joists, or more technically correct place the designated axis perpendicular to the joists. The floor sheathing comes marked with arrows. BUT stagger the overlaps. If the right side is as drawn start the center with a half sheet with the directional axis perpendicular to the joists. Use the other half sheet at the other end. Then stagger the next row to be like the first row. Never have the corners of four panels meet at one same point. The T&G loss can be accommodated by reducing the 12 ft width at the outside rim to rim distance. Maybe shorten the length a little to under 24 ft by enough to compensate for the other T&G joint? Link to doc , example of label at the bottom. Lots good info on panel use in between.
|
|
Mushroom Man
Member
|
# Posted: 17 Apr 2017 10:57pm
Reply
I feel like a idiot.
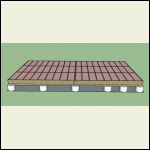
It laid out almost perfectly. I only have to bring in 3/8" from the outer edge of the rim joists. Yes...I may reduce the 'frame' 3/4". Making it 11' 11 1/4" x 23' 11 1/4"
Getting some sleep. Thanks for the info!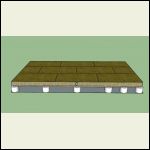
measurement_18.jpg
| 
measurement_19.jpg
|  |  |
|
|
ICC
Member
|
# Posted: 17 Apr 2017 11:37pm
Reply
Quoting: Mushroom Man It laid out almost perfectly.
You got the pattern!! FYI, on a wider floor we sometimes start the sheets in the middle and work out to the long edges as long as we have at least a half sheet width on either side, other wise we offset to whatever works best.
You really do not need the blocking, it is a pita to install. But if you do a good job of placing it and you glue and nail properly you can do w/o the T&G if you can find 3/4 OSB that is not T&G. Then you just leave a 1/8" space between all panel edges and fasten it down. T&G and no blocks is easiest and works. Nailing all those blocks in there in a straight line is a lot of work.
Use a bead of construction adhesive on each joist top and 8D common nails (2-1/2" x 0.031" dia.) every 6 inches around the perimeter of the sheet and every 12" in the field. (center area). Same nails if using T&G. If you use ordinary air gun nails make the spacing 4" and 8" as they are smaller diameter like box nails. Don't let the adhesive skin over before laying sheet, so only apply one sheet worth of adhesive at a time especially working alone and slow.
|
|
Mushroom Man
Member
|
# Posted: 18 Apr 2017 10:52am
Reply
Thank you ICC!!!
I'll be coming back to these strings in insure I do things right.
I'm psyched!
Mushroom Man
|
|
DaveBell
Moderator
|
# Posted: 19 Apr 2017 08:21pm
Reply
Mice climbing posts. It might be cheaper to use some of the roof roll flashing bent at 45, snipped half way at every 4" or so and nailed to the support posts. Or wrap and tack the posts with double sided sticky tape, 4 inches tall.
|
|
rockies
Member
|
# Posted: 19 Apr 2017 08:47pm
Reply
This article has information in it about the type of insulation method you are doing for the floor.
http://www.greenbuildingadvisor.com/blogs/dept/musings/cut-and-cobble-insulation
|
|
Mushroom Man
Member
|
# Posted: 20 Apr 2017 12:30pm
Reply
Thank you rockies and DaveBell. 
|
|
Mushroom Man
Member
|
# Posted: 20 Apr 2017 12:32pm
Reply
Hey ICC. I will be adjusting the width 3/4 in so the sub-floor fits perfectly.
I'll keep you goes updated with a YOUTUBE channel in a month or so. Waiting for the rains to stop before I get out there.
Mushroom Man
|
|
| << . 1 . 2 . |

