| . 1 . 2 . >> |
| Author |
Message |
lawnjocky
Member
|
# Posted: 22 Dec 2013 11:48am
Reply
My latest project, a sheep wagon.
|
|
bldginsp
Member
|
# Posted: 22 Dec 2013 03:34pm
Reply
Ok, explain to us city folk what a sheep wagon is.
|
|
lawnjocky
Member
|
# Posted: 22 Dec 2013 07:48pm
Reply
OK, sheep wagons are the original RVs. They were made around the 1880 up to the present for sheperds to live in while tending the sheep in the days of open range. The originals were made on wood running gear and later steel running gear or old truck frames.
Inside there is a bed across the back. Under the bed are two deep drawers, one on either side. In the center is a cuttingboard like table. Under the table back to the back of the wagon is a large storage area.
Toward the front is a small wood stove complete with an oven. The entry way is a dutch door.
The founder of Airstream was a former sheperd and he was inspired by sheep wagons.
I am making mine as a two wheel version so as to make freeway travel more pleasant.
A few years back I made a tear drop trailer for going back and forth to New Mexico but I wanted something a bit bigger so I can put my pants on indoors. If you are at all interested in sheep wagons check them out on google images.
|
|
lawnjocky
Member
|
# Posted: 22 Dec 2013 08:09pm
Reply
A couple more photos:
|
|
TheWildMan
Member
|
# Posted: 23 Dec 2013 10:35am
Reply
the gypsy wagons are an older but similar design, and both resemble the prairie schooner (covered wagon) used by white settlers out west after the civil war
|
|
lawnjocky
Member
|
# Posted: 23 Dec 2013 08:26pm
Reply
Yes they are similar. The early teamsters often pulled several wagon at once and the last wagon was their camper know as a Cooster Wagon.
I am out on the West Coast these days so I spend a lot of time camping and hunting or fishing in the western states. I have been using the tear drop but I wanted a bit more room. This will be my mobile cabin for all the other places I go besides my New Mexico cabin.
I decided to post it here because this is a cheap option for those wanting a small cabin on their land. It can be built at home and hauler to your land and moved when you want to move it. If you do a nice job these sell for about 10K. I will have between 2-2.5K in costs total putting this together.
The trailer was a boat trailer with current registration and title I got off Craigslist for $200. The current registration saves me having to deal with DMV with a home made trailer. I modified the trailer by cutting it down to the correct size and welding it back together. I had to shorten the axle too which included welding on new spindles. I think I spent about $100 on steel for the trailer modification. The wood stove was another Craigslist find for $300. It was in a little town about 250 miles away that I was going to be driving through on a fishing trip anyway. That was a lucky break as finding a real sheep wagon stove outside of the Rocky Mountain states is almost unheard of. I purchased the bows from a wagon supply place in Northeastern Oregon. Again I got lucky as the bows cost $300 and the shipping would be about the same price but the owner was heading down to an auction in the centeral valley and he offered to bring them along for a small fee. I met him at a truck stop about 20 miles from my place. The rest of the budget goes to wood, fasteners and paint. The wheels and tires are a back up set I had for my Jeep.
The top is going to be two layers of 1/4 ply laminated in place and then galvanized or aluminum sheetmetal as the final layer. I started putting the plywood on today but I had a bunch of Xmas stuff to do also so I didn't get that far with it. Below are some photos of the trailer mods and the plywood installation. Bending the plywood can be tricky so having lots of clamps and retchet straps handy is helpful.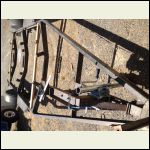
photo53.JPG
| 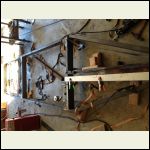
photo52.JPG
| 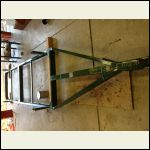
photo51.JPG
| 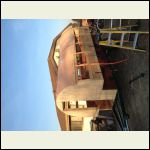
photo54.JPG
|
|
|
lawnjocky
Member
|
# Posted: 23 Dec 2013 08:28pm
Reply
And here is a photo of the inside to get an idea as to how the interior will look.
|
|
creeky
Member
|
# Posted: 24 Dec 2013 09:51am
Reply
Great project. What glue are you using to laminate the roof ply?
Hope you don't mind. thought I'd share the progress on my wagon. Pic taken moments ago.
|
|
|
lawnjocky
Member
|
# Posted: 24 Dec 2013 11:03am
Reply
Nice. For gluing I use three products, West System epoxy for most laminating. Five Minute epoxy when needed, and for the top I just use contact adhesive. It is cheap and doesn't tend to drip while setting the piece in place. I used it on my tear drop and it worked great.
|
|
neb
Member
|
# Posted: 24 Dec 2013 07:12pm
Reply
Very intersting project. Looks very professional and very well done. Some years back I rebiult a one seater buggy. I used all square headed bolts and did it to original as I could make it. It was a great project took a few winters. I finally had to sell it it took up to much room in the garage. Keep us posted please.
|
|
lawnjocky
Member
|
# Posted: 24 Dec 2013 08:05pm
Reply
First layer of sheathing is complete. Now you can get an idea as to the living space and exterior lines. There is still some trimming on the edges and maybe after santa is done in the morning I can get the second layer on.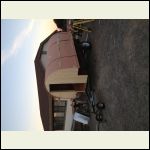
photo56.JPG
| 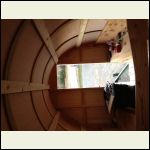
photo57.JPG
| 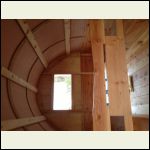
photo58.JPG
|  |
|
|
neb
Member
|
# Posted: 24 Dec 2013 09:43pm
Reply
I see you are going to use it for hunting etc. Do you have any plans to set it up on your land and ive in it?
|
|
lawnjocky
Member
|
# Posted: 24 Dec 2013 11:31pm
Reply
I have a small cabin on my land. This is for my other travels and to and from the cabin. I built a tear drop a few years back and it has been all over, TN, AR, OK, TX, NM, AZ, CA, CO, WY, MT, UT, NV and I am probably forgetting a few. In the spring I will take it to MD from CA. I am going to help my daughter and her husband do some remodeling. I will be towing this with a 4x4 f250 with a 7.3 diesel. I shouldn't be too limited as to places to go. I like getting way out on BLM land in the desert or up in the mountains for a few days of XC skiing. The wood burner is good for the cold weather like elk hunting or skiing. If I recall correctly I think I posted some pictures of the tear drop, or at least the wood burner I made for it, here.
The bottom line is I like building stuff. Everytime I go to the cabin I have some project. The building behind the sheep wagon is my shop behind our home. I always have some project going on in there. Looking at something and figuring out how to build it is half the fun.
|
|
lawnjocky
Member
|
# Posted: 25 Dec 2013 08:03pm
Reply
A slow day today. I only got 1 1/2 sheets of the second layer of plywood up. It took a lot of shimming to get it down tight. Tomorrow I should be able to get three down. The limiting factor is the ratchet straps holding one down prevent the installation of the next.
I also trimmed the edges of the top and installed the rear window. The window is going to take a bit more work befor I am happy with it.
And the most important thing done today was the hanging of my sheep calendar I got for Christmas. Miss May is really something.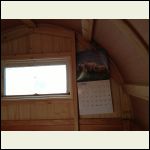
photo59.JPG
| 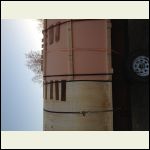
photo60.JPG
| 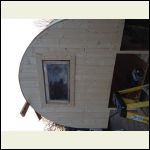
photo61.JPG
| 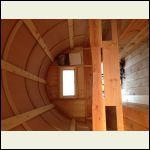
photo62.JPG
|
|
|
neb
Member
|
# Posted: 25 Dec 2013 08:14pm
Reply
I like the calendar fits the sirroundings. Very nice job and I will have to agree with you I like to biuld things also. Sometimes it costs more to build it then to buy it and less hassle but still fun to build and but your own touches on a project.
|
|
lawnjocky
Member
|
# Posted: 26 Dec 2013 04:39pm
Reply
I worked a half day today. The contact adhesive wasn't working as well as I would have liked so I swithced to PL200 today. Only 1/2 sheet to go on the top second layer. Lots of shimming to get the two layers tightened together.
I primed the ends. Threre were a coulple of gallons of metal primer in the shop so I am using that since I like oil based paints and marine paint isn't in the budget.
Hopefully I can get the metal sheathing for the top in the next day or two.
|
|
lawnjocky
Member
|
# Posted: 28 Dec 2013 05:45pm
Reply
I had a couple of hours free to work on the project so I started on the Dutch door. I took a 12' 2x12 and ran it through the planer bringing it down to 1" thick. Then I cut it into two 5'6" pieces and marked them side by side for dowling. Then using a dowling jig I drilled the holes for the dowls. Using West epoxy I glued up the joint and dowls and clamped it up. Note the wax paper under some of the clamping set up, epoxy won't stick to wax paper so this keeps things from getting glued to the work. Also on the ratchet straps I used blocks to keep the straps out of the epoxy.
Years ago an old boat builder friend taught me a cool trick, white vinegar works well to clean uncured epoxy off your hands and tools. That is a lot easier on your body than acetone or nail polish remover. Also never use MEK on your skin unless you want to get on the liver transplant waiting list.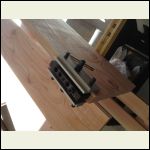
photo67.JPG
| 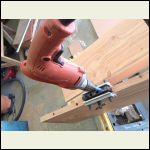
photo66.JPG
| 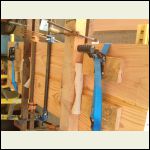
photo65.JPG
|  |
|
|
creeky
Member
|
# Posted: 29 Dec 2013 09:13am
Reply
add another use for vinegar. the duct tape of cleaning supplies. thx for the tip.
nice looking shop.
|
|
lawnjocky
Member
|
# Posted: 29 Dec 2013 06:22pm
Reply
I worked on the Dutch door some today. First was making a template using some 1/4 ply battens and 5 minute epoxy. Then using the template I marked the door blank and cut. After some fitting I fastened the hinges. The final step was screwing a guide to the door so as to get a nice clean cut between the upper and lower sections. I do it this was so as to avoid the head aches of trying to hang each section separately and getting everything to line up correctly.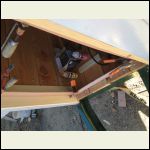
photo71.JPG
| 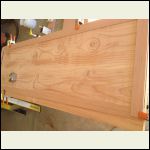
photo70.JPG
| 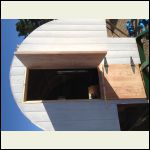
photo69.JPG
| 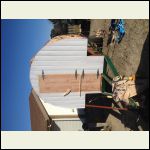
photo68.JPG
|
|
|
neb
Member
|
# Posted: 29 Dec 2013 06:41pm
Reply
Once again very nice work.
|
|
lawnjocky
Member
|
# Posted: 31 Dec 2013 10:21am
Reply
I had a slow day yesterday due to catching a nasty cold. It worked its way through the family and I was thinking I was going to avoid it but that wasn't my luck.
Anyway, I managed to get the last piece of the second layer of plywood on the top. I installed the antique door nob and reinstalled it several times to get it to latch properly. Other than that I just did some clean up and painting.
One of the most difficult things to locate material wise has been rolls of 36" wide galvanized steel. I found out that roofing supply houses often carry it in 50' foot rolls and sell it as valley flashing. Hopefully I will be able to pick some up on Thursday and get this thing weather tight before my luck with the weather runs out. I mention this here in the event someone reads this who is building a sheep wagon and runs into the same problem. It is surprising how little is on the web about actual construction of sheep wagons.
Another problem I came across was the axle. Originally I ordered sipndles from Northern Tool. The existing axle turned out to be 2x2 square tube with a 1/4 inch wall. The spindles from Northern were 1 3/4 across the square end thus only good for a 1/8 wall tube. That meant I could not reuse the old axle tube. I was concerned about the strength of an 1/8 wall tube so I contacted Northern to get the specs. Northern did not have them but said they would get back to me. They didn't. After three weeks I called back and this time they got the info needed, to use 1/8" wall tube I would need to use a medium carbon steel, not mild steel. No one in the state carried medium carbon 2" square tube. So what I did was order spindles from e-trailer that had 1 1/2 square ends so I could use the existing axle material. This little problem caused me about a month delay with the trailer frame sittning in the middle of the shop floor.
On well, here is a pic of the sheep wagon with some paint on it.
|
|
lawnjocky
Member
|
# Posted: 31 Dec 2013 10:24am
Reply
Here is the pic:
|
|
lawnjocky
Member
|
# Posted: 31 Dec 2013 08:48pm
Reply
Another slowish day. I put a deck outside the door and did some trim stuff. I also started securing the stove. It will have 4 rods through bolted from the stove top through the floor as well as securing the feet. Some pics on making the rods are below. The machine screws through the stove top are connected to the rods using allthreat couplers.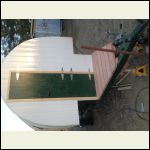
photo73.JPG
| 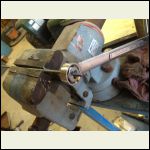
photo74.JPG
| 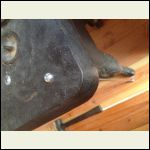
photo75.JPG
| 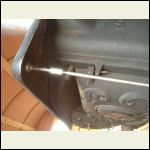
photo76.JPG
|
|
|
lawnjocky
Member
|
# Posted: 4 Jan 2014 08:14pm
Reply
It has been slow lately, still fighting this nasty cold that seems to be going around. One of the hardest things to find information on is the rear access to the storage area under the bed. I have spent hours on line trying to locate photos or any information on it. With all that I have only found a couple of photos and no written material on it. I went ahead trying to figure it out as I went along. It is a convoluted design with the door hinged in the middle. The only reason I can think of for doing it this way is that it could act as a stiffener for the rear of the wagon bed. I am sure I didn't get it right so I wouldn't use this as an example.
Other than that I have been working on many detailed items, some important like the beer bottle opener and others less important like bolting the stove down. I have also been gluing in splines between the floor planks as they have shrunk more than I care for. And finally the varnish in the interior is going on. Lovely fumes.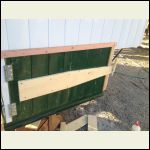
photo81.JPG
| 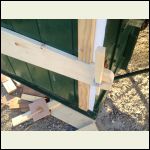
photo80.JPG
| 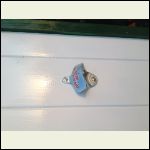
photo79.JPG
| 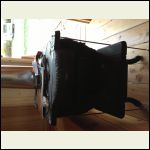
photo78.JPG
|
|
|
lawnjocky
Member
|
# Posted: 7 Jan 2014 09:08am
Reply
My son came over yesterday and we installed the metal sheathing. Each sheet is 13' 6' x 3'. They are 28 guage galvanized steel. We started at the back and worked forward so the overlapping joints would have the edge side facing the rear. We really glued the down. I choose not to just use butyl tape on the edges like many trailer builders do purposely because there are going to be a limited number of screws and I really wanted this stuff to stay put.
I am still moving kind of slow due the nasty cold that is going around.
|
|
lawnjocky
Member
|
# Posted: 7 Jan 2014 09:16pm
Reply
Today was more sheet metal work. I trimmed the edges of the metal we installed yesterday flush. Then I installed the roof jack and stove flue. The roof jack is bedded with 500 degree silicone. The 6" roof jack was way too loose so I picked up a 5" and cut it down until it was a nice snug fit. The storm collar was also too loose but when I cut it and tried to weld it back together it self destructed even using my little wire feed welder on its lowest setting.
More sanding and varnishing inside too.
I can see light at the end of the tunnel.
|
|
neb
Member
|
# Posted: 7 Jan 2014 09:23pm
Reply
It's looking good. Very nice work!
|
|
jrbarnard
Member
|
# Posted: 7 Jan 2014 09:52pm
Reply
lol.. i only scrolled to the ones that were not sideways... i am being lazy tonight.. but very nice 
Russ
|
|
lawnjocky
Member
|
# Posted: 7 Jan 2014 11:18pm
Reply
I am the lazy one, I keep posting them sideways. If I get my act together tomorrow maybe I'll get the materials for the heat shields. Then I can bake an apple pie to test the stove out.
When I purchased the stove I was on my way out of town for a fishing trip. After sitting in camp a couple of days looking at the stove we decided apple pie would taste good. We pulled the stove out of the truck and set it up. The picture below is the pie cooling on a coleman stove. We had a serious discussion as to whether or not we should eat it. The crust on the top has a remarkable likeness to Hilliary and we dreamed of retiring after selling it on e-bay.
|
|
lawnjocky
Member
|
# Posted: 7 Jan 2014 11:19pm
Reply
You have to look at it side ways and maybe squint a bit. Beer helps....
|
|
| . 1 . 2 . >> |

