| . 1 . 2 . 3 . 4 . >> |
| Author |
Message |
BlaineHill
Member
|
# Posted: 25 Feb 2011 08:46pm
Reply
I am a new member here on the site. I thought I would introduce my land and summer project. About a year ago I bought 72 wooded acres in south-central Ohio (see topo map and photos). I did not buy the land to build a cabin, but I am building a cabin in order to fully enjoy the land. This wilderness property is about a 1 ½ hour drive from my house. This seems like a nice distance as I can easily go out there for the afternoon and be home in time for dinner. Currently, there are no structures on the property and this summer I will be building a cabin.
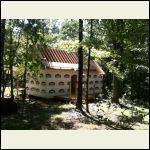
The photo of the red cabin is the inspiration cabin, 16'x24'. There is a local company that will build this cabin for you in 1 day as long as you put in the post-and-pier foundation ahead of time. I think I can build a similar cabin for half the cost if I do it myself. Additionally, if I build it myself, I will get exactly what I want and I will have the personal satisfaction of building my own cabin. I started the foundation last weekend. My plan is to put in place all the pressure treated lumber to include the foundation, floor joists, front porch floor and back deck over the next 6 or 8 weekends. Then, this spring I will take a week off of work and spend a solid 9 days getting it from that point to a roof covered with tarpaper and walls covered with house wrap. Then I will finish the siding, roofing and interior throughout the summer and fall. That's my plan. We will see how it goes.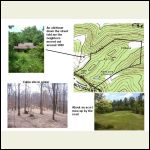
Topo map of my place with a few pics
| 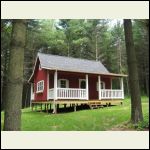
The inspiration cabin. Mine will be similar.
|  |  |
|
|
hattie
Member
|
# Posted: 25 Feb 2011 10:06pm
Reply
Welcome to the forum BlaineHill...Warning that this is addictive though. *S*
72 Acres! That is a lot of land. Do you plan to live there full time eventually? It looks like a beautiful spot. I love the cabin design you want to go with. Keep us all posted as you progress. Good luck!!!
|
|
turkeyhunter
Member
|
# Posted: 26 Feb 2011 07:28am
Reply
BlaineHill, like the looks of your property off the topo and pic's, looks like BIG DEER country. Like the design of your cabin/camp also.........keep us posted of your progesss.
|
|
rayyy
Member
|
# Posted: 26 Feb 2011 02:56pm
Reply
Sound's like a great plan,folks.That's gonna be one sweet cabin when your all done with it.Keep us abbrest of your progress.
|
|
BlaineHill
Member
|
# Posted: 28 Feb 2011 07:51pm
Reply
Thanks for your welcome messages. This is going to be a very solitary project for me so I appreciate being able to share my progress and get advice from other builders and dreamers.
Working alone, one pick-up truck load of equipment and materials and a full day's work is enough for me to build one of these post-and-pier rows. The row in the background runs along the back wall of the cabin. I built this one first with the goal of getting it as straight and level as possible. I built the one in the foreground yesterday with the goal of getting it straight, level, perfectly square and the same height as the one in the back. I projected the height of the back row onto the front with a 20' clear plastic water tube I bought at the hardware store. I never used a water tube like that before, and it worked well. I have a gas-powered post hole digger with a 10 inch diameter auger and a generator for power tools which certainly made the work go faster. I still have to build 3 more of these. Then set floor joist on top and perpendicular.
The post hole digger got me down to about 28 inches. Then I flared-out the base and took it down to 36 inches with a bar and manual post hole digger. Poured in quick-set concrete. Set 4"x 6" posts on top of the pad and bolted 2"x10"s to the posts with 1/2" carriage bolts. Then used the back end of the bar to ram earth around the posts.
The hickory tree out back has a low fork and one of the sections was hanging over the cabin site. I figured I better cut it down now before it falls on the cabin. Those hickory trees out there seem to rot from the inside out and fall unexpectedly. Anyway, with spring on the way, the sap is starting to flow and that part of the tree is soaked. The bark discoloration at the base of the tree is actually sap. If you think this is something I should be concerned about, let me know if you have any advice for sealing a wound in a live tree.
|
|
Rob_O
|
# Posted: 28 Feb 2011 08:10pm
Reply
Looks good so far. Will you be adding diagonal bracing to the piers when you have them all set?
|
|
BlaineHill
Member
|
# Posted: 28 Feb 2011 08:29pm
Reply
Rob_O,
I have asked myself that same question. I am thinking of using some kind of colar tie where every floor joist connection touches a pier-- about 150 ties. I think this will eliminate any lateral shifting. The high side will probably be 4 feet off the ground. Any thoughts?
|
|
Rob_O
|
# Posted: 28 Feb 2011 08:51pm
Reply
Well, worst case scenario you get this

I say brace it
|
|
|
BlaineHill
Member
|
# Posted: 20 Mar 2011 06:33pm
Reply
This foundation work I have been doing is not all that interesting, but I thought I would post an update. I think 2 more days out there and I will have the foundation finished.
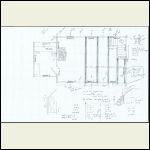
Planning is an important part of the process. So, I scanned in a couple of my working drawings. It might seem odd to some people who design everything on the computer that someone would use graph paper and a pencil, but it's what I am used to.
As for the drawing of the cabin layout, I really wanted a separate area for bunks. It's hard to imagine that a guest would not want to drink bourbon and play cards until the early hours of the morning, but that is the reality of it. So, I wanted a separate sleeping area ... no matter how small. I am also trying to tuck a small staircase in the corner. The 9-foot sidewall height will go a long way toward making this happen. The shaded bars indicate the location of 4"x10" cedar loft support beams.
I am really looking forward to getting up out of the mud and building the more interesting parts of the cabin.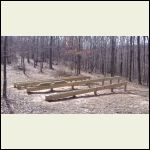
The current state of the foundation work
| 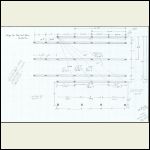
Foundation drawing
| 
Cabin plan drawing
| 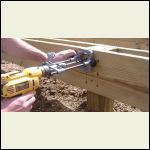
Drill attachment for drilling straight holes
|
|
|
turkeyhunter
Member
|
# Posted: 20 Mar 2011 08:46pm
Reply
looking good, looks like you are well under way .
|
|
kbvalley
Member
|
# Posted: 26 Mar 2011 12:31pm
Reply
that foundation looks beefy, I like it.
|
|
BlaineHill
Member
|
# Posted: 30 Apr 2011 08:30am
Reply
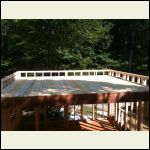
There have been a few weather delays, but I have been able to get out to the property for a days work here and there. I have finished the foundation, placed most floor joists (still a little sparse), and got the basic framing for the back deck (12'x8'). I still need to build the front porch floor and do a few other things before I start looking at the calendar and plan the week off to get the cabin dried-in.
The biggest issue I am facing now is the driveway. It is a nice access cut through the forest, but there was never any gravel put down. We have received an enormous amount of rain lately and the driveway has become very muddy. I have an agreement with a local gravel company to do the tractor work required, put in 5 culvert pipes and put down enough gravel to cover a quarter mile. I think I will be on their schedule sometime next week.
Yesterday, when I was leaving the property, I got stuck in the middle of the driveway. I had to use a winch to pull the truck onto solid ground. Then had to hook-up tire chains to get out of there. I am going out to mow the field today, but I don't think I will be accessing the cabin site until the gravel work is done.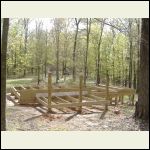
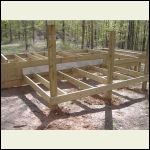
Back of cabin
| 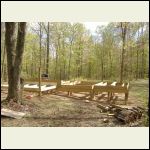
Left to right: deck, main cabin, bunk room
| 
Back deck. Just big enough for a grill
| 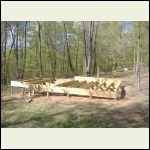
Front of cabin. Still need 9 more floor joists
|
|
|
BlaineHill
Member
|
# Posted: 22 May 2011 09:53pm
Reply
It finally quit raining long enough for the gravel company to install the driveway. I put marker flags in the cabin clearing where I wanted the driveway and the turn-around placed. They did a nice job. They put down 115 tons. It certainly helped a lot, but I don't think they estimated enough. If that was 115 tons, I would say it needs about 60 tons more. The two areas that were the worst were well covered, but the middle of the driveway had sparse coverage and I am now starting to sink in up there. I don't feel ripped-off. I got 115 tons installed and that's what I paid for ($2200 USD). I will see if I can get them back out for another round.
Since I regained access to the cabin site, I finished the floor joists and put the decking on the back deck. I have ordered engineered posts [laminated 2x6's] common in pole barn construction for the front porch to ensure the posts do not twist or bow over time. If the weather is decent [doubtful] next weekend, I will get started on that.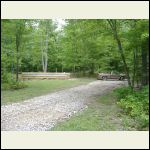
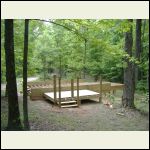
New parking area
| 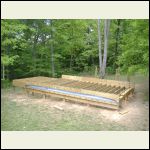
Front of cabin ready for porch
| 
Treated 2x6's used decking material
| 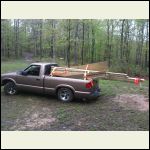
Hauling 16-footers. It's amazing how much weight a dashboard can withstand
|
|
|
turkeyhunter
Member
|
# Posted: 22 May 2011 10:20pm - Edited by: turkeyhunter
Reply
Quoting: BlaineHill Hauling 16-footers. It's amazing how much weight a dashboard can withstand
that looks like a "hold my beer and watch this" :-) would have been really bad f you backed into a tree, OR someone,---ran into those 16 footers............look in CList and pick you up a used utility trtailer, i use mine daily to haul materials......
looking good, you need dry weather and i am praying for rain.
gravel drive looks good too, did they tailgate spread it????
|
|
BlaineHill
Member
|
# Posted: 22 May 2011 10:34pm
Reply
I have a 14-foot tandem axel trailer but I have not needed it yet. I figure if I am headed out there and I can carry a full-days work with just the truck it's less hassle. When I get going with anything above the floor, I will need the trailer.
They dumped all 115 tons up by the road. Then they brought in a front-end-loader to widen the drive, cut the drains and spread the gravel. The ground is just saturated.
BTW, I have been enjoying your construction photos. Looks like you are a little ahead of me on progress ... then again, I work alone ;)
|
|
turkeyhunter
Member
|
# Posted: 22 May 2011 10:48pm - Edited by: turkeyhunter
Reply
Quoting: BlaineHill BTW, I have been enjoying your construction photos. Looks like you are a little ahead of me on progress ... then again, I work alone ;)
THANKS---i have a real good friend who helps me --either on sat or sunday, ( only 1 day a week) depending on his workload. I could have not done it with out his help. And i work down there a little during the week on the build, PLUS getting materials for the weekend WORKDAY etc.
|
|
BlaineHill
Member
|
# Posted: 6 Jun 2011 07:29pm
Reply
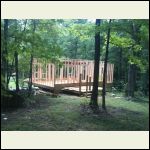
The laminated porch posts I ordered arrived at the lumber yard and I was able to get out to the land last weekend. I went out Saturday morning to dig the 6 post holes. My gas-powered auger sheered-off around hole #21. Since then I have been digging by hand. I was going out anyway, so I took the opportunity to deliver those posts. On Sunday, I was able to set the posts and built most of the framing for the front porch.
I know it is getting a little weird, but I wanted to build the front porch before the cabin walls. It's all treated lumber and I like the idea of building the front cabin wall, spanning porch rafters between the cabin front wall and that porch beam, and then moving on. The beams were made by Perma-Straight and the bottom 6 feet of each beam is made of treated lumber. I ordered 16-footers, but judging by the extra height, I could have ordered 14-footeres instead. I spent time getting it all square and level and I think I will be able to tie it all together when the time comes.
I usually take pictures at the end of the day, but this time I thought I would post a couple of mid-day shots.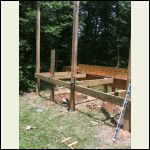
Building porch 1 of 2
| 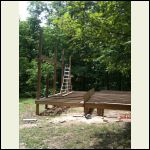
Building porch 2 of 2
| 
Left to right: front porch, main cabin, back deck
|  |
|
|
BlaineHill
Member
|
# Posted: 26 Jun 2011 11:40am
Reply
I wanted to post a few technical details of my build. If you come to this forum for small cabin lifestyle and philosophy, you might want to skip this post.
As I researched tools, materials and techniques in preparation for this project, it was always illustrations of details posted by others that helped me the most. (Thanks oldhouselights for gable end wall framing details). Sometimes I would see something that would not work for my climate or budget, but still offered a point of reference and I appreciated having the opportunity to see it. The pictures attached here illustrate some topics regularly discussed on this forum. I am not saying these techniques are correct; I am just illustrating what I did. Hopefully, somebody, somewhere, will benefit from them.
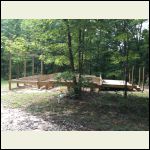
Picture 1 is where the front porch meets the cabin. I used 2x10 floor joists for the cabin floor and 2x8's for the porch. Even with 2x6 deck boards, the cabin floor will still be a little higher and it still has sub-floor on the way. The last deck joist is supported with a hidden hanger. All other joists on the interior are regular hangers. That gray thing above the deck is copper/vinyl flashing and extends behind the last deck board, on top and slightly in front of the ledger board. The top of the flashing will eventually end up behind the house wrap. The underside of that last deck board is notched every couple of feet to prevent water from standing back there. The pressure treated plywood panel you see is actually a starter strip for the exterior sheathing. I will transition to regular plywood above this point.
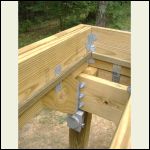
Picture 2 is the inside corner of the bunk room. I notched some bracing into the inner joist of the double end-wall. The lower end of this brace ended up fitting between the carriage bolts with a hidden hanger. I used those little flat Simpson ties between every other floor joist all the way around the cabin. This tied the floor to the foundation. The 1"x2" treated strips you see were added to support the bottom panel for the insulation. I had to install these inside every floor joist cavity, but it did not take too long as I quickly cut the pieces to length with garden pruners (A.K.A "loppers") and installed them with a pneumatic stapler. In this picture you can also see the generator inlet box. It is a 30 amp, 4-prong twist lock. I have a piece of 10-3 I will be running to a panel on other side of the cabin. My generator clearly states on the front "floating neutral" so I will be bonding at the panel.
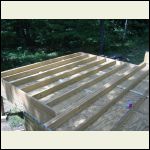
Picture 3 shows the bunk room with the treated plywood insulation enclosures in place. These panels are nailed to the 1"x2"s seen in picture 2. The insulation cavity is about 6 inches deep. I plan on putting 3.5" thick non-faced insulation in there. I still need to take a hole saw and drill 3" vent holes through those panels, near the outside walls. I plan on running a bead of adhesive around the holes and installing a piece of metal screen over the holes. If you look close you can see the insulation supports. I cut pieces of 14-2 wire into 2-foot lengths and separated it into individual strands. I used wire staples to secure each piece. These supports will hopefully keep the insulation against the cabin floor and out of the vent space. For the record, if you can see a way to insulate your floor with ridged foam with no enclosure, I would recommend that.
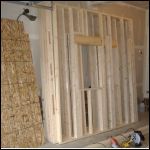
Picture 4 shows the 5 wall sections I have pre-built in my garage. I am cutting the perimeter of the cabin every 8 feet. With gable ends I am looking at about 18 sections. Those are 9-foot side walls in the main cabin. Some of those panels have loft beam support framing and window headers and I estimate they weigh around 150 pounds. I told my wife she can't park in the garage for a couple of weeks.
Sorry if this turned-out to be a painful level of detail. Because I am an engineer, these are the things that fascinate me.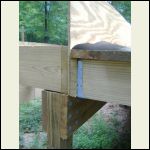
Picture 1
| 
Picture 2
| 
Picture 3
| 
Picture 4
|
|
|
Erins#1Mom
|
# Posted: 26 Jun 2011 06:19pm
Reply
No "Sorry". I find all this very informative. I want to build the best cabin for my buck. Hopefully, all these posts will help me to do that.
|
|
BlaineHill
Member
|
# Posted: 31 Jul 2011 09:13pm
Reply
Up until about a week ago I was in about 25 pick-up trucks loads of material and about 25 random days of work since last February. I took off work last week and the previous Friday and worked on this project for 10 days straight. I had hoped to post updates to the forum throughout the week, but I was too exhausted by the end of the day. I did take a lot of pictures so I am going to start at the beginning of the week and post a few updates.
|
|
BlaineHill
Member
|
# Posted: 31 Jul 2011 09:28pm
Reply
On day one, I hauled out about half of the wall sections and 16 sheets of sub-floor. I paid a little extra for a plywood subfloor called "Dry Ply". I think it is supposed to hold up to some rain for some period of time. One side felt like it had wax on it. I figured it was good insurance against slow progress and a wet summer. The rest of day one was spent installing the sub-floor. I have a collated screw gun which really helped, but it was still a lot of work.
On day two, I hauled out the second half of the wall sections, did basic framing and installed a couple of the loft beams. Some of those wall sections were really heavy. I think if they were 10 pounds more I would not have been able to manage them.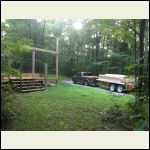
Morning of day 1
| 
Basic framing
|  |  |
|
|
Scott_T
Member
|
# Posted: 31 Jul 2011 09:29pm
Reply
So far looks very solid!
|
|
Scott_T
Member
|
# Posted: 31 Jul 2011 09:33pm
Reply
Did you have a helper with the walls?
|
|
BlaineHill
Member
|
# Posted: 31 Jul 2011 09:47pm
Reply
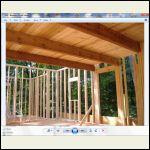
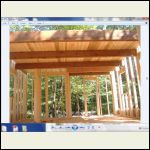
Days 3 and 4 were spent doing the rest of the interior framing, installing the rest of the loft beams and installing the 2x6 tongue and groove loft flooring. I used ratchet straps to pull every floor board tight before screwing it in. It took a lot of time, but I got a really solid floor out of it. I feel like I got an attractive ceiling from below and a nice floor in the loft all in one shot. The clear space between the beams is 45 inches and I was not sure if the T&G 2x6 was going to go a little soft with that kind of span. Seems very solid and I am happy with it. Both the 4"x10" cedar beams ($8.50USD/lf) and the T&G ($.70USD/lf) are special order in my area. The T&G sample chunk at the store measured 5 1/8" true coverage so I ordered 37 of them. What showed-up had a true coverage of 4 ½" so I had to go back and order 5 more boards. I put some temporary blocking in the stairwell to hold up the ends and covered over the stairwell for now. I wanted to use that area in the loft during the construction process. I will cut out those boards during the interior finish.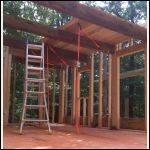
Installing loft floor
| 
Finished
| 
Finished 2
| 
Loft floor
|
|
|
BlaineHill
Member
|
# Posted: 31 Jul 2011 09:57pm
Reply
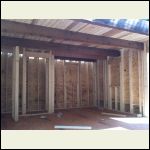
Days 5 and 6 were spent putting up exterior sheathing. It was really dreadful pushing those full sheets up a ladder.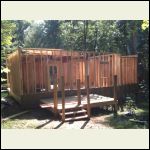
End of day 5. Half done
| 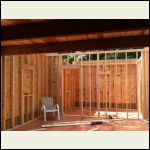
From the stairwell toward the bunk room
| 
Cooking area on the right. Stairwell on the left
|  |
|
|
BlaineHill
Member
|
# Posted: 31 Jul 2011 10:12pm
Reply
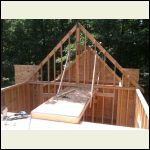
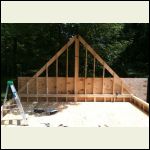
The first thing I did on day seven was build a temporary platform from the loft to the cabin wall and across the bunk room. Then I moved the pre-built bunk room gable end from the loft, across both bridges, and installed it in place. On day seven I also built the gable ends for the main cabin. Those platforms did not take long to build and I have really enjoyed having them. I am not sure when I will remove them. I will be installing 1x8 T&G on the interior and it would be nice to have them in place for that process.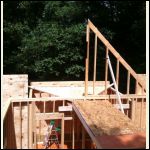
Temporary platforms and one pre-built section in place
| 
Bunk room ridge board pre-built into cabin wall
| 
Loft end
|  |
|
|
BlaineHill
Member
|
# Posted: 31 Jul 2011 10:27pm
Reply
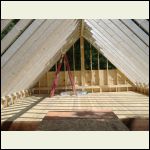
Days 7, 8 and 9 were spent on rafters. I designed the rafters months ago and I wish I had pre-cut them as this seemed to take a long time. I also put in a couple of 6"x6" cedar beams over the open areas in the loft and the bunk room. I think they look pretty cool. I am happy to report that I was able to tie in the porch as planned. I still have the rest of the porch rafters to install. I would have liked to been able to install the roof sheathing this week, but I did not get that far. It is a top priority and I don't plan to work on anything that is not directly related to getting a roof on this cabin. That was my week off. Now it's back to random days of cabin building when time allows.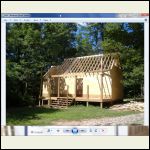
Front of cabin
| 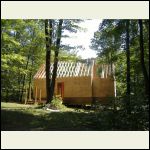
Back of cabin
| 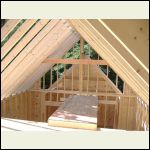
From the loft
| 
Toward the loft. 6-foot step ladder for scale.
|
|
|
Erins#1Mom
|
# Posted: 1 Aug 2011 05:07pm
Reply
It's beautiful workmenship. Love the loft. A lot of work for a week off.
|
|
old buddy
Member
|
# Posted: 27 Aug 2011 09:19am
Reply
Your cabin looks great. Your loft shot reminded me of a cathedral. I'm sure by now you have made a great deal more progress. We're in Jefferson County and by your membership name I'm guessing you're from Belmont County, originally. I say that because there is a Blaine Hill on US40 in Belmont County. Great job..let's see some new pics! Old Old Buddy (I'm signed in under my son's name of Old Buddy).
|
|
BlaineHill
Member
|
# Posted: 27 Aug 2011 08:52pm
Reply
Old Old Buddy,
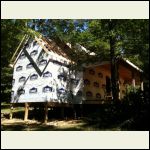
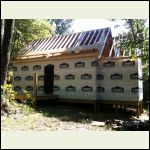
Thanks for checking on me. The weather here has been favorable – late summer drought I guess. I have been able to get in a good handful of days since the last time I updated this thread. I finished the roof framing, house wrap, some roof sheathing and some odds and ends. It was a beautiful day on the hill and I am posting some pictures I took today. I am not a big fan of walking those roof jacks, but that's just the way it is. It's probably a little ambitious, but I am going to try to get the rest of the sheathing on the main cabin, tar paper and drip edge tomorrow.
My ancestors are from Belmont County. Good catch. My grandfather grew-up on a farm on the Blaine Hill you mentioned. He always referred to that farm simply as "Blaine Hill". The land he used to work is now Linwood Cemetery. I have named my cabin property after that original farm to carry on the tradition.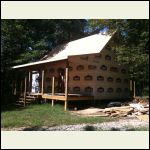
front1.jpg
| 
front2.jpg
| 
back1.jpg
| 
back2.jpg
|
|
|
| . 1 . 2 . 3 . 4 . >> |

