| . 1 . 2 . >> |
| Author |
Message |
daniel_hawkins
Member
|
# Posted: 30 Dec 2015 14:05 - Edited by: daniel_hawkins
Reply
We started construction on our cabin in the spring of 2015. The idea came long before that.
My girlfriend and I decided it was time to quit renting and start saving money. We figured we could put the amount we normally pay in rent towards construction materials and never acquire any debt. That was of course if we could live rent free during construction (parents). We both consider ourselves pretty handy and build projects regularly for ourselves and others. So we figured why not.
The real start to this idea was when her father gifted .4 acres of land as a graduation present. He scored a handful of properties sometime back and knew she always liked that one. So then it was onto the design process. That was much harder than I ever imagined it to be. We spent months searching, planning and drawing out ideas for floorplans only to have them scrapped for various reasons.
We finally settled on a floor plan that worked for us, it was 8' x 16' with a loft overhead and a small porch built in. Downstairs was basically kitchen and bathroom. The bedroom was the loft area upstairs.
Most of our inspiration came from Pinterest and forums. These are some of our favorites.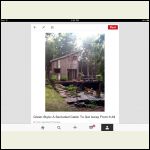
image.png
| 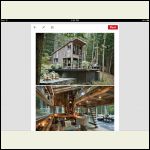
image.png
| 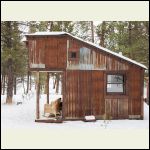
image.jpeg
| 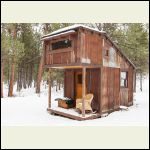
image.jpeg
|
|
|
daniel_hawkins
Member
|
# Posted: 30 Dec 2015 14:19 - Edited by: daniel_hawkins
Reply
We went back-and-forth several times on size of the floor plan but decided if we built a larger one it would take a longer time to complete and it would be best if we lived on site. So if we built a smaller floor plan and liked it, we could stay put. If we wanted to build a larger space in the future we would already be living there and it would make life easier. We decided to start with the smaller floor plan to get a real idea of what this do it yourself home construction was all about. The next thought was that if we built small enough, in the future we could just haul the little house away to another location on a trailer. That's how we settled on 8 feet wide. 16 feet long was the smallest we could do while still fitting in everything we wanted. We completed the drawing and design sometime around January 2015.
|
|
daniel_hawkins
Member
|
# Posted: 30 Dec 2015 14:25 - Edited by: daniel_hawkins
Reply
March 2015: construction began
We broke ground on the block foundation I guess you would call it. It's not quite pier and beam.
|
|
daniel_hawkins
Member
|
# Posted: 30 Dec 2015 14:43 - Edited by: daniel_hawkins
Reply
We used two pressure treated 4x6x12' beams
Next came 2x10's every 16"
Topped everything off with 3/4" t&g OSB. In the future I would spring for the expensive tongue and groove plywood over the OSB. It was exposed to the elements for a while and despite several coats of paint and plastic barrier, it still swelled in some spots leaving the floor uneven.
|
|
daniel_hawkins
Member
|
# Posted: 31 Dec 2015 12:23 - Edited by: daniel_hawkins
Reply
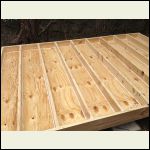
The 1x2's in between the floor joists supported 1/2" plywood. Rolled fiberglass insulation was set on top of that to insulate the floor before the sub-floor was laid down. I thought I was saving time and avoiding working under the house but I was wrong. I should have painted the plywood on the exposed outside face at least. Also the cracks need to be sealed totally or moisture will warp the plywood and expose more of the insulation to the elements and critters. The floor insulation is a total redo that I will have to revisit someday (before we live there during cold weather). Two things I wish I took more time on are insulating the floor once and for all, and I should have set piers in the ground instead of on blocks.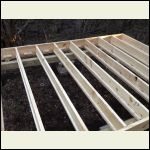
1x2" supports
| 
1/2" plywood
| 
Insulation
|  |
|
|
daniel_hawkins
Member
|
# Posted: 31 Dec 2015 12:39 - Edited by: daniel_hawkins
Reply
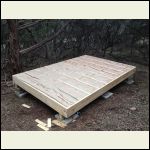
Next was the 3/4" tongue and groove OSB to top it all off. The OSB is half the cost of the same dimension plywood but I feel like the price is totally worth it. If you will have the floor exposed to the elements, meaning without a roof and walls, for more than a month, go for the plywood. Jen and I like to say building small makes it easier to upgrade quality of materials without seeing a large increase in cost. Our washboard floor does a good job of reminding us about that perk. Another thing Ill have to revisit I guess, sometime in the future, before we install finished floor. Here is the finished foundation.
|
|
daniel_hawkins
Member
|
# Posted: 31 Dec 2015 12:51 - Edited by: daniel_hawkins
Reply
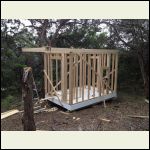
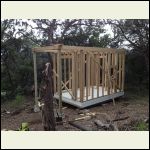
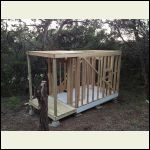
Walls came next and they went up pretty quickly. A nail gun would cut framing time down to less than half of what we spent. I felt like it was more genuine, nailing all the pieces together one at a time. I stopped feeling that way when I hammered my thumb more times than as many minutes passed. Slowly I transitioned to exterior grade deck screws for all the framing. The screws were more costly than nails but made assembly a bit faster once everything was all laid out. The extra cost of buying screws over nails was probably less than $100 for the entire framing operation. The second floor was a bit tough to frame cause half of it had no floor to stand on and the entire structure was really shifty until we put sheathing on the exterior.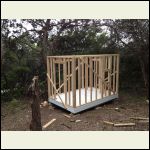
First Floor
| 
Loft
| 
Loft supports
| 
Porch and subfloor
|
|
|
daniel_hawkins
Member
|
# Posted: 31 Dec 2015 13:10 - Edited by: daniel_hawkins
Reply
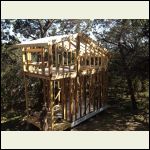
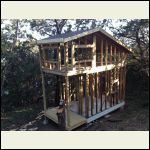
Second story framing went a bit slower, more trips up and down the ladder and this design brought angles into the mix, but it all worked out. Spring and summer provided a good bit of rain and filled the nearby lake nearly to capacity. We worked through it as best we could and got the "roof" on in June. The "roof" was OSB and tar paper but it shed water like the real thing. Life was good under the roof during a downpour.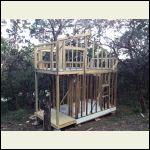
Second floor framing
| 
Rafters
| 
Roofing
| 
Lake view from the roof
|
|
|
|
daniel_hawkins
Member
|
# Posted: 31 Dec 2015 13:35 - Edited by: daniel_hawkins
Reply
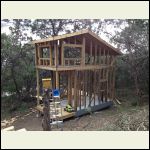
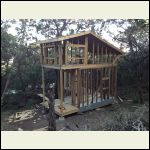
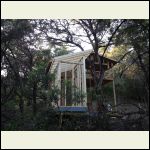
With the framing done and the roof doing its job I decided to add an addition for a bathroom. The original plan was to have the last 2' by 8' dedicated to bathroom space. Looking back now, I can see this was a terrible plan. Shower was to be on the left and toilet on the right as you entered. No sink was included for lack of space and there would be one in the kitchen 6' away. I don't know when I fully realized it but I knew there had to be more if we were going to live in this place full time. Plans were drawn up to add a 5'x8' bathroom onto the far corner of the building, opposite of where all the pictures are taken from. The old toilet space will become a closet and the old shower area is a hallway into the new bathroom wing. The bathroom addition is the best idea I have had on this build so far.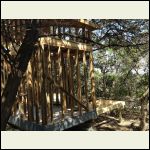
Back view addition
| 
Floor addition
| 
Framing addition
| 
View from opposite corner
|
|
|
daniel_hawkins
Member
|
# Posted: 31 Dec 2015 13:53 - Edited by: daniel_hawkins
Reply
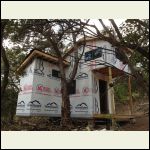
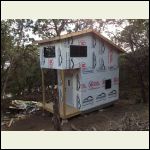
Next on the list was closing it all in with sheathing. We went with good old radiant barrier, OSB with a layer of foil on one side. Here in Texas, its the heat you have to worry about more than the cold. This is something that seems to be used around here so thats what we got. It went on pretty easily but it took longer to stagger all of the seams so that the sheets of siding and sheathing dont have joints on the same stud. House wrap came next along with the windows and finally the door. Feels good to have a closed in building.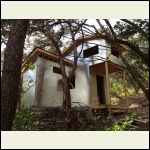
Sheathing completed
| 
Wrap and Windows
| 
Door
|  |
|
|
daniel_hawkins
Member
|
# Posted: 31 Dec 2015 14:09 - Edited by: daniel_hawkins
Reply
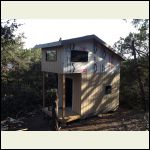
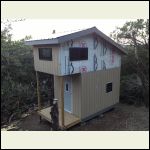
We started feeling a need to finish the exterior and began siding and roofing at the same time to get it all done. Siding was easy enough cause it came in 4x8 sheets the angles along the roofline made it a challenge but not too bad. Metal roofing was easy to install (some types) and has a good longevity. We decided on R-panel type roofing. There was some trim work to add on over the rafters that formed the eaves before we could install roof panels and roof trim. That stuff is hard to see in the pictures but it all went on.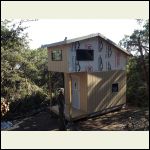
Painted rafters and siding
| 
Rafter trim
| 
Roof panels
| 
Roof trim
|
|
|
daniel_hawkins
Member
|
# Posted: 31 Dec 2015 14:27 - Edited by: daniel_hawkins
Reply
Finished siding pictures.
We trimmed back a lot of the cedar in the area around the cabin because the needles the drop makes rainwater collection more of a hassle.
|
|
daniel_hawkins
Member
|
# Posted: 31 Dec 2015 14:36 - Edited by: daniel_hawkins
Reply
This all brings us up to date. The previous posts have been the progress throughout the year 2015.
I want to thank everyone that helped me with ideas and or labor on this project.
To do still before we can start the interior are:
Door and window trim
Enclose the eaves and resulting trim
Paint exterior
|
|
daniel_hawkins
Member
|
# Posted: 31 Dec 2015 14:45
Reply
Please feel free to post on here if you have any questions as to why or how I did it the way I did. I would love to help anybody that needs clarification or ideas for their project.
|
|
MtnManDan
Member
|
# Posted: 31 Dec 2015 19:51
Reply
Daniel, before the technical questions and comments come...I have 2 questions:
Where is your cabin located, and when will be your 1st night of sleeping in your new cabin? It will be an incredible night filled with celebration and satisfaction!!! Enjoy
|
|
neb
Member
|
# Posted: 31 Dec 2015 20:10
Reply
Nice! Keep it coming.
|
|
daniel_hawkins
Member
|
# Posted: 4 Jan 2016 07:24
Reply
We are set up near Medina lake outside San Antonio. We will be staying out there sometime soon, just need to take some time off work. The weather is great for camping here in TX, for me there is no sleeping outside in the summer, nights don't get below 80 degrees F most times.
|
|
shall
Member
|
# Posted: 4 Jan 2016 18:41
Reply
Medina is a beautiful lake. The first time I saw Medina Lake, the water was Caribbean blue.
My father in law had a cabin on Medina about 15 years ago. Nice to see that it's filled back up
Awesome cabin. I love the unique design
|
|
timcook
Member
|
# Posted: 5 Jan 2016 16:17
Reply
That is a sweet cabin !!!!!! I like it
|
|
jrbarnard
Member
|
# Posted: 6 Jan 2016 13:39
Reply
Awesome!
More pics!
|
|
daniel_hawkins
Member
|
# Posted: 21 Feb 2016 12:07 - Edited by: daniel_hawkins
Reply
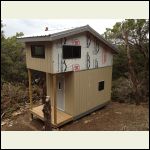
We have been working on trim for a few weeks, now an endless amount of gaps and crevices to caulk and then we will be ready for paint.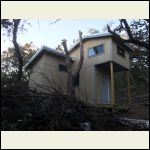
Some trim
| 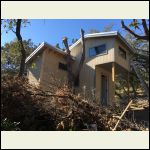
Eaves enclosed
| 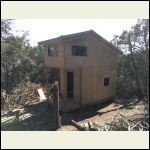
Trim and caulking done on this side
| 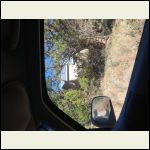
View from the road nearby
|
|
|
shall
Member
|
# Posted: 22 Feb 2016 15:18
Reply
I was looking at this thread last week and hoping that you'd do an update.
I really like the design.
I've was looking at some land for online last week in Mico and it made me think of this build. That's a really neat area. I shoulda bought something waterfront back before the lake filled back up. They were going pretty cheap as I recall
|
|
daniel_hawkins
Member
|
# Posted: 28 Feb 2016 12:41
Reply
Thank you Shall, yep there are some good deals to be had out there if you look long enough. I feel like most people just post stuff for sale for what they paid and hope it sells eventually. Nice to see there are some following our story too. By the way, we are now engaged and plan to get married this winter after we move into the new cabin!
|
|
abby
Member
|
# Posted: 2 Mar 2016 10:17
Reply
I love it! can't wait to see more. 
|
|
daniel_hawkins
Member
|
# Posted: 5 Mar 2016 10:03 - Edited by: daniel_hawkins
Reply
We started painting and here are a few updated pictures of the new trim color.
|
|
daniel_hawkins
Member
|
# Posted: 5 Mar 2016 10:06 - Edited by: daniel_hawkins
Reply
I'll update with the most recent pics next week when we get back out there.
|
|
abby
Member
|
# Posted: 18 Mar 2016 09:57
Reply
can't wait to see updates, daniel. it's wonderful!
|
|
daniel_hawkins
Member
|
# Posted: 18 Mar 2016 16:09 - Edited by: daniel_hawkins
Reply
It took longer than I expected to finish the paint and dodge the spring rains here. As of Wednesday we officially finished the paint!
We actually have to paint the door still but I consider the painting done.
We have the electric company coming out to discuss cost for connection to the grid and we will soon have a physical address. In the next month we will work on plumbing and electrical. Time is moving very fast now. We are supposed to be moving in in September!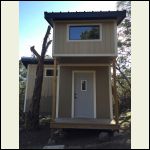
This shows the new color better
| 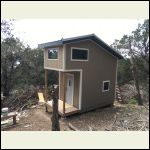
All done on this side
| 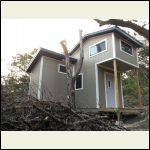
image.jpeg
|  |
|
|
old ugly
Member
|
# Posted: 4 Apr 2016 21:45
Reply
I did the exact same thing with the plywood and insulation in the floor of the cabin a built a few years back. I never had any issues with rot or critters. looks like a good job to me.
|
|
hattie
Member
|
# Posted: 5 Apr 2016 00:11
Reply
I don't know how I've missed this thread. This is a beautiful build!! I just love the house design. You should be very, very proud of your hard work.
Congratulations on your engagement!!! 
|
|
| . 1 . 2 . >> |

