| << . 1 . 2 . |
| Author |
Message |
creeky
Member
|
# Posted: 30 Jan 2014 12:28pm
Reply
hey tim. maybe it's time to declare: do not use any of my ideas without thorough research. I accept no responsibility for my oft times too creative ideas or their implementation. reader beware. 
alright. time to get some wiring done. just a point. i hate doing electrical. my dad was an electrician, and no, nothing rubbed off.
once again I find there is absolutely no way to buy anything I need locally.
(well. except for batteries. total battery gives me an good price on 6, what they call L16s, but actually use a completely different charging profile, Crown 395s. 120 lbs of lead ea. they also give me a break on the core charges as I haul in every scrap battery I can beg borrow or badger.)
all the wires and bus bars present a big problem. fortunately, with my ally, the www, I find a post by a guy who did all his own wires. and I discover, across the border, a terrific company called City Electric (note. they are not responsible or accessories to any of my shenanigans).
So I buy a bunch of wire. Get out my drill kit. Find my bench press (just moved, stuff's all over). and I start making cables and connectors. Using drill bits taped to the press I am able to attach the lugs to the wires. then, a good tug to make sure they are tight, and voila. Not as neat and tidy as using a proper tool, but it works.
Next, again at City Electric, I find these cool bus bars. What a marvelous invention. Strip your wires, plug your wires, tighten the honking big screw. You're connected. Connections are super easy and water/critter/etc protected.
Finally. Using various sizes of these bus bar things I wire the panels to the Midnight Solar combiner box with 6 gauge (two panels [48v at 11 amps nom.] on each 20 amp breaker). Run 2 gauge to Morningstar ts-60. run two gauge to bus bar 1. run 2 gauge to bus bar 2. run 2 gauge to each serial connected 12v battery (2 @ 6v).
The reason I use two big bus bars is so that I can connect battery and inverter (0000 gauge) wiring together. But bus bar 1 allows me to add in a charger. eventually a second solar controller. and I had thought to add a small morningstar pure sine inverter ... but never did.
the positive 0000 wire goes through a fuse. 300 amps.
anybody still reading. 
i didn't add the charger until 2012 to be fair. but it's the only pic I've got. you can sort of see a 4" vent pipe to the far left. this takes off gasses and funnels them outside. probably too big. but it works.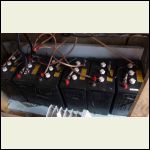
battery pack
| 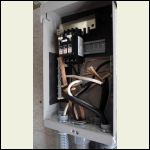
combiner box
| 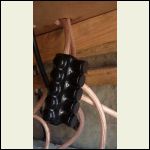
honking big bus bar
| 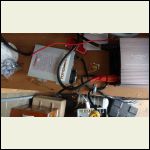
charger/inverter/vent pipe
|
|
|
creeky
Member
|
# Posted: 30 Jan 2014 12:40pm - Edited by: creeky
Reply
i found another pic of the wiring.
note: do not buy the ts-60 like I did. it was a mistake. I was able to resell it for what i paid for it (less taxes/shipping). and made a great friend doing so. but. if you have a reasonable solar set up get an mppt controller. i upgrade first thing 2012 to a ts-mppt-60.
note the fuse at the bottom of the backer board.
I'll bet the electricians in the audience are some impressed with my tidy wiring.
|
|
creeky
Member
|
# Posted: 3 Feb 2014 01:15pm
Reply
and that brings me to the end of my projects for season 2. My hops withered under a scorching hot summer sun. My tomatoes, I couldn't give them away fast enough. Potatoes. Here's a bucket of reds.
Just before I left I moved the trailer and insulated the basement with straw bales. Helped. But man. That trailer is cold in the winter.
A buddy came by one afternoon and we barbequed. And dressed the solar shed with hardie board.
and I put in a couple of posts and a 2 gate cedar gate at the entrance. which I closed together with two screws and a piece of wood.
high tech security.
Now off to visit family for xmas and then Belize for the winter. Life is rough. Here's a pic of the cabin I lived in on Tobacco Caye. Super nice folks. Highly recommended.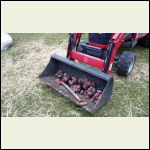
bucket o' potatoes
| 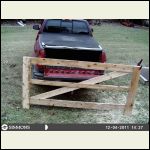
one gate
| 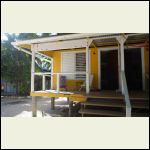
belize cabin
|  |
|
|
creeky
Member
|
# Posted: 3 Feb 2014 01:26pm
Reply
a few more pictures of Belize. just to warm us up on this cold winter's day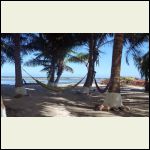
the hammock
| 
the sunsets
| 
friendly folks
|  |
|
|
CabinBuilder
Admin
|
# Posted: 3 Feb 2014 04:31pm - Edited by: CabinBuilder
Reply
creeky, if your goal was to make rest of us in the snow envy you - you have succeeded. 
|
|
creeky
Member
|
# Posted: 3 Feb 2014 06:22pm - Edited by: creeky
Reply
hey cabinbuilder. remember. this is two years ago. i'm here in the icy cold along with you'ze all today.
i'd say that a period of r&r (research and rum) is essential to any good summer camp build...
|
|
creeky
Member
|
# Posted: 6 Feb 2014 11:03am
Reply
thx again cb for the envy. you know when you're an aged bald short male with a 12 year old truck and living in a shed ... only on a cabin site would this seem enviable.
i've been chuckling for days.
|
|
creeky
Member
|
# Posted: 6 Feb 2014 11:19am - Edited by: creeky
Reply
okay. I'm back from holiday. It's now 2012.
This year I will haul yet more gravel. Hammer nails. And change course.
First things first. Plug in the trailer and turn on the electricity. Did the solar system survive three months of inattention?
Yes. I plug in. Turn on the power and gas. I'm home. And no mice. I had worried that the straw under the trailer would turn into a rodent nest. But a least weasel (Ms. M has him run between her feet, I never saw him) has kept the mouse population at bay.
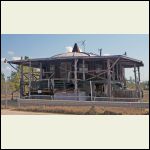
I also include a picture of a neat cabin I found in Florida on the way home. It appears abandoned...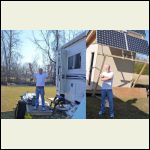
ready for more
| 
found cabin
| 
kevin law, wikipedia
|  |
|
|
|
creeky
Member
|
# Posted: 6 Feb 2014 11:25am
Reply
As always I celebrate with a spring paddle.
Ms. M takes an alternate route and gets terribly lost in a swamp. I mean an hour of hacking through swamp/reeds lost.
But at least she does it with style.
2012paddlingfashion.jpg
| 
2012verylostpaddlin.jpg
|  |  |
|
|
creeky
Member
|
# Posted: 6 Feb 2014 11:34am
Reply
Now onto swinging hammers and extending the road. In 2011 I built 500 feet of road. But I still need to get around a corner and to the back of the property. There is a line between trees, that when wet, is so soft I almost get the tractor stuck. So it's a no go even for 4x4s.
More road tarp and three more loads of gravel please.
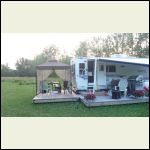
Plus, remember that deck I built in two pieces. A wind storm has completely destroyed the gazebo that was on it. after only two years. sheesh. So it comes apart and ...
taking a rain break
| 
summer 2012
|  |  |
|
|
KSalzwedel
Member
|
# Posted: 11 Mar 2014 07:56pm
Reply
Looks good. Wondering where this road goes to, since you paddle in. Suspenseful.
|
|
tichalet
Member
|
# Posted: 12 Mar 2014 12:29am
Reply
This has been a very entertaining read so far.
Creeky, you have a wonderful sense of humor and an even more wonderful knack for putting it in words.
More, please!
|
|
creeky
Member
|
# Posted: 13 Apr 2014 09:11am
Reply
Hi All, well winter is over and I'm back from the enviable antics (Florida). Just couldn't hack any more winter.
Luckily I'm back in time for a record breaking flood. We're over the 100 year mark. Just.
So back to the camp build.
2012 was a great year. I started on my "shizzer shack." Initially this was to be a 3 season washroom with a big shower, a composting toilet and room for a clothes washer.
For the build I found a neat site. apb pole barns. He had a really good set of instructions on how to build ... a pole barn. I thought, well, for my next building, why not try one?
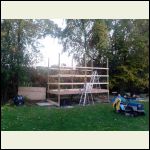
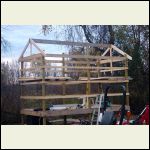
So easy. I put the auger on the tractor and drilled myself 6 12" post holes 4 feet deep. I lined the holes with landscape fabric to keep the gravel in place. I put down a few inches of gravel. Put in my PT 4" posts with rebar cleats and poured in a concrete base. Then I filled the remainder of the hole with gravel and some concrete powder.
Boy. If you ever do this get some help. What a PITA. Eventually I got the posts in and square and only 1" long. So I would have to notch the posts and girts on the end to make it all fit precisely. I may have gotten a little, er, fussy here.
The other thing is. Get your girts on right away. I left my posts up while I worked on other stuff and they started to warp as they air dried. Took a little tugging and pushing to get 'em back into place.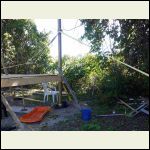
shizzershackbracing..jpg
| 
shizzershackframe.jp.jpg
| 
shizzershackframe2.j.jpg
|  |
|
|
creeky
Member
|
# Posted: 13 Apr 2014 09:27am
Reply
I'm pretty proud of the roof design. It's a long story, but what have we got but time?
NB: people in warm climates will find this very useful.
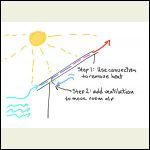
It started out when my wife mentioned that a guy in Africa had come up with a design to keep the houses there cooler. They use corrugated metal roofing and when the sun shines, well, it turns the house into an oven. So he put two layers of metal roof on. Blocked the sides and built a gap between the two sheets of metal. This allowed for cool air to be drawn in from the bottom of the roof slope and hot air to be ejected out the top.
Ha ha ha. I laughed when Ms. M told me about this idea. That'll never work. But you know. The idea started scratching away.
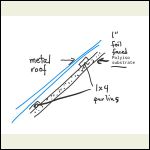
Then I read (and I have tried and tried to find this research again) about a guy who did the same thing except his bottom layer was foil faced 1" polyiso. He wanted to retrofit a roof to cool the attic. He put ventilation at the bottom of the roof slope and used the heat from the sun baked metal roof to drive the stack effect. He managed to cool his attic some 50 degrees. And he had cool graphs and actual data.
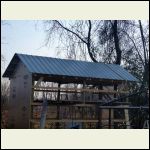
So with this in mind. I start my roof.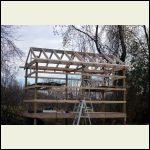
shizzershackframe4.j.jpg
| 
solarheatremoval.j.jpg
| 
roofschematic01.jp.jpg
| 
shizzershackframe5.j.jpg
|
|
|
creeky
Member
|
# Posted: 13 Apr 2014 09:35am
Reply
You can't see the polyiso foil faced insulation I used under the metal roof in any of my pics. Dang. But it's there.
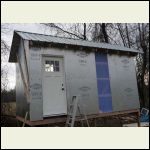
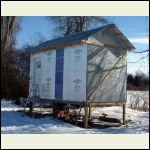
One thing about a pole barn. It doesn't rely on the sheathing for structural or racking support. So you can put up any old kind of sheathing. I have used polyiso insulation. Both foil faced as seen here. And, later when I go for a four season room, exterior polyiso.
So my entire pole barn is sheathed in polyiso insulation. That's it so far.
Next I put in a door. And finish the sheathing. I get 'er all wrapped up before winter. Well. Forgot the stairs. So for the first few months I'm stuck using a ladder. Oh so not convenient.
For windows I use polycarbonate panels on the south side of the building and a poly not carbonate panel on the north.
I also install a used Envirolet composting toilet. Which, after three years of use, I have to say is working relatively well.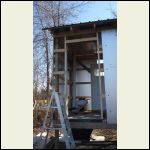
shizzershackframe6.j.jpg
| 
shizzershackframe7.j.jpg
| 
2012shizzershackwr.jpg
|  |
|
|
creeky
Member
|
# Posted: 13 Apr 2014 09:47am
Reply
I think you can just see the polyiso roof sheeting in frame6 jpg above.
The envirolet is hilarious to install. The "engineer" actually put the two holes for venting and waste too close together. To get the vent stack in you have to angle back away from the toilet the unit shipped with.
I'm guessing it was originally designed for a different toilet.
Of course I had already put the stack in and then went to install the toilet. So there was some "hey, this doesn't fit! What the ..." And then some contemplating time to figure out a fix...
I raised the building so that you can see over the shrubs along the tree line. This way there are nice views of the field going down to the creek.
The cedar boards you see on the outside are something I threw on as a huge wind storm started. It turns out they are entirely not necessary. The polyiso stays on no problem with just the plastic washered nails.
Really fun to build. And of course. Now there's a protected place for sitting down and contemplating nature.
|
|
creeky
Member
|
# Posted: 13 Apr 2014 09:55am
Reply
Right. And after a complete summer of use (2013). The roof works like a charm. The warmest the shizzer shack ever got was 35 C. It was 34 C ambient outdoor temperature that day. So the cooling effect of the vented roof completely removed the added heat of the sun.
Imagine that room with just the metal roof. The roof orients south/north and is unshaded. Also, the two 2x8 polycarbonate "windows" are adding a good deal of solar gain.
So success. And I highly recommend looking at this design to anyone putting a metal roof on a cabin/outbuilding.
|
|
creeky
Member
|
# Posted: 7 Mar 2015 10:20am
Reply
I have continued the full story of my camp build on my blog. Please feel free to visit and comment there. Thx. Creeky.
Note: You will find the full build to date, broken down by year, starting in 2010. There are more photos. etc.
|
|
creeky
Member
|
# Posted: 31 Oct 2015 11:47am
Reply
I've been enjoying the mild fall and continuing the finishing. Here are a few photos from getting my kitchen put together that have yet to get to my blog.
the kitchen is in my "studio." last winter i closed off the back door with 3.5" of polyiso. and dang. cut my propane cost in 1/2 and used just over a face cord of wood all winter. the coldest in 44 years. Weeks of -30s. That's two big thumbs up on the power of insulation. and a word of warning about doors in general.
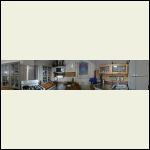
So the kitchen was "L" shaped. now it's galley style. Here are some pics. Including one of the wackier "panorama" shots yer likely to see.
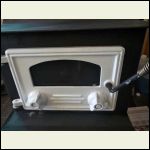
I spray painted the door to the wood stove. ain't that purty? and blacked the main stove. she looks like new.
I built a dining table out of 72" of bamboo counter top. I'll leave that story for my blog. It is real handy. Imagine coming in a putting your groceries on a table. Not just dumping them on the floor.  I dadoed a block of cherry for the foot. which you can't really see due to the high quality photo. But I love cherry. I dadoed a block of cherry for the foot. which you can't really see due to the high quality photo. But I love cherry.
Installed some cabinets and backsplash above and behind the sink.
And I trimmed out a window with some ash left over from a tree felling I did about, hang, 10 years ago? Of course I got all the trim in except the sides of the window and then went looking for more bits to trim out the sides. Ah, nope. All gone. Jeez.
Total budget on my kitchen, including appliances is under $2.5k. I have got some good bargains off of kijiji.
Looking ahead: I'ma thinking I'll blow out the back wall and put in a dining nook. Every since I saw it on Rockies latest design foray the idea has been scratching at me.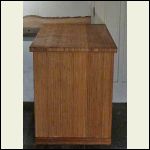
bamboo table
| 
almost done kitchen
| 
painted lady
| 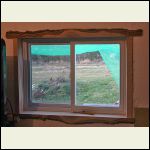
trimmed out
|
|
|
Wilbour
Member
|
# Posted: 31 Oct 2015 04:53pm
Reply
Nice work around the window!
|
|
Rowjr
Member
|
# Posted: 5 Nov 2015 02:15pm
Reply
Looking good
|
|
creeky
Member
|
# Posted: 6 Nov 2015 08:11am
Reply
well. the test of exterior foil coated polyiso insulation/sheathing is done. I figured 3.5 years plus was enough... man that stuff is tough. still looks like new. i've taped over the odd place where I've nicked it. but no bugs. no mice. two thumbs up.
a friend dropped by and helped me get started on the siding for the shizzer shack.
I bought this concrete fiber board from a woman who'd finished building her house. I'm not sure how much I got but it was cheap.
The plan is 1/3 lower grey fiber board below (done!) with white tin above (not done). 2/3s grey fiber board on the end walls. South wall is mostly windows. you can't see it here. so that will just be whatever as it looks out over a hay field / bird sanctuary.
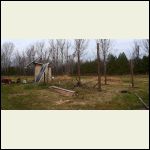
And I got the poles in on my tractor run in / tool shed. Those 16' cedar posts are a might weighty. Couldn't do it without Al.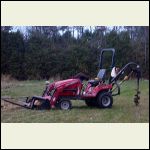
altakesabreak.jpg
| 
tractorrunin.jpg
| 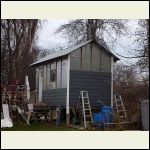
sssiding.jpg
|  |
|
|
creeky
Member
|
# Posted: 3 Jun 2016 09:10pm
Reply
Breaking news
Do I start a new thread? Or add to my camp build. Anyway.

I've been talking about lithium for some time now. Well. I've taken a calculated gamble. I just bought a 2014 chevy volt battery from a wrecking yard. Untested.
The wrecking yard in far far far north Quebec was nice enough to deliver the pack 1/2 way to my house. They drove for 3.5 hours south. I drove 3.25 hours north. We met. Slid a pallet between two truck beds.
I drove home thinking. Please be 3. I gambled. No way to test it. Needless to say. First thing I get home. Tractor comes out. Fork lift bars go on. Pack gets carried to the tractor shed where it will reside while I work on it. I get the lid off. Out comes the voltage meter.
Front pack. 115.3v or 3.84 /cell. Middle pack. 92.1 or 3.84 / cell. Back pack. 161.4 or 3.84 / cell.
Huge sigh of relief. Minor dancing in the field.
So I now have a 2014 pack basically fully charged. All I need to do now is take it apart. Build/find a bms solution. Reconfigure my Morningstar solar controllers. Buy a Victron 48v inverter. And a few other dozen things.
But that's a job for tomorrow.
Am now taking suggestions for BMS. I wouldn't mind trying an arduino atmini something. Anyone with ideas?
Back to dancing in the fields.
|
|
Steve_S
Member
|
# Posted: 4 Jun 2016 07:25am
Reply
Quoting: creeky Do I start a new thread? Or add to my camp build. Anyway.
Oooo I think this should be in a thread of it's own, as it will certainly have folks interested in what your up to watching it... Noted that you don't mention the investment cost ;)
Best of luck on this project as I am sure many of us will be watching closely and hoping that it all works out positively for you.
|
|
creeky
Member
|
# Posted: 21 Mar 2017 10:53pm
Reply
I can't believe I'm celebrating 7 years off grid this year.
Thought I might take a bit of a look back.
So here's my camp build. With the washroom etc.
Have a look at my
my winter bedroom
http://www.small-cabin.com/forum/6_5106_1.html
and my electrical shenanigans
http://www.small-cabin.com/forum/6_6756_0.html
All well worth reviewing. The winter bedroom has worked out real well. easy to heat. Super comfy. I added a washroom. And some closets.
That solar system is still the best investment I've made. So worth it to have power. You know. A dishwasher. A fridge. In the summer I cook on an induction cooktop. Pretty flash. I even have a "smart grid" with lights that go on automatically when the gf heads to the washroom and other cool stuff.
Anyway.
Hope you'ze all will join me in hoisting a cold one (water in my case) and enjoy the good vibes.
Off grid rules. 
|
|
Ontario lakeside
Member
|
# Posted: 21 Mar 2017 11:31pm
Reply
Exciting stuff, will be going the club soon!
|
|
creeky
Member
|
# Posted: 22 Mar 2017 09:37am
Reply
I'm adding some of the tractor shed experience over the next little while.
The tractor run in
I had 3 problems.
1) I had 4 solar panels standing in a field. Which I couldn't adjust the angle of. And they were often in the way.
2) I had a tractor which needed to be covered.
3) I had time on my hands. Every fall I get the itch to build something. Nope. Don't know why.
And I had an opportunity. I had 4 cedar posts bought for building solar panel stands.
This is what I did.
First. Al and I augered some post holes.
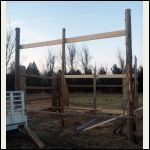
Then I stood the posts up in the holes. Then I found a bunch of pressure treated wood at a big box in the bargain bin. 300 bucks worth of wood for 90. Huzzah.
And then I got to nailing.
then I found a local lad to cut me some 16' white pine 2x10s. These actually came out a bit larger. And the quality was / is really too good for a tractor run in.
And I hope to get a small workshop out of this. My storage tent is deteriorating fast. I need a covered workshop.
Its hammer swinging time!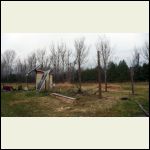
fourposts.jpg
| 
fourpostandrising.jp.jpg
| 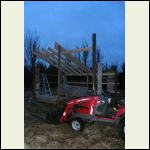
alwaitspatiently.jpg
|  |
|
|
creeky
Member
|
# Posted: 24 Mar 2017 02:04pm
Reply
Quoting: Ontario lakeside joining the club soon!
Ontario. You're not the only one. there are few lithium lads here now. Hidden from view. Wisely. smile.
For year one I got started, as you can see in the pics, very late in the season. I thought to get the base frame in before winter so I could let it settle.
Much to my delight. I met a woman while I was building. She has solar on her roof. She renovated several properties. Built lots of stuff. So we made a trade. I helped her finish her studio (12x24 garage conversion) and she helped me put up some of the tractor shed. Aw.
The race became: would winter shut me down; Or could I get the run-in covered before the snow flew.
Fall in my area never cooperates. There were lots of hours spent in the gloom and cold rain. Usually I get the nail gun out on these projects, but this one I decided to drill/screw. I found a couple of boxes of those new lag screws in a bargain bin (3.75 and 6"). Why does each kind use a different head?
I swear I spent more time looking for the right bit than I did working some days. And having only one bit for each, meant a lot of scrabbling around in the grass when they fell out of the drill just as I was about tooo .... any hoo
I'll have to find the photos. Gotta run. Next post.
|
|
| << . 1 . 2 . |

