| . 1 . 2 . >> |
| Author |
Message |
creeky
Member
|
# Posted: 25 Jan 2014 12:55pm
Reply
In the spring of 2010 I bought six acres of forest and field. The property is 1000 yards/meters from the main road and, more importantly, the closest power line.
The fields, about four acres, have been in hay production, off and on, for 60 years. The two forests are small. Planted about 30 years ago. Red pine, cedar with the occasional oddball thrown in (a line of black locust for instance).
I seem to have misplaced the photos I took this first year. So I'll keep looking and add them later.
|
|
creeky
Member
|
# Posted: 25 Jan 2014 12:58pm
Reply
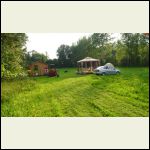
The first thing I did was bring in an amish shed for storage and I built a 12x16 deck. I built the deck in two sections of 8x12 so that I could break it apart later and move it more easily.
I also bought a tractor. Essential for off grid life (cough cough).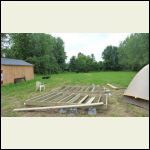
thedeck2010.jpg
| 
turkey01.jpg
| 
yearonedeckshedga.jpg
|  |
|
|
creeky
Member
|
# Posted: 25 Jan 2014 01:03pm
Reply
At the bottom of this field is a small creek/river. It's up to 10 feet deep and maybe 100 feet wide in places. The nice thing is it's not connected to any large industry and is mostly swamp, excellent for filtering the water.
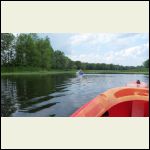
You can launch upstream in a park and paddle with the current to my property. Takes 2 hrs to all day. Depending on how lost in the swampy areas you get. For most of the distance you don't see any sign of civilization at all. It's really very beautiful.
yearonewaterlily.jp.jpg
| 
yearonepaddle.jpg
|  |  |
|
|
turkeyhunter
Member
|
# Posted: 25 Jan 2014 05:33pm
Reply
nice place you have....
and a tractor is a must at any camp )))....I luv my tractor...LOL )))....I luv my tractor...LOL
|
|
OwenChristensen
Member
|
# Posted: 25 Jan 2014 06:05pm
Reply
Nice place. It's special with the creek.
|
|
silverwaterlady
Member
|
# Posted: 25 Jan 2014 07:05pm
Reply
That is a beautiful place you have creeky. I wish we had a tractor.
|
|
Truecabin
Member
|
# Posted: 25 Jan 2014 07:17pm - Edited by: Truecabin
Reply
turkeyh i understand
if you live your life such that you need a tractor you chose a good life
and if you have a creek at your cabin that is good too
|
|
gersus
Member
|
# Posted: 25 Jan 2014 09:48pm
Reply
Nice! We would call that a river around here ;)
|
|
|
creeky
Member
|
# Posted: 26 Jan 2014 08:25am - Edited by: creeky
Reply
thx for the comments. i luv my tractor. i call him Al. Folks ask me, Creeky, how the heck did you do that. I say, Oh, Al came by and lifted/dragged/plowed/dug it. 
|
|
creeky
Member
|
# Posted: 26 Jan 2014 09:49am - Edited by: creeky
Reply
Found some more pics of the river and stuff from year one. Year two coming up.
found the truck pic from hauling the deck material. note that the rear mud flap is dragging in the grass. redneck time.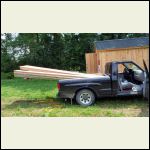
redneck hauling
| 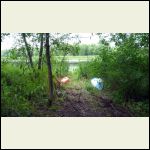
gettin' to the creek
| 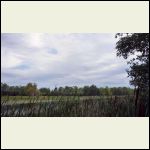
neighbors
|  |
|
|
gersus
Member
|
# Posted: 26 Jan 2014 09:57am
Reply
Lol, that's my my kind of hauling!
|
|
creeky
Member
|
# Posted: 26 Jan 2014 10:05am
Reply
...and I had a little clean up done. sadly the "porcupine" had got into the previous owners cabin ... it was trashed. lots of garbage piles left by visitors too. i still find stuff in the trees, but mostly cleaned up now.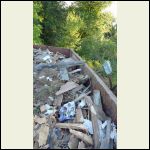
yearoneskip.jpg
| 
yearoneskip2.jpg
|  |  |
|
|
creeky
Member
|
# Posted: 26 Jan 2014 10:07am - Edited by: creeky
Reply
...my posts are hanging on load ... so. another duplicate.
|
|
neb
Member
|
# Posted: 26 Jan 2014 10:11am - Edited by: neb
Reply
Looks like some good bottom ground. Keep us posted on your project.
How many acres do you have?
|
|
creeky
Member
|
# Posted: 26 Jan 2014 10:27am
Reply
Okay, onto year 2
(In this episode I will hammer wood. Hit myself with a solar panel. And get lost.)
So back from trying out being a snow bird I find that the creek has done spilled it's banks. And I discover the property, at least this lower part, is some wet come spring.
No worries tho. The flood will rise another 3 feet from where you see it in picture 2. Almost to the 100 year high mark indicated on the map I found. Great. Now I know how far to set back my gardens and all.
|
|
creeky
Member
|
# Posted: 26 Jan 2014 10:40am
Reply
First order of business. Get lost.
Here's Ms. M just before I decide to try an alternate route. I follow beaver channels in circles for a half hour before bashing my way through a thicket of dogwoods to return to the main channel.
Ms. M laughs. Oh ya. Wait till next year!
|
|
creeky
Member
|
# Posted: 26 Jan 2014 10:59am
Reply
Next. Plant stuff.
In the middle field I plant five apple trees. Two cherry and two pear trees. Look how happy I am.
The groundhog eats the cherry trees. The deer eat the apple trees. I'm all like, what, nobody likes pear? Oh wait. Then the bugs come.
In the front field I also plant a row of hops for beer (good thinking right) and a row of asparagus. and potatoes for some reason. and garlic. and tomatoes.
They all do great. whew.
|
|
creeky
Member
|
# Posted: 26 Jan 2014 11:06am
Reply
hey neb. I've got just under 6 acres.
it's mostly deep loam with a clay base. good soil for sure. being in hay it's not been sprayed. the farmer using it fertilized with cow manure every fall.
see my genius 8 plow in the pic "return". I use it a lot. Plowing the hops rows was just a blast.
I also used it to plow the laneway. but that's still to come.
|
|
creeky
Member
|
# Posted: 26 Jan 2014 11:20am
Reply
I also buy a 31 foot trailer from Oak Hills sales in NY. They are awesome. I had some troubles getting the trailer I wanted into Canada. They sold me my second choice. cheaper. No hassles and in mint condition. Delivered to the border. Highly recommended.
You'll note I'm a bit, er, frugal. And I saved thousands off Canada pricing.
It was a fun day getting it to the property. Thx to Dad and his Ford f-150 with tow package.
From there I towed it around with my little 150. Got it into position just before spring thaw really hit. Backing it up into place it was already sinking into the grass (took a year for the trailer marks to smooth back out ...). But once I had it up on boards she was beaut.
|
|
creeky
Member
|
# Posted: 26 Jan 2014 11:50am - Edited by: creeky
Reply
Right. So Year 2: I'm settled in. I've got a bed. I've got a kitchen. I've been out for the inaugural paddle. Time to get to work. First order of business. Start building the road.
First, digging around with the tractor last year I had found a vein of gravel. The previous owners dry well I think. I use it to rebuild the first 150-200 feet of roadway which has already had some stone added. I then put a layer of "road topper" on.
Second. I find (and for some reason I remember it being on the U of Minnesota's website?) a really neat study done in the '70s on techniques for building farm roads on soft farm soil. My place.
They took the top layer of organic material off.
So I set the plow to six-eight inches and turned over the top layer of organic material. Then I used the FEL (front end loader) to remove the mostly grassy layer. Works like a charm.
Then they put down a layer of fabric.
Get on the web. Find a local wholesaler of geotextile. 500 bucks per 12 foot by 250 feet roll. Two rolls later. OUCH.
Then I went to my local gravel guys. Super nice folks. Started bringing in the trucks of 3". They don't sell 3 inch. They call it 3" minus. Which means it's pieces or crushed rock 3 inches and smaller. But it's mostly 3" with only a bit of smaller and fines. So "it is what it is." This expression becomes my phrase for the summer. lol.
My soil is waaaaay too soft for a big truck to back up over. So I had to dump on the front of the drive which I had renovated.
Then roll out the tarp. Then start dragging with the FEL. Did some loading up of the bucket. But man that 3", for my little tractor. Dragging worked way better (Thx for the tip Ray, the gravel delivery guy).
So away I went. Drag a load of 3" to 4" deep. Call for another. Drag a load. Call for another. I can only work off and on, so took about two weeks.
Then finally. 500 feet later. Ray comes in with a square back trailer and pours the 2" of "road topper" over my 4" of 3" so neatly I don't have to drag buttkiss. Bless his heart.
Tada: 500 feet of solid road. 1000 in geotextile. 1200 in gravel. Not getting stuck in the soft soil. Priceless.
And it was mucho fun. Love working with Al. He's loud. But boy the stuff he can do.
|
|
creeky
Member
|
# Posted: 27 Jan 2014 03:19pm
Reply
I'll add. It's been two full years since I built the first 500 ft, heading into year 3. I haven't had to touch the geotextile/crushed gravel roadway.
so. 28 years to go on the road test ...
coming up next. the solar shed.
|
|
naturelover66
Member
|
# Posted: 27 Jan 2014 07:41pm
Reply
I cant wait to read more !!  Im hooked. Im hooked.
|
|
creeky
Member
|
# Posted: 28 Jan 2014 11:31am - Edited by: creeky
Reply
thx again to all for the kind words.
well. another cold day at the farm so thought I'd post some more pics.
year one my solar system consisted of two 6v 105 amp hr batteries in series for 12v. and 60 watts of solar panels. el cheapos.
this year tho. after discovering to my shock that I couldn't just walk into a solar store and buy an offgrid system. and that systems online were 10-15 thousand dollars. i decided to build my own.
ha ha!
so I found some used (recycled!) 250 watt 48v mono panels. The fellow who was selling them had brought in a container load for the microfit program in Ontario, only to be told they didn't qualify as they had no "made in ontario" content. His loss. My $2/watt gain.
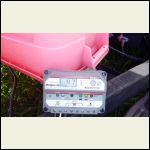
Here's panel one outstanding in the field. and my first amps.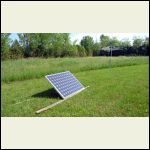
firstpanel.jpg
| 
firstsolaramps.jpg
|  |  |
|
|
creeky
Member
|
# Posted: 28 Jan 2014 11:46am
Reply
now I discovered my online advice
(oh. nature time out. a chickadee flew into my window. I've learned that with small birds after a window strike they often go into shock and die. but if you get out there right away and poke them. it reboots their systems. the chickadee that I just rebooted has, after a 10 minute system check, flown away! success. and which reminds me I need to buy a white grease pencil and draw stabilimentum on my windows (a white zigzag shape spiders make to keep birds out of their webs).)
so. online advice said mppt was a silly waste of money. so I ordered a pwm charger. but the online adviser was matching solar panel voltage to battery voltage. i couldn't find reasonably priced 12 or 24v panels anywhere. six bucks a watt and up.
so I ended up with 48v panels. that pwm charger is making 4.7 amps at 14v. So I've effectively turned my 48v panels into 12v panels. OUCH.
and guess who just ordered a ts-60 pwm controller?
|
|
creeky
Member
|
# Posted: 28 Jan 2014 12:07pm
Reply
once i had my system running. I did things like buy 720 lbs of lead acid batteries. Crown 395s. 1 kw of panels. a bunch of wire (I also had wire found while digging about on the property. I guess to avoid theft the previous owner buried about 500 bucks worth of wire, armoured cable etc). A switch box. a fuse.
But now the question came up. Where the heck am I going to put all this stuff and how am I going to mount the panels??? Cause, yikes, trackers are phenomenally expensive.
Then I see a post where a solar shed floats down out of the sky. Magically the panels unfold. Easy instant solar power. Cool. I can build one of those I think to myself.
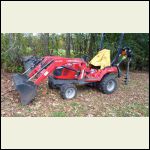
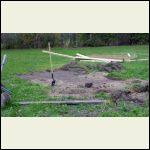
So I gets me my genius 8 plow and buy an auger (on sale of course) and prep myself a landing spot for the solar shed.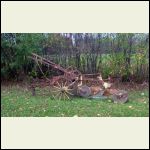
genius8plow.jpg
| 
tractor.jpg
| 
shedlocation.jpg
|  |
|
|
creeky
Member
|
# Posted: 28 Jan 2014 12:15pm
Reply
then I get busy swinging hammers as OwenChristensen would say.
I screw the pressure treated base (8x12). And then build a modified frame/post and beam thing. 10 ft tall wall. 8 ft back. 8x8.
I wrap it just in time. Rain sets in and it's two weeks before I can work on it again.
|
|
creeky
Member
|
# Posted: 28 Jan 2014 12:31pm - Edited by: creeky
Reply
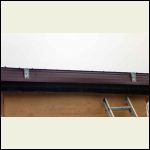
finally the weather clears and time permits .. I install hinges. I have visitors (aka. the peanut gallery). I admire my professional looking plan.
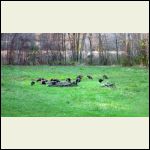
the turks were quite unfazed by my hammering, cursing and general construction.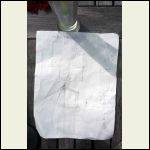
plan
| 
visitor 1
| 
panel bracket
| 
visitors 2
|
|
|
creeky
Member
|
# Posted: 29 Jan 2014 11:03am
Reply
finally. time to install the door. put in some insulation and mount some panels.
this was hilarious. the installation instructions for the door (my second ever install) were completely wrong. So. Much muttering later. It's in.
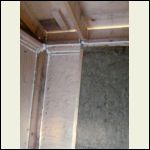
Started the interior finish. Note the line of air light seen at the top. I foamed all the joists etc to reduce air movement. Then filled the joists with roxul. in the "attic" you're left with a small air gap on both the short and tall walls that I cover with wire mesh to keep critters out. This way as the air in the attic heats up the air moves up the slope of the roof and exits out the gap. I can affirm that on a hot summer day the hot air is moving with some vigour out the top gap.
so. 1/3 more ventilated area than required by code. and it seems to be working. early days yet of course. I roxul between the joists and add a layer of foil faced styrene to the ceiling of the shed.
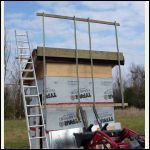
the panel rack is made of dock hinges attached to a pt 2x10 (?) and then the metal rails are bolted to the 2x10. This allows me to adjust for wind storm (flat). summer 30, fall/spring 45, winter 60 degrees.
i will be adding reinforcement to the bottom 2x4 this year. we had a 100km wind storm this summer and I noticed the right bottom corner flexing. so a little bracing is in order.
i wasn't sure how to lift the panel rack up as I had assembled it on the ground. So I tied the inside rails to the fork lift bars on the fel with yellow straps (you can see one hanging there).
I tried lifting the rack and it rose right up. so I thought, well, let's drive up and see how it fits. The hinge brackets slid right in. Put the brake on the tractor. ran up the ladder. slipped the hinge bolts in. done.
ya do get lucky sometimes.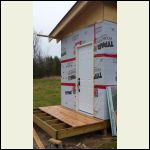
doors in
| 
insulation
| 
panel rack
|  |
|
|
creeky
Member
|
# Posted: 29 Jan 2014 11:11am - Edited by: creeky
Reply
now it's time for the panel install.
I make a little panel lifter bracket for the fel. I lift panel number one into place and bolt 'er in. the used panels have predrilled holes from their previous install, so I use those.
On the second panel I don't notice that a wind has come up out of the north. as I come around the building with the second panel a gust catches it. The blasted thing tips over onto the fel arms. slides down the arms straight at me. I have just enough time to get my arms up and push the panel (50 lbs) off the tractor, but not so much time that it doesn't sock me right in the jaw.
panel is okay. some red paint on the frame. my jaw however.
sometimes things don't work out so well. second panel up. i take a break.
few days later I put the rack to "flat" and bolt in the final two panels from up on the roof. much easier. no punches to the jaw.
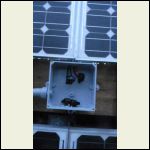
i add the combiner box. which really is a bit to big. and start wiring.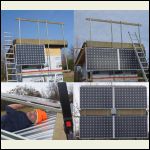
1234solarpanels..jpg
| 
solarcombinerbox.j.jpg
|  |  |
|
|
timcook
Member
|
# Posted: 29 Jan 2014 09:07pm
Reply
Looking good would like to see more pics of your solar set up, need i deas for seting up my pannels
|
|
| . 1 . 2 . >> |

