|
| Author |
Message |
crownland
Member
|
# Posted: 22 Jan 2014 11:52am - Edited by: crownland
Reply
First, a quick thanks to everyone on this forum - I have been lurking for a while, as many of my searches eventually lead to threads here, and this site is a fantastic source of information and inspiration.
A bit of background - we are building on a few acres in an unorganized twp in northern Ontario. My plan was a 16x16 with loft, but since there is nothing on site yet, I decided to start smaller so that we have a roof over our heads as soon as possible - and cheaper.
I settled on a 12x8 shed, and tried a few designs, including a covered porch with loft above it on one of the 12 foot sizes, making a 12x12 footprint (pictured below).
But what I'm leaning towards now is a 12x8 with a double-bed sized loft and a smaller (3 foot) overhang that won't require supports to the ground - we can then hang a simple tent-style screen as a poor man's screened porch. (2 pics below)
This will give us a home base and storage so that we don't have to drag everything back and forth from home every time we go, plus relief from the bugs and a real place to sleep.
From there we can plan a bigger cabin as a future build, and work on that slowly knowing we have a temporary comfortable space to work from (last year we worked out of a car and 2-man tent).
After the future build, this will be a shed and/or guest house
What I'm hoping to do is finalize a design that can be floated on 6x6 PT skids resting on gravel. If the building develops a lean from frost, it won't be the end of the world and we can fix it later. Avoiding footings for this first building will greatly speed up the process.
I have been getting used to sketchup and have thrown together a drawing that I'm still putting finishing touches on.
My goal is a freestanding shed with as little waste as possible. I am trying to design as many dimensions as I can to reduce cuts, and to reuse cutoffs whenever possible.
I will then either get the lumber delivered, or pre-cut it at home and bring it up myself - depending on lumber quotes and timeframe. Pre-cutting will save time on the land, but local delivery might end up cheaper from a sawmill.
I'm hoping you can give me some feedback on the design so far - I haven't seen anything really like it - I toyed with the roofline a bit in order to build the overhang out, as well as give a little more headroom in in the loft. The blue box is a mock up of a double bed. Loft access will be a removable or hinged ladder.
Window and doors are not placed yet as I hope to reclaim used ones from kijiji and I think it's a bit premature to start looking for them!
Thanks again for past and future info and advice  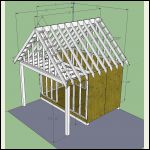
Overkill design
| 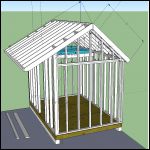
3 foot overhang
| 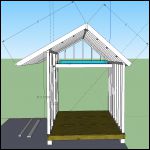
loft
|  |
|
|
crownland
Member
|
# Posted: 22 Jan 2014 12:27pm
Reply
This past fall we got a driveway in... luckily it's a very short run to a small seasonal road. The rest of our lot is undeveloped and surrounded on 3 sides by crown land. We are not on water but one edge of our lot is 200ft from the lake over crown land. We are very excited - we'll be in the forest, but will have easy water access without all of the tax/cottage overhead of owning waterfront.
I plan to widen the end of the driveway a bit with some gravel and put the 8x12 on skids with the porch facing away from the driveway and toward a future building site. The overhang will perhaps make a good place to keep some firewood too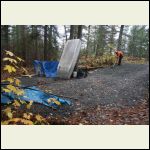
Driveway spread by hand
| 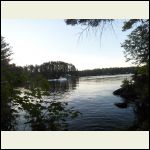
Lake access a few hundred feet away
| 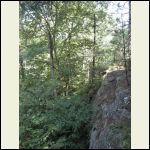
Canadian shield on the lot
|  |
|
|
silverwaterlady
Member
|
# Posted: 22 Jan 2014 01:46pm - Edited by: silverwaterlady
Reply
We to are in a unorganized twp in Northern Ontario. We camped for 25 years. We were not allowed to build a shed until a cottage was built. We had to get a admendment to the bylaws and that had to be approved by the municipality to build the cottage. There was a fee of about $250.00.
|
|
crownland
Member
|
# Posted: 22 Jan 2014 02:49pm
Reply
Luckily we have no "municipality" and the office that has jurisdiction simply "recommends building to code". A refreshing change from the city, where I have to ask the mayor for permission to go to the bathroom.
|
|
rockies
Member
|
# Posted: 22 Jan 2014 05:47pm
Reply
Hi. A nice design for either cabin. I suggest you build the smaller one if you are going to build a bigger cabin later on. You don't say if you are going to insulate at all. If not , bear in mind that the sun baking through the roof will cause the loft to really heat up, so you might want to add a window in the loft area to cause a "thermo-syphon effect" where hot air will naturally rise up and exit through the loft window.
A concern I have is the exterior wall heights. The taller wall (south?) is shown to be 8' 3 15/16" (including bottom and top plates?) Since the north wall is lower and then you have the loft joists installed below the top plates I'm guessing that the height under the loft will be about 6'? I would suggest increasing the heights of all exterior walls by one foot and then installing the loft floor so that you have a clearance of 7' (or more) underneath.
Since you're going to be building the walls anyways why not get some extra height? With a 7' clearance underneath the loft the tops of the loft joists may not end up being attached to the walls right underneath the top plates (they could be a few inches below the top plate), but then you'd also get a bit more clearance from the top of the loft floor to the underside of the roof rafters on the north side of the cabin. More room for your feet..
You will probably also need to run a 2x6 along the length of the eave of the overhang (under the eave) and use a couple of angled braces (2x6's) placed against it and running back to the walls (at the corners) to support the overhang too. Depends on your snow loads.
|
|
Just
Member
|
# Posted: 22 Jan 2014 09:59pm
Reply
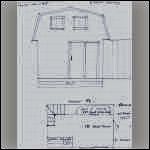
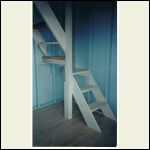
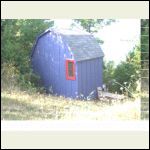
built this one in 2003 '3000$ then 'two bedrooms in the loft standing room of 6 ft. 8 x 13 or 1o sq. M . the loft floor dropped down over the kitchen cuboards and the couch down stairs to allow for the standing room upstairs.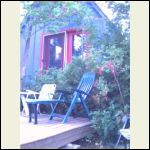
7982_2.jpg
| 
7982_1.jpg
| 
19805_1.jpg
| 
7982_3.jpg
|
|
|
toofewweekends
Member
|
# Posted: 22 Jan 2014 11:52pm
Reply
Rockies is spot on about the loft height. You will have much more useable space there with just an extra one foot on each side. The 45 angle where your roof hits the loft floor is really hard to use. We have both sides that way in our place; another $25 of lumber would have given us 50 square feet of better space.
|
|
crownland
Member
|
# Posted: 23 Jan 2014 08:12am - Edited by: crownland
Reply
My main problem with the wall heights is that I would like to sheath the back wall with 8' plywood and I'm trying to minimize waste. I designed the roof so that the cut off plywood ends from the smaller side can be used on the front wall (above the door). I suppose I could add another foot or two and use just one extra sheet...
Actually it occurred to me I set the wall heights based on the plywood sheathing overlapping all the way to the bottom of the floor joists. I guess I don't really need that overlap if I'm using pressure treated wood on top of the skids... so I could gain another 5" height all around
Under the loft is 80" - I chose that based on standard doorway height that most of us humans can stand up under 
We'll definitely have an opening window near the peak.
I haven't decided about insulation yet... the land is not easily accessed in snow so I don't think we'll spend much time up there in the winter til we ar emore settled.
Thanks guys - I'll post more as I find time to tweak the design 
|
|
|
razmichael
Member
|
# Posted: 23 Jan 2014 09:31am
Reply
Quoting: toofewweekends Rockies is spot on about the loft height
I too would suggest you consider getting more room in the loft - for the cost of a bit more wood, extra sheet of plywood it will be well worth it if you think you will be using the space for any extended time. You could also consider a gambrel roof - bit more work to do the rafters but it is a small building. This would substantially add to the usable space.
Quoting: crownland I haven't decided about insulation yet
As Rockies suggested, insulation may be more to keep things a bit cooler in the hot sun. What type of roof are you considering?
|
|
rockies
Member
|
# Posted: 23 Jan 2014 09:01pm
Reply
I would still wrap the sheathing all the way to the bottom of the floor joists. This will result in a solid connection between the walls and the floor structure. It may not seem important from a structural loading perspective, but it will definately help to stabalize the cabin with regard to wind forces. Run the lower sheets of plywood horizontally around the cabin to create a strong connection between the walls and the floor, and then put plywood cut to fit the remaining height above it.
I would still increase the ceiling height under the loft to at least 84" from the 80" you mention. Having the loft ceiling height directly in line with the top of the door opening tricks the eye and will make the space feel "cramped". Although people will be able to walk under an 80" ceiling height, psychologically they will always feel like they have to hunch down a bit. I've seen people who are 6'6" hunch down everytime they walk through a standard 80" high doorway, and yet they know they have 2 inches to spare.
|
|
silverwaterlady
Member
|
# Posted: 24 Jan 2014 06:37pm
Reply
For your consideration, http://www.mah.gov.on.ca/page2103.aspx#
|
|
creeky
Member
|
# Posted: 25 Jan 2014 09:31am
Reply
nice looking property.
I think Owen C has said 7'4" or was it 7'6" is a good height for under a loft. He's built a tonne of these things so his advice will be spot on.
I too would put higher walls in for the loft height. and I would forget the giant overhang in favour of an easier build. It's a good idea. but you could tack on a shallower sloped roof later. over a deck? esp. nice if you had higher walls / roof line to begin with.
finally: in your area put insulation in. you'll be thankful in the spring and fall. even early fall/late spring can have some cold nights. and those seasons are often the best for being out at the cottage. no bugs. beautiful colours.
my .02 cents. good luck.
|
|
crownland
Member
|
# Posted: 25 Jan 2014 03:57pm
Reply
Thanks guys, this gives me lots to think about... plenty of time for doing up more drawings before the thaw comes 
|
|
rockies
Member
|
# Posted: 25 Jan 2014 04:58pm
Reply
As to insulation, the temptation is to put batt insulation in between the ceiling rafters and then cover it over with plywood or drywall and that's it. Batt insulation provides very little resistance to air movement within the roof cavity, plus you'll have to provide eave and ridge venting and use baffles to provide a space for air flow between the batts and the underside of the roof sheathing. You'll also have to put in a vapor barrier below the batts before you put on the ceiling treatment.
A much more effective type of insulation would be to use a system like "Tiger Foam" which is a spray on expanding insulation that comes in a kit and can be applied by the home owner. When you're done you send the empty kit back to them. It's an insulation, vapor barrier and air flow barrier in one, and you also don't need to install venting in the roof system. Spray once and you're done.
|
|
crownland
Member
|
# Posted: 28 Jan 2014 07:46pm
Reply
Yes - the insulation matter will depend on what our usage timeframe ends up being, and whether it will revert to "shed". If we do insulate, it will likely be two part foam for all of the reasons you already mentioned 
|
|
crownland
Member
|
# Posted: 9 Jun 2014 06:39pm
Reply
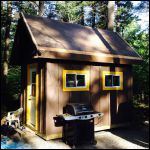
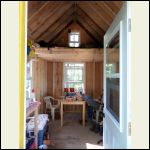
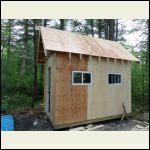
Update - we ended up simplifying the design to use precut studs to determine final height, and basic 12/12 roof. This ensured all angles were 45 or 90 degrees which meant the entire shed could be built with a speed square and cordless circular saw with minimal battery usage. Avoiding angle calculations as well as avoiding cutting every stud was a real time saver.
We ended up doing 8x12 with 16" gable overhangs and 8" eave overhangs. We did an 8 day trip - five of us had it up and sheathed in 2.5 days and then two of us spent the rest of the time doing soffits, fascia, battens, trim, painting and a bit of interior work, all of which is a lot more time consuming than the framing.
Thanks for the ideas and advice!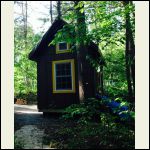
back.jpeg
| 
front.jpeg
| 
insideloft.JPG
| 
mostlysheathed.JPG
|
|
|
|

