| . 1 . 2 . 3 . >> |
| Author |
Message |
cbright
Member
|
# Posted: 10 Jul 2013 09:07am - Edited by: cbright
Reply
Hello all...
I'm working on a lofted 16x13 (208 sqft) on a tricky piece of land on my property. Went with the 13 dimension to maximize the sqft but stay under our provincial permit limit of 215sqft.
I'm build where there was previously a 22 by 10 deck built on a bunch of rock and concrete fill. The hill is basically 45 degrees down to the water, which makes the build very labor intensive as everything has to be brought down by hand from the hill above. You can slide things like lumber down, but concrete and concrete blocks have to be carried down by hand... one at a time.
|
|
cbright
Member
|
# Posted: 10 Jul 2013 09:15am
Reply
Here is the final design I've come up with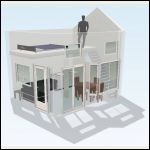
Desgin1
| 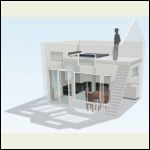
Design2
| 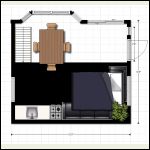
Design3
| 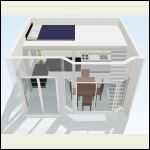
Desing4
|
|
|
cbright
Member
|
# Posted: 10 Jul 2013 09:20am - Edited by: cbright
Reply
Here is some context of what I'm working with.
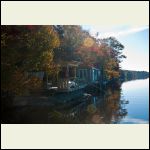
First picture showd what it looked like last fall. Not much space available.
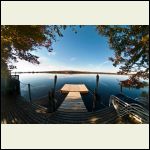
Second is my neighbors place which gave me the inspiration (but mine will be better!!!)
Third is the view I have/will have out the picture window.
Fourth is just a nice sunset a few weeks ago.
Property1
| 
Neighbors
| 
View1
| 
Sunset1
|
|
|
cbright
Member
|
# Posted: 10 Jul 2013 09:30am
Reply
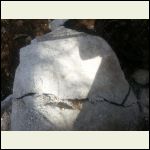
Since there wasn't much space to build my first task was to cut back into the hill and build a retaining wall.
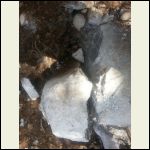
This also included getting rid of a huge granite boulder by splitting it in half with EcoBust (great stuff!).
Also had to removed one big tree and a few smaller ones. And dig up over 100 wheelbarrows full of dirt / rocks.
First pic is me attempting to cut the rock.... no dice at all!
Second is the EcoBust right after putting it in. Had to drill 3x 1.5" holes with a hammer drill into the rock. And a bunch of small (3/4") holes too.
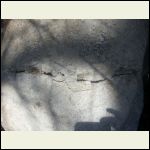
Third is after about 3 days and the EcoBust has expanded and cracked the rock.
Fourth is after a little prying and it all came apart!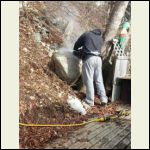
BigRock
| 
EcoBust1
| 
EcoBust2
| 
EcoBust3
|
|
|
cbright
Member
|
# Posted: 10 Jul 2013 09:34am - Edited by: cbright
Reply
More rock splitting pics.
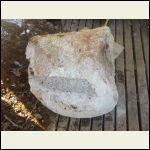
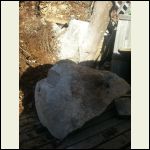
First pic show the super clean split ... this rock's cross section is about 3' by 3.5' ... and it split almost perfect straight, way past the drill holes. Those drill holes are 12" deep and only went a third of the way through.
Second is the deck on the dock.... I couldn't move it till a friend helped me roll it into the water.
Third gives some perspective.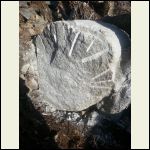
CleanSplit
| 
RockOnDeck1
| 
RockOnDeck2
|  |
|
|
cbright
Member
|
# Posted: 10 Jul 2013 09:40am
Reply
Next step was to dig back into the hill... Most labor I've ever done in my life!!!
First - digging out the hill.
Second - hill excavated!
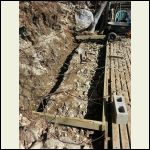
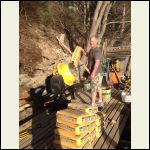
Third - me mixing concrete ... was hot for April!
Fourth - Footing for the wall in place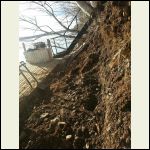
Hill1
| 
Hill2
| 
Concrete1
| 
Footing1
|
|
|
cbright
Member
|
# Posted: 10 Jul 2013 09:45am - Edited by: cbright
Reply
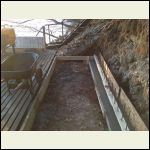
Next step was to build the retaining wall... remember all these bricks and concrete had to be brought down from 60 feet above at the road level!
First picture shows the first course of the wall put in will mortar.
Second is the wall completed.... was built by dry stacking and filling the holes with concrete.... I had a bunch of rebar I got for free that I put in every single hole... Should be super strong. Was somehow one block short!
Third is the whole wall completed. Has drainage behind it and was backfilling with gravel and misc. rocks I had around. You can see the back part of the floor framed up now too.
|
|
cbright
Member
|
# Posted: 10 Jul 2013 09:56am - Edited by: cbright
Reply
Next step was ripping up the entire old deck.... Simple but time consuming work. Built with nails, so I had to remove them all, since I'm reusing most of the decking.
First pic shows the old deck stripped down. Built with 2x6s and not supported that well. Previous owner of my property was a bit of a hack and never saw a screw in their life, it seems.
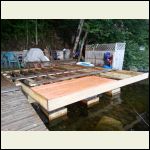
Second shows the rebuild. I built 3 piers in the water using some 8x8s from a 100+ year home. The base is built with Eight 8x8x16 concrete blocks (two levels of 4) in a boxed frame. Concrete will be poured (when the water goes down a bit) in the holes and rebared to make a solid mass than the ice can't move around in the winter. Wish I could have used precast blocks, but you just can't get them to the site.
The main frame for the floor is built using Sixteen (2 for the beam) 16'x2x10 pt lumber. Expensive, but this part needs to be done right and can't be fixed later. The boards cantilever 4 feet out past the main beam to give a nice 7-8 foot deck in front of where the boat house will be.
This is basically where I am now. Put some of the decking back on the front of the structure.
I have pre-built the entire front of the house (including tricky framing of the bay window). The other walls will be built in place since they are fairly simple.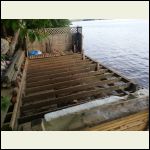
20130618_200402.jpg
| 
20130708_203709.jpg
|  |  |
|
|
|
cbright
Member
|
# Posted: 10 Jul 2013 10:03am - Edited by: cbright
Reply
I'm working at this fairly slow, but I'll be updating this as I progress over the next 2 months (in which I hope to have it water tight/sided/roofed).
A few tidbits. You'll notice I went with a different loft than normal. Mostly so I can put the stairs in a better place and I like the floor space it will provide. Also with the orientation to the lake, I figured I'd have the front be the wide open area.
I'm using 12 foot 2x6 walls for the whole structure with a fairly mellow roof line. This will give lots of head room in the loft. It also gives me wall space to add more windows in the front. I picked up 3 awning style windows, brand new, for $50 each which I incorporated into the design.
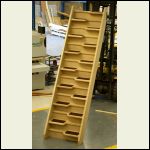
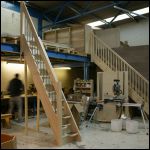
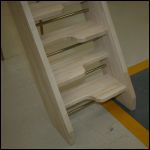
Going with alternating stairs to the loft like in the pics below.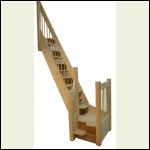
stairs1
| 
stairs2
| 
stairs3
| 
stairs4
|
|
|
old old buddy
Member
|
# Posted: 10 Jul 2013 05:09pm
Reply
Welcome to the forum! You have been rather busy. We didn't have to deal with the 60 foot drop you have but we have constantly had to deal with a road that is rather steep itself. Our cabin started as 12X16 with a 12:12 pitch loft and that was hard enough for me putting the steel roof on. But all the work on the cabin pales in comparison to getting all the material to the top of the hill to build the cabin. Our road from the hardtop to the cabin is 4/10 mile. BUT...it goes up in elevation about 600 feet in that distance. Therefore...we're stuck with three very steep hills to get to the top. Before we got the Honda Foreman we could only get to the cabin about seven months a year in my 4X4 pickup but now we can go any time we want.
You're going to have a nice place that you'll be very proud of. Our cabin is my favorite place to be
Good luck on your build!
Old Old Buddy
|
|
cbright
Member
|
# Posted: 11 Jul 2013 09:19am
Reply
Thanks for the welcome.
Yeah, the process of getting materials to the location doubles the work. Also working with the existing structure isn't the easiest... I've basically rebuilt the entire thing now.
Things like the main door, sliding door and bay window will need to be brought over by boat... that should interesting!
Last night I got most of the decking that will be in front of the house in place. Next I need to put the flooring in place. Still on the fence about insulating the floor, but I think I will. Just want to get to building walls!
|
|
old old buddy
Member
|
# Posted: 11 Jul 2013 04:46pm
Reply
Believe me....you definitely want to insulate the floor. We used fiberglass insulation (3 and 1/2 inch on part of the cabin anf six inch on the lower room). After we stapled the insulation in, we put 30# felt paper down for a vapor barrier (because someone strongly suggested that we do) and then put the tongue-and-groove 3/4" plywood over that. It's pretty cheap for a warm dry floor
Old Old Buddy
|
|
PatrickH
Member
|
# Posted: 13 Jul 2013 06:09pm
Reply
Your place is going to be awesome, cant wait to see the progress. I think alot of people on here can relate to having to haul materials to the building site, I find myself continuously asking why does everything has to be so heavy?
|
|
cbright
Member
|
# Posted: 19 Jul 2013 10:54am
Reply
Not a whole lot of progress. Just reinstalled the decking in front of the cottage and started putting in the strips that will hold the panels below the floor insulation. Time consuming stuff. Tomorrow I should be able to put a lot of work in and hope to have the floor 100% installed.
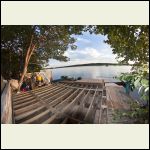
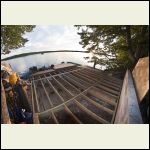
Some better pictures taken with my D90 and Fisheye lenses.
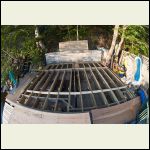
First image is showing the layout of the entire floor. Had to put the plywood down to make sure everything lined up correctly before I put in the final framing for the front edge of the cabin.
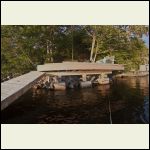
Second shows the floor framing with the front supports in place defining where the sliding door and bay window will be.
Third shows the detail of the pier supports... Water has dropped a foot in the last week and I could fill them with concrete now, but will wait a bit.
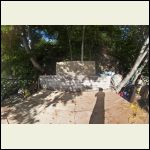
Fourth shows the back retaining wall.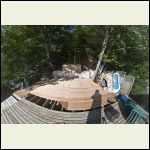
Layout
| 
FramedUp
| 
Supports
| 
BackWall
|
|
|
cbright
Member
|
# Posted: 19 Jul 2013 10:59am
Reply
And here are just a few more I took of the area last night.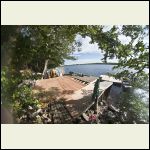
Stairs
| 
BackLeft
| 
BackRight
| 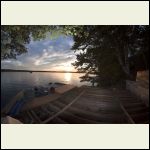
Sunset
|
|
|
cbright
Member
|
# Posted: 22 Jul 2013 09:07am
Reply
Good progress on the weekend. Got the entire floor installed 100%.
This involved making "trays" to hold the insulation in place.
Insulating all off the floor and then covering in tar paper.
Then install the 3/4" plywood floor.
And finally finish up all the decking that surrounds the cabin.
Ready for building walls now! Only took about 3 months to get here.
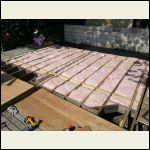
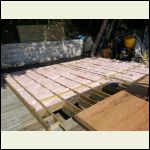
First pic shows the building of the trays to hold the R12 insulation.
2nd & 3rd show the insulation installed.
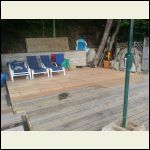
4th shows the finish product. Turned out good and is super solid.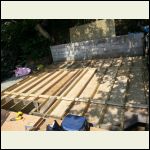
Trays
| 
Insulation1
| 
Insulation2
| 
FloorDecking
|
|
|
cbright
Member
|
# Posted: 1 Aug 2013 10:17am - Edited by: cbright
Reply
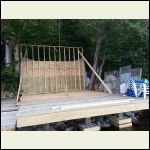
A bit of progress.... first big (16'x12') back wall in place. Everything takes longer that you expect.
Back wall has pressure treated ply at the bottom in case of water coming through the wall behind it. Also has a layer of tar paper, then a layer of house wrap and then another layer of tar paper on the lower 4 ft. Hopefully there will be no possible way for water to penetrate. Also built a little roof that sits just above the block wall that directs and rain to its back side, just in case.
Picked up all the siding that I'll use on the place. Hardie board from a builder that had a bunch left over from a job. Will need to partially install the siding on the next (right side) wall before putting up because the space is so tight in the back right corner.
Will start looking like a building soon!
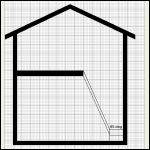
Two pics of the wall in place and one showing the side profile of the building. Loft will go in after the side walls are in place.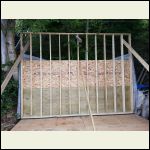
BackWall1
| 
BackWall2
| 
SideView
|  |
|
|
hattie
Member
|
# Posted: 1 Aug 2013 01:42pm
Reply
This is going to be amazing. Can't wait to see all the pictures when it is done.
|
|
cbright
Member
|
# Posted: 7 Aug 2013 01:12pm
Reply
Adding these photos to my Flickr account... whole album as a slideshow here;
http://www.flickr.com/photos/30757536@N08/sets/72157634967850201/show
Some progress lately... need to take some photos.
|
|
cbright
Member
|
# Posted: 16 Aug 2013 08:42am - Edited by: cbright
Reply
Some more progress and should make a ton of progress this weekend as I have help enlisted and perfect weather ahead.
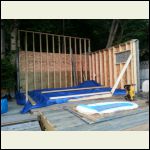
First two of the side walls up.
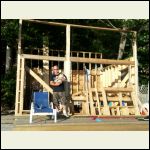
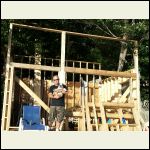
Next two, me and my dog posing in front of the partially built front wall. Rest will go up easy as it is already built in pieces.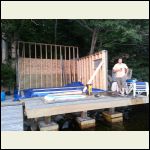
20130807_203257.jpg
| 
20130807_203308.jpg
| 
20130815_183329.jpg
| 
20130815_183344.jpg
|
|
|
cbright
Member
|
# Posted: 16 Aug 2013 08:46am - Edited by: cbright
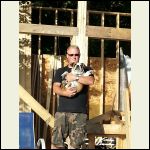
Reply
Two more of me and my dog (15 week old purebred bulldog)
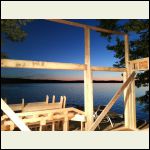
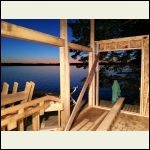
And two of the sunset as viewed from inside.
20130815_183408.jpg
| 
20130815_183337.jpg
| 
20130815_205843.jpg
| 
20130815_205909.jpg
|
|
|
OwenChristensen
Member
|
# Posted: 16 Aug 2013 09:41am
Reply
Nice work and a lot of it!
|
|
ShabinNo5
Member
|
# Posted: 16 Aug 2013 06:41pm
Reply
Nice project and great view!
|
|
razmichael
Member
|
# Posted: 17 Aug 2013 08:51am
Reply
That's coming along really nicely! I looked at your "view" shot of the sunset and thought - that's my view - only the sunrise.
You mentioned alternating tread ladder/stairs. I put one in a couple of months ago and it is working out great. At 20 degrees it is very steep but so easy to go up and down. The real proof was when my 73 year old father-in-law was up helping to finish up the siding and he would come down the ladder facing forward without even thinking about it. Only difficulty is you cannot stop on the ladder (to talk or think about something) because the automatic reaction is to put your other foot down at the same level on the one on the tread - nothing there!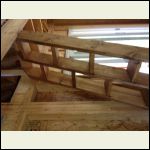
Stairs 1
| 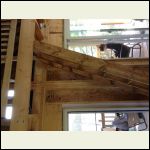
stairs 2
| 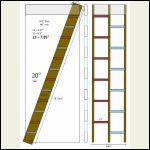
Stair plan
|  |
|
|
cbright
Member
|
# Posted: 25 Aug 2013 07:27pm - Edited by: cbright
Reply
Thanks for those plans razmichael... will be doing something along those lines.
Had a productive weekend. have the front of the building all framed up. Loft in place. Then installed the ridge beam and the entire roof framing.
Pictures to follow...
|
|
cbright
Member
|
# Posted: 25 Aug 2013 07:29pm
Reply
Views from the outside... looking like a building now!
|
|
cbright
Member
|
# Posted: 25 Aug 2013 07:34pm
Reply
View from under the loft. Ceiling is 7'4" under the beam (4 by 16' 2"x8")... feels just fine.
|
|
cbright
Member
|
# Posted: 25 Aug 2013 07:39pm
Reply
Loft and ceiling views. Ridge beam's top is 15 from the floor. Gives about a 7 foot height in the middle. Ceiling is 5/12 pitch in the front, but only 3/12 pitch in the back giving good head room for most of the loft. Will be covered in osb and then metal.
|
|
cbright
Member
|
# Posted: 8 Sep 2013 10:30am
Reply
Latest progress...
Gable ends framed and sheaved.
Roof sheaving installed.
Next up, house wrap and windows/doors install.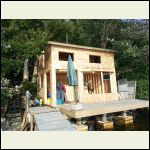
Front view
| 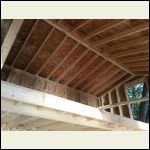
Roof from below
|  |  |
|
|
cbright
Member
|
# Posted: 7 Oct 2013 08:58am
Reply
Been awhile since I posted... here is my progress. Only work 1 or 2 partial days a week, so slow going)
Two pictures of the place wrapped up in Tyvek.
My dog (Sully) and I relaxing after working for a few hours.
Sunset on the last day of summer.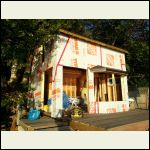
Tyvek2.PNG
| 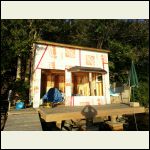
Tyvek1.PNG
| 
SullyWorking.jpg
| 
LateSummerSunset.jpg
|
|
|
| . 1 . 2 . 3 . >> |

