| . 1 . 2 . 3 . >> |
| Author |
Message |
Oilerfan
Member
|
# Posted: 5 Apr 2013 01:12pm
Reply
Well I finally get a chance to start my own thread after reading so many others over the past 6 months. This forum is one of the best on the internet and I feel I have to contribute.
Road right of way to the lot and upper portion of build site cleared yesterday. Road will go in sometime in May when road restrictions are lifted!!
Cabin build starts around the end of May. Going with a 12'x16'.
|
|
Oilerfan
Member
|
# Posted: 5 Apr 2013 01:34pm
Reply
Clearing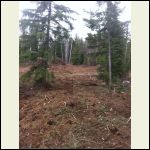
Building Site clearing
| 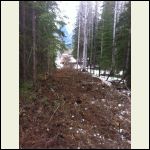
Road ROW clearing
|  |  |
|
|
Alaskaman
Member
|
# Posted: 5 Apr 2013 02:43pm
Reply
Beautiful site.
|
|
old old buddy
Member
|
# Posted: 7 Apr 2013 11:05am
Reply
Welcome to the forum! Always glad to see another 12X16 cabin builder. I'll tell you....my son and I have had a great time building ours over the past four years total. Basically, we had the cabin built by August of 2011, but it was only waterproof at that point. It still is not finished inside but I love it the way it is. We put the porch on about a year after we built the cabin and then put on an 8X16 bump-out in the fall of 2012. The side room has made all the difference in the world.
I'll be anxious to watch your progress. Are you located very far from your home? Fortunately we're only eight miles away....pretty handy if you forget something. Where is your cabin located (in general terms)?
Old Old Buddy
|
|
Oilerfan
Member
|
# Posted: 8 Apr 2013 12:48pm
Reply
This is the cabin design I came up with. I still have a bunch of tweaks to make but the general concept plan isn't going to change. I want an open rafter ceiling so i am trying to figure out how to install rigid insulation on the roof with enough R value to keep me warm on -30C winter evening! Either way 192sqft isn't much too heat with a good wood stove!
PS - Best find were 7ftx3ft windows for $100 each...regular $1400/each...and they were brand new. Someone just wanted them out of their garage and didn't care about the money!! Crazy!!
We are 2.5hrs from home so I will be a weekend warrior all summer long. I have been planning all winter so hopefully I will be ready come May when building starts.
|
|
countrygirl
Member
|
# Posted: 9 Apr 2013 12:18pm
Reply
If you can get those windows to face the sun for winter (south) you heat up time will be much less in winter. Our cabin in manitoba we go down to -35C, and inside of the cabin is only -15C, because the large windown face the sun. Friends down the road don't have the windows and are under pine trees and there cabin inside is colder then outside. Heat up with a good wood stove is 5deg a hour to heat up. also putting and insulation foot wall will make a big different, the ground under the cabin will not freeze up as fast. If you are planing to use the cabin in winter these are some things to think about.
Looks like you have a lot of work a head of you good luck. Can't wait to see the pictures.
CountryGirl
|
|
Oilerfan
Member
|
# Posted: 9 Apr 2013 01:33pm
Reply
The 3 windows will face directly south towards the sunshine and mountain peaks! I can't wait to enjoy a morning coffee and hear the wood crackle next winter.
Lots of work but nothing but time. I will be in a hurry to get the building closed in sooner vs later but after that I can tinker away all summer.
|
|
tcmatt
Member
|
# Posted: 9 Apr 2013 08:14pm
Reply
Oilerfan,
Best of luck to you! A year ago last weekend I started my 12x16 and now it's 95% complete! I can't wait to see your progress.
Matt
|
|
|
nicalisa
Member
|
# Posted: 9 Apr 2013 08:54pm
Reply
enjoy your build!!!! I think that the weekend warrior build is the best part and we really miss it. It is also sweet when it is done though you are never really done. We are a 9.5*15.5 and for us the biggest deal was the loft space. it created a separate "room" in cabin for the kids and a space under it for a "second bedroom" ok, perhaps that is optimistic, but it works for us though you are never really done. We are a 9.5*15.5 and for us the biggest deal was the loft space. it created a separate "room" in cabin for the kids and a space under it for a "second bedroom" ok, perhaps that is optimistic, but it works for us
|
|
leonk
Member
|
# Posted: 10 Apr 2013 03:33pm
Reply
Good looking site.
Where is it?
If you don't mind me asking - what's the going price for land?
I used to live in Calgary.
|
|
Oilerfan
Member
|
# Posted: 10 Apr 2013 03:47pm
Reply
The site is just outside of Golden, BC. I currently live in Calgary.
The price was $67K for 1.5arces. Previous buyer paid $140K in 2008 before the market fell out.
|
|
leonk
Member
|
# Posted: 10 Apr 2013 03:57pm
Reply
Huh, interesting. Thanks. Go Oilers! 
|
|
ericfromcowtown
Member
|
# Posted: 12 Apr 2013 10:34am
Reply
Looks great! I'm also in Calgary and we pass through Golden all the time on our way to Kelowna. It's a beautiful part of the country.
|
|
Oilerfan
Member
|
# Posted: 26 Apr 2013 12:29pm
Reply
Driveway/Road 3/4 done. Waiting for road restrictions to be lifted so we can gravel the rest of the roadway. Hope to get started on the foundation for our cabin mid May.
Going to preframe the outhouse this weekend. Never thought I would be excited to build an outhouse!
Still trying to figure out how to do a solar setup. Have another thread on the forum with some good suggestions. I know the components I need, however its the install I need assistance with. Trying to find someone locally to install for cash. Hopefully I find someone!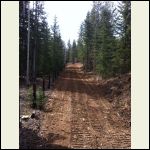
Cabin_Road_2.JPG
| 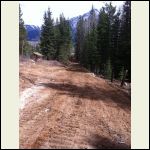
Cabin_Road_5.JPG
|  |  |
|
|
leonk
Member
|
# Posted: 26 Apr 2013 02:24pm
Reply
how long's your road and what it cost to build, if you don't mind again 
I camped on Kicking horse river, there was a campground. Beautiful, I envy you 
|
|
Oilerfan
Member
|
# Posted: 26 Apr 2013 02:56pm
Reply
Road is about 250m long. The contractor is completing on a time and materials basis but he estimated it would be between $5K-$10K. I haven't seen a bill yet 
|
|
leonk
Member
|
# Posted: 26 Apr 2013 07:03pm
Reply
steep, like the Rockies 
|
|
Oilerfan
Member
|
# Posted: 10 May 2013 04:12pm
Reply
Made it out to the cabin yesterday to meet with the road contractor and finalize the alignment. Next weekend I am going to start construction however I can't get too far as the local concrete supplier takes the weekend off...crazy!! Either way I am sure I will have lots to do...outhouse, landscaping, building layout, purchasing building suppliers, etc. Planning upfront always pays off in the end. I will post a couple photos I took yesterday.
|
|
Oilerfan
Member
|
# Posted: 10 May 2013 04:15pm
Reply
The building site is where the morning sun is shining down.
|
|
Oilerfan
Member
|
# Posted: 23 May 2013 05:40pm
Reply
Road was finished 1 day before the long weekend so we were finally able to access the lot!!
On the weekend I almost got the outhouse done! I went a bit over board on the height but I always feel tight in them so I built mine 5'x5' with an 8' front wall. I wanted to use the outhouse as a bit of a mock up of the shed style cabin I am building so all in all it was good practice. It has been years since my summers of construction. Man did building the awkard off size ever produce a lot of waste material!
We also got the 5th wheel levelled out to stay in the weekends we build. Grandparents were nice enough to let us use it for the summer! I think they probably want to cash this in as free stays once the cabin is built!
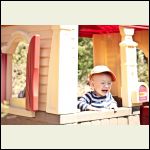
My little guy wanted his own cabin as well so Grandma bought him a little cottage. He loved it...well most of the time.
I would have liked to pour the piles/piers but concrete doesn't get delivered where I am at on long weekends and I really didn't want to mix 60 bags of concrete. I will save the piles/piers for next weekend and do some landscaping while I wait for them to cure.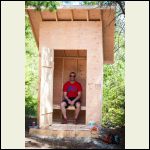
Outhouse.jpg
| 
Lil_guys_cabin.jpg
|  |  |
|
|
Gerry
Member
|
# Posted: 24 May 2013 10:36am
Reply
Nice Oiler! I'm retired army & settled down in the wife's hometown in northern NB. Never did it before, but going to try to build adirondack type cabin too. Thinking somewhere like 12' x 15'. We have 25 wooded acres behind the house. So I'm going to try my hand building it of logs. So this summer I'll cutabout 60 logs, peel 'em & let them dry out until next summer. It'll probably be crude but (hopefully) water tight & just a retreat for myself & dog when I need to get away for the night LOL! Good luck Bud!
|
|
Oilerfan
Member
|
# Posted: 24 May 2013 10:46am
Reply
Thanks Gerry and good luck with your build. The lot is going to be our little oasis. Last weekend it was like all the stress was lifted from my shoulders. Amazing what a nice sunset, fresh air, and some sunshine will do.
I went with 12x16 to keep the dimensions a standard size. Everything comes in 4', 8', etc lengths so you might want to take the extra foot of room and save some cutting! Just a thought.
|
|
leonk
Member
|
# Posted: 24 May 2013 11:25am
Reply
the loo looks good!
Not to steal this thread, Gerry you may want to start your own and people will chime in with suggestions, there's a lot of experience in this forum.
Summer logs are not the best, not sure if you care. What method (notch) of log construction you plan to use? Have a look at fpw cabin on the forum - hand scribed, my dream, but beyong most peoples' skills 
|
|
Oilerfan
Member
|
# Posted: 10 Jun 2013 01:15pm
Reply
Well progress is being made at our lot. I managed to get the foundation in which is a big check off the to do list.
I laid out the footing/pier locations with batter boards and stringline on Saturday morning before the drilling was scheduled to be done in the afternoon. I am still amazed how well something like batter boards/stringline still works with all the new tech out there. No real issues with layout other than dealing with the slope of ground. I had to keep the height of the top pier row closer to the ground to minimize the height of the second pier row. The tallest pier was 24 inches so i was happy with that. The 3rd row of piers are for the deck so I am going to install 4x4 posts. I wasn't as concerned about the extra connection with the decking as I was with the 1st and 2nd row which are for the cabin.
The drilling was completed with a skidsteer (c/w 12in auger). We ran into rock/cobble about 30-36 inches down so I didn't get to the frost line which is 48 inches but nothing I could really do. I was already prepared to deal with frost issues as I couldn't justify putting in the work for the bigfoot footings (large excavation, backfilling, etc) for such a small structure intended for weekend use. There is good draiange under the building site and the building piers are into cobble with only minimal clay so maybe I will get lucky. If not i will have to deal with levelling the cabin a couple times a year if the frost is bad. I was extremely glad that I spent the money getting a skidsteer in. They took 1hr to dig 11 holes. I would have spent 1 week and probably would have only gotten down 24 inches in most places. We used a laser level to adjust the height of the sonotubes. This worked seemlessly and most footings ended up bang on. All in all it was a 12hr day but we were ready for concrete in the morning.
Concrete came the following day. It took about 1hr to wheelbarrow and shovel all concrete. The mix was pretty wet so we waited about an hour to set the connecters. The finished product is shown in the photos.
After it was all said and done the footings seem to be level and straight so mission accomplished. Glad to get this step done!! On to the floor in a couple of weekend. Hope to have walls standing by July long weekend.
|
|
Oilerfan
Member
|
# Posted: 10 Jun 2013 01:18pm
Reply
Foundation
|
|
Oilerfan
Member
|
# Posted: 2 Jul 2013 06:38pm
Reply
Finally got back out to the lot this weekend to do some more work. The transcanada hwy through Canmore opened up just in time for me to sneak out before the crowds. The complete mess the flooding has caused was crazy.
The inlaws and my wife headed out a few days earlier then me (a 6hr detour around the closed section of the transcanada) and made good headway on the beams and joists. Of course they choose to ingore a few details on my plans but mostly minor. I finished off the outhouse that has been nagging me for a few weekends and we relaxed with a few beverages and bugs!
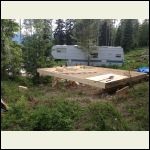
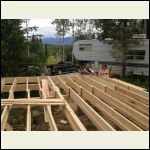
Saturday we finished off the joists and preppred them with a ledger board to hang rigid insulation. I ended up going with 1 layer of 1" rigid then R20 batt on top to keep us warm on cold Canadian winter days. I sealed the edges of the rigid with gap sealant before placing the batt. Installing the ledger board was tedious work but the insulation went great and fast. Next we installed the t&g subfloor. I ended up gluing and screwing the floor down to reduce squeaks. I have a little one and I would like to avoid late night wakeups when i come in from the fire. All went well but we didn't notice until it was too late that the t&g installed snug doesnt come out to 12'. We were just short at 11'11". Weird but at least it wasn't long. After the subfloor we installed decking boards to create a wrap around deck. We have 6ft out front and 3ft on cabin side. It turned out great and i was quite please with the results.
Sunday we decided to tackle the 2 load bearing walls. The back wall has no windows and went together quite quickly with the air nailer i borrowed from a friend. Man are those things awesome. Next we built the front wall which has 3 big bay windows. A lot of cutting went into trimmers, cripples, etc...lots of nails, lots of wood. We finished up around 5pm but with the 32C heat we decided to call it a day and stand the wall Monday.
Monday we figured out that in our heat stroke state that we had installed the top plate on the bottom of the wall. Good thing we installed all the sheathing!!! I made the decision to remove the sheathing a do it right...I wish sometimes I was less picky. The removal process took a couple hours then we were finally ready to stand the wall. After a few attempt we gave up with only 2 guys and 2 gals. Oh well it was 35C and we had a good run for the weekend...down to the river for a glacier swim!!
I already have 4 or 5 people rounded up for next weekend to stand the load bearing walls. Hoping to get the rafters and side walls up as well. So excited to get a roof on!!
I posted a few photos of my work crew and decking layout. The lil one hurts production but he keeps moral up!! My mother in law took a few more photos which I will post once I get them.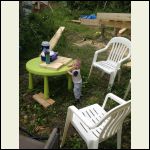
decking_001.JPG
| 
decking_003.JPG
| 
decking_004.JPG
|  |
|
|
cabingal3
Member
|
# Posted: 3 Jul 2013 07:57pm
Reply
Quoting: Oilerfan My little guy wanted his own cabin as well so Grandma bought him a little cottage. He loved it...well most of the time.
he is precious.lol
|
|
Oilerfan
Member
|
# Posted: 9 Jul 2013 04:17pm
Reply
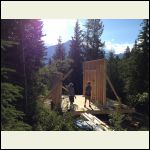
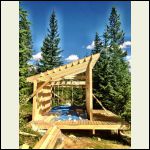
Had a good productive weekend. Stood up 2 walls and did the framing for most of the third. Rafters went up with blocking. Installed the joists for the loft and some 2x6 ties that connect the tall wall (above windows) to the rafters.
The 12ft wall took every inch of strength for 3 of us to get up. I was a bit nervous that we wouldn't get it but all was fine and it went up without a hitch. The 8ft wall felt like a feather!!
The rafters we 100% easier than I thought initially. We made a good jig and copied this for the rest. Everything fit perfectly.
I am happy with the progress and looking forward to 1 or 2 more weekends to have things closed up. Really like the look so far. The 12ft wall still makes me a little nervous but had an architect look at it and they said it would be fine.
Curious if anyone knows if I need to vent my roof or not. I blocked the end of the rafter so i can leave the overhangs exposed. Will fill the rafter cavity with batt insulation. Do I need to vent both ends or is it fine without it??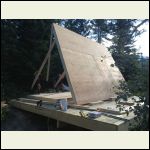
cabin_framing_010.JP.jpg
| 
cabin_framing_012.JP.jpg
| 
cabin_framing_014.JP.jpg
|  |
|
|
leonk
Member
|
# Posted: 9 Jul 2013 04:29pm
Reply
good progress 
What a beatiful setting!!! when is a good time to visit? 
|
|
2680
Member
|
# Posted: 9 Jul 2013 06:31pm
Reply
my large cabin has vaulted ceilings so the insulation is sandwiched btw the roof decking and finished beadboard. i didn't do any venting and haven't had a problem in 4+ years. not sure what's right or wrong, but that's my experience.
great looking lot and cool cabin design. looking forward to seeing your progress!
|
|
| . 1 . 2 . 3 . >> |

