|
| Author |
Message |
luther
Member
|
# Posted: 5 Jun 2012 18:31
Reply
Hello, long time viewer of this fantastic site and thought I would join and share my experience in building a 20x20 with loft cabin. when I was younger I build numerous decks and fences but building this cabin was an eye opener for me. Its still not finished but its getting there. I have attached a few photos of the build and will no doubt be asking for some advise on what to do next. The cabin has power but no septic or well.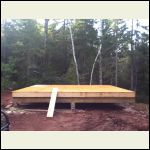
The foundation / floor
| 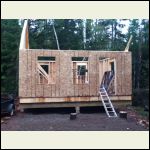
raising the walls
| 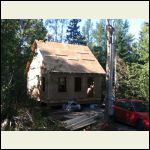
getting there
| 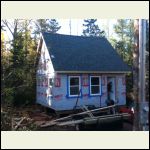
Typar on
|
|
|
luther
Member
|
# Posted: 5 Jun 2012 18:35
Reply
I should have added that I started the build this past September and my family and I have been spending the weekends at the place since this past Jan.
I have installed a commercial composting toilet and have to say that so far i am very impressed with its performance and complete lack of nasty smells (so far)
|
|
nscampgirl
Member
|
# Posted: 6 Jun 2012 07:59
Reply
Hi and GREAT to see another Nova Scotian here. 
|
|
bushbunkie
Member
|
# Posted: 7 Jun 2012 08:06
Reply
Heck...great to see another Canadian livin' the dream.
Cabin looks great...what's your property like...looks pretty rustic!
|
|
luther
Member
|
# Posted: 7 Jun 2012 17:05
Reply
Hi, thanks for noticing my post. I know there lots to read on this site.
The property is dense woods, mainly softwood there is a large pond with very slow moving water through it in the middle of the property an it essentially devices the lot into two almost equal pieces.
As for the cabin, as I mentioned earlier, it does have power to it but no water or septic, this may be installed later. The inside is slowly being finished with wood plank ceiling and drywall on the walls. The layout is simple and included a small 8x8 bedroom for my child and the last is for the grownups. there is also a decent sized bathroom which presently only has the composting toilet. plans are to put in a sink once I have a water storage container installed.
The cabin was built to code, a necessity as the power company wouldn't hook up power without a building permit.
The main beams are 3 ply pt 2x12's and the floor joists are 2x10. Over built but hopefully it won't go anywhere.
In order to save money I used re-sawn spruce 2x8 for the siding and interior ceiling. To my surprise it turned out better then I thought it would and costa fraction of what pine would have.
The plan is to use the place mainly in the fall and winter (its insulated) as it is close to one of our downhill ski areas.
I will send some other pics soon.
|
|
luther
Member
|
# Posted: 7 Jun 2012 17:44
Reply
Here are a few more pics
|
|
trollbridge
Member
|
# Posted: 8 Jun 2012 10:44
Reply
Very nice! Welcome to you. You have been working fast. It will be fun to see more pics as progress continues!
|
|
quoddy camper
Member
|
# Posted: 8 Jun 2012 18:55
Reply
Nice to see another canadian, welcome aboard and the place looks great......
|
|
|
luther
Member
|
# Posted: 13 Jun 2012 12:07
Reply
Here are a couple of early photos of the build (site prep). This was the one of a couple of stages that I completely misjudged, both from a time and budget aspect. I hired a guy with an excavator that was already in the area on another job and had him prepare the site after I cleared the area of trees. He did a good job but it took longer and cost more then I was expecting.
Originally I was going to build a completely off grid cabin but after looking at the cost of a solar setup with what it was going to cost to have power brought into the site it was a very easy option. It only cost me the $200 hookup fee... A friend who was also building in the area lent me his temp power setup which saved even more money...
Anyway, I will get some more recent photos of the place up soon. I was at the cabin this past weekend and finished the ceiling and put the toilet vent through the roof (had it exiting the wall earlier). No camera with me though.
Cheers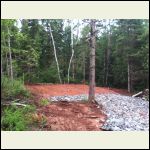
site prep
| 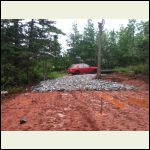
driveway being put in
| 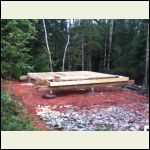
floor joist and subfloor
| 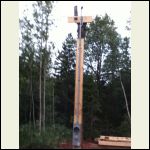
Temp power setup
|
|
|
luther
Member
|
# Posted: 3 Jul 2012 21:20
Reply
Still no new photos, but I was wondering if anyone has suggestions for flooring. presently I have 5/8 OSB over 3/4 inch plywood. I would like to put down pine or another softwood ( I like how its dents and such) but other then pine, are there any other options? in the short term I was just going to paint or stain the OSB. does anyone know of a good floor paint or stain that will last without chipping or wearing out yearly?
Cheers
|
|
hattie
Member
|
# Posted: 3 Jul 2012 21:33
Reply
Your place is beautiful!!!
|
|
OwenChristensen
Member
|
# Posted: 3 Jul 2012 23:18
Reply
Nice cabin. I'd like to see pics. of your area too.
Owen
|
|
luther
Member
|
# Posted: 17 Sep 2012 18:38
Reply
Well its been just over two months since I was last at the cabin and I have to say that it was great to be there. Even though I have lots of work/projects to complete it is still much more relaxing to be at the cabin then in the city...
This cabin is being used mainly in the fall and winter so my cabin season is just starting.
This past weekend I was able to tape and mud the drywall and installed about 3/4 of the flooring. I did not have my camera with me but this weekend I will make sure I remember and so I should have a few more photos to post next week.
luther
|
|
luther
Member
|
# Posted: 25 Sep 2012 19:14
Reply
Just a short update. I was up at the cabin with my buddy and my son and were able to get a bunch of things done. The majority of the interior floor is installed, walls painted and kitchen almost installed. We even hung the 1st piece of art on the wall.
future projects include a ladder/ railing for the loft, trimming out the windows and installing baseboard and door trim.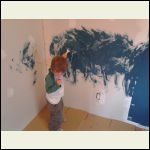
little guy helping!
| 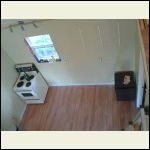
Soon to be kitchen
| 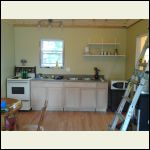
Kitchen
| 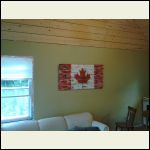
art on the wall
|
|
|
Kudzu
Member
|
# Posted: 25 Sep 2012 19:54
Reply
Everything looks great, you have done well, and keep the updates coming.
|
|
canadian girl
Member
|
# Posted: 2 Apr 2013 11:09
Reply
looks great  I can't wait to see more pictures as your work progresses. I can't wait to see more pictures as your work progresses.
|
|
customrunner
Member
|
# Posted: 3 Apr 2013 20:09
Reply
Love you cabin and I really want your Canadian flag art
|
|
DJZAJB
Member
|
# Posted: 3 Apr 2013 20:15
Reply
Looks great, I am in N.S. as well!!!

|
|
neb
Member
|
# Posted: 3 Apr 2013 20:15
Reply
Awesome!!!!
|
|
luther
Member
|
# Posted: 29 Aug 2013 20:10
Reply
Sorry for the long break between posts... Summer was very busy for me. Anyway, thanks for the positive comments on the cabin. I have attached a few more of the place. Still have a bit of painting to do and of course the baseboard and trimming out the windows. Maybe I'll get to that this fall.
Other projects that I hope to complete include:
smaller bunkhouse
wood shed
thinning out the trees in the immediate area of the cabin.
|
|
hattie
Member
|
# Posted: 29 Aug 2013 21:20
Reply
Your place looks amazing!!!!
|
|
luther
Member
|
# Posted: 1 Oct 2013 20:05
Reply
Well I decided to build a bunk house for our guests that come to visit. last year we had lots of visitors and found the place to be pretty tight. In addition we are expecting our 2nd child in the new year and felt that in order to accommodate everyone we needed a bit more room.
My wife thought I should finish the trim inside the present cabin, but thats not my style. I like to have many projects on the go!
I decided on a 12x16 with 6 in 12 pitch roof, as this is a winter place its built with 2x6 so i can get at least R20 in the walls. I opted to use LP Smart Panel (or similar) for the sheathing/siding. The basic design has the door in the center of the long wall with a large window on each side of the door. I also installed a smaller window in the rear right corner (may frame in a small room for a composting toilet)
I am about 100 feet from the main cabin and I plan to bring power to the bunkhouse. It will be a simple set up with about 3 or 4 outlets, an outside light and an outside outlet. I am planning on running 8/3 wire from the cabin to the bunkhouse (I think this will be ok for a 100 foot run).
The project got under way three weekends ago when I went up and cleared the area for the bunkhouse. I also had two loads of gravel delivered. I used the gravel to level off a pad that the bunkhouse would sit on.
The gravel was moved and spread by wheel barrel the next weekend.
This third weekend the cabin went up. On saturday the foundation and floor. I used 2x2 patio stones with 4x4 deck blocks. I laminated 2 3-ply beams using 2x8x16PT the beams are supported in three places. I placed the 2x8x12PT joists on top of the beams. and finished the floor off with 3/4 ply. The floor was also insulated at this time.
On Sunday I had four friends show up and we put the walls and trusses up. We even managed to get half the roof sheathed. many thanks are owed to them!
On the Monday one of the brave souls from Sunday stayed and helped get the rest of the roof sheathed, ice shield, drip/rake edge and felt on. We also were able to close in the gable ends and install the windows.
Anyway I have included some pictures of the process and will provide more when I am up next to shingle and put the exterior trim on. I will also be insulating and adding some type of interior panelling once the simple wiring is completed.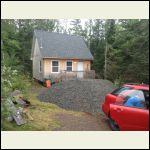
gravel on site
| 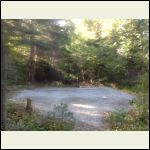
gravel pad
| 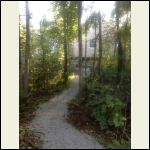
path from cabin to bunkhouse
| 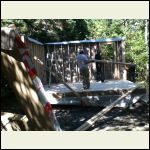
walls going up
|
|
|
luther
Member
|
# Posted: 1 Oct 2013 20:06
Reply
here are a couple more
|
|
luther
Member
|
# Posted: 1 Oct 2013 20:07
Reply
here they are
|
|
luther
Member
|
# Posted: 6 Jan 2014 08:50
Reply
Winter is well underway here in Nova Scotia. We have had a good amount of snow and a good amount of freezing rain over the holiday season. The trees were heavy with ice and caused a bit of concern as some were now resting on the power line. I managed to clear the branches in as safe as a way possible but at times I definitely felt like I was trying for the 2013 Darwin awards !
The bunkie is pretty much done with the exception of a bit of interior organizing, and it housed its first overnight visitors over Near Years. It was nice to not be so crowded in the cabin.
The only unexpected visitors seem to be a couple of mice that have found a way into the one of the cabin walls. Spend a couple of days dealing with them. I am told that at this time of the year, that what ever mice are in the cabin will stay and that no new outsiders will make there way in because they have all found warm areas to spend the winter. I am not sure if this is true or not.
Anyway I have attached a few pics of the holiday season spent at the cabin.
I hope everyone have a fulfilling 2014.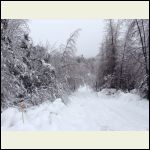
The driveway.
| 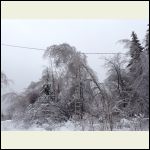
ice covered tree causing some issues
| 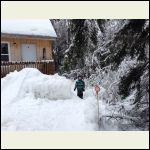
little guy enjoying the snow
| 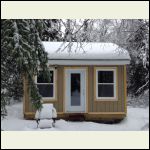
Bunkie in the snow
|
|
|
skootamattaschmidty
Member
|
# Posted: 6 Jan 2014 11:42
Reply
That looks fantastic! When in Canada you have to embrace the winter! I love the bunk house. Great work!
|
|
cbright
Member
|
# Posted: 6 Jan 2014 13:31
Reply
From one Nova Scotian to another.... Looks great!
Yeah, the winter has been off to a fast start, but all the rain today will knock a lot of the snow back. Huge sheets of snow were sliding off the metal roof of my place on the weekend... probably bare now. The next two weeks look to be very mild for January.
|
|
luther
Member
|
# Posted: 6 Jan 2014 14:32
Reply
I hope we don't loose too much snow. Its been a great start to the ski season. My place is by Wentworth and we have been lucky to not have gotten some of the rain the coastal areas have, though I am sure its raining there today.
I wouldn't mind the ice being off the trees though. Less to worry about as far as power failure.
|
|
|

