| . 1 . 2 . >> |
| Author |
Message |
tex
Member
|
# Posted: 4 Jun 2012 10:37am - Edited by: tex
Reply
Hello all -
Welcome to our cabin project in the woods.
Project Description:
12'x16' basic cabin, sloped roof, wood stove, small kitchen, sleeping area, includes windows, door and small screened area beside.
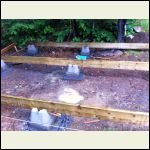
May 2012 - developed design, removed trailer, started the footings
June 2012 - bought supplies, finished levelling, frame floor for platform
See pictures of status so far...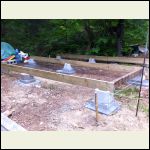
Cabin_Foundation_1_0.jpg
| 
Cabin_foundation_2_0.jpg
| 
Cabin_foundation_2_0.jpg
| 
IMG_0047.JPG
|
|
|
Montanagirl
Member
|
# Posted: 4 Jun 2012 11:35am
Reply
Nice! Good luck and keep us posted on your progress!
|
|
OwenChristensen
Member
|
# Posted: 4 Jun 2012 01:55pm
Reply
I like your piers they look good. Also it looks like your cantalevering out beyond. That's the way I'd do it.
It's fun. Isn't it?
Owen
|
|
DaJTCHA
Member
|
# Posted: 4 Jun 2012 03:27pm
Reply
Keep posting the progress pics and keep us updated on new work. Looks like a good start on a wonderful spot!
|
|
tex
Member
|
# Posted: 4 Jun 2012 11:23pm - Edited by: tex
Reply
Thanks for the encouragement.
We really needed it this last weekend. Lots of rain and forgot some tools too!
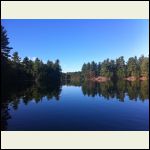
Here are some more property shots for viewing...
We will head up this weekend to work on mortaring some of the supports and tie the frame together.
Platform hopefully done in a weeks time. Need to decide on ply and thickness...any suggestions, T & G, G1S, 5/8" should do?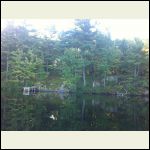
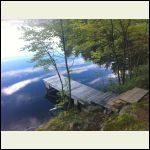
View from the lake to the site
| 
IMG_0055.JPG
|  |  |
|
|
TomChum
Member
|
# Posted: 5 Jun 2012 12:08am
Reply
Wow you sure have a beautiful site!
Are there other cabins on that lake?
|
|
DaJTCHA
Member
|
# Posted: 5 Jun 2012 10:27am
Reply
My advice...make every purchase decision based on the premise that you want it to last a LONG time. If you think you can get by with 1/2" here, 2X6"'s there...go with 3/4" there and 2X8's or 10's there...Trust me, you want to do this once and forget about it. If you ever go to sell it, then you want the new owner to look at it and have no doubt that it was built like a brick (port-a-potty) house! LOL!
I forgot some tools (once!) and then I made an excel doc that lists all my tools and supplies based on what adventures I've got planned for the weekend. I can send it to you if you'd like?
|
|
Cornhead
|
# Posted: 5 Jun 2012 02:19pm
Reply
Looks like your getting a handle on things Tex. Bear in mind that your ground floor will suck dampness from the ground even if it is a foot or to above grade. Industrial grade vapour barrier may be the ticket.
Keep up the good work!
Hope to play site boss someday
|
|
|
OwenChristensen
Member
|
# Posted: 5 Jun 2012 02:40pm
Reply
Where are you? It looks like my neck of the woods, northern MN.
Owen
|
|
JasonСrabl
|
# Posted: 6 Jun 2012 04:51am
Reply
tex looks good.
|
|
tex
Member
|
# Posted: 7 Jun 2012 07:12pm
Reply
Thanks its a nice secluded lake, with bass, and lots of animals too.
One other cottage, but, its much larger than mone, and with amendies it lacks a true appreciation of this lake and true respect for it too. There are some camper trailers on the lake also. All are off grid
|
|
tex
Member
|
# Posted: 7 Jun 2012 07:32pm
Reply
Yes, I agree.
But, there maybe a balance in our design / build thinking.
I also wish to be sustainable and reuse materials that will both meet expectations of the cabins use and design. The foundation and platform will be built with both recycled and new lumber.
Its a little more work, and takes longer, but lows costs, and I think the story of the cabins "bones" will be more interesting too.
E.g -
Having recycled, T & G 2 -3/4" x 5" cross member, is good support, environmentally friendly, and cost me $ 20.00. Not $ 100.00 for P.T.
|
|
tex
Member
|
# Posted: 7 Jun 2012 07:48pm - Edited by: tex
Reply
Cornhead - Thanks for the encouragement. I was up there today mortaring/levelling specific supports. Went well.
I will attach 2-3/4" x 5" x 65" cross beams (12) and cover with ply likely by next week. Used windows at a demo yard, will be purchased this weekend! $ 20.00 each, not perfect, or fancy, but not junk either.
I plan to use, tarpaper, or tyvec - breathable barrier, and will have 2" thick insulated sheets inserted with the frame floor and taped.
The floor will also be T & G, and likely ply. I do not like chip board , OBS, and may stain the floor to. If I could afford, or see value, in marine plywood for this cabin I would.
But, I will wear warm socks instead and notice the ground is fairly sandy, and will build a trough or two underneath to gather the rain and move it away from the building. Hopefully, this will help.
More pictures to come.
Thanks everyone for your ideas and support.
It can get lonely sometime. And though the birds and chipmonks may complain too, its nice to get positive vibes from the forum members!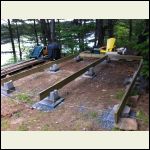
mortar, levelling some supports
| 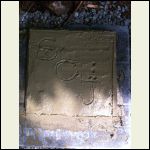
looks like chocolate cake!
|  |  |
|
|
Anonymous
|
# Posted: 7 Jun 2012 09:11pm
Reply
Quoting: OwenChristensen Where are you? It looks like my neck of the woods, northern MN
North of 1000 Islands region, Canada
I like you wee cabin, send me some snaps for desgn ideas?
|
|
tex
Member
|
# Posted: 10 Jun 2012 10:42pm - Edited by: tex
Reply
Greetings fellow cabin folks...
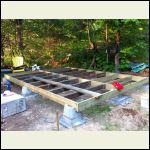
We just returned from the site and can profess the platform frame is ready for insulation, tar paper and T & G sheathing!
Picked and delivered the recycled windows to the site too.
Large window with 2 side windows, 3- 28" x 48" casement type, 1 - 3" x 3" older unit. All have closing hardware and 2 panel glass with decent seals. Some cleanup required...but all for $ 85.00.
We also have an exisiting window that has a rolling blind, that will go on the south side of the cabin.
Had some challenges with the final squaring of the platform, installing recycle beams and the bugs...but the two of us finally came up with building solutions, and ran from the bugs too!
Nice to have it at a stage that actually seems functionally ready for moving from the basic bottom to now into framing the walls, windows etc.
We are both quite tired from the weekends organizing and work.
But as the picture reveals we are finally "seeing the light" on this project.
Nice to take a break for a few days though, shop and prepare for T & G this week, and finsih the floor hopefully next weekend.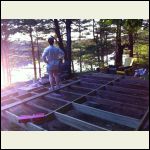
Seeing the light
| 
Cabin_foundation_2_0.jpg
|  |  |
|
|
trollbridge
Member
|
# Posted: 11 Jun 2012 03:10pm
Reply
Hey welcome Tex! Your setting on that lake is absolutely breathtaking!!!! Lucky, lucky you!!!!!
I will enjoy watching your cabin go up! You'll have trying times but it will be soooo worth it in the end! We've all been there! Best of luck and enjoy!
|
|
tex
Member
|
# Posted: 17 Jun 2012 05:59pm - Edited by: tex
Reply
See next
|
|
tex
Member
|
# Posted: 17 Jun 2012 07:09pm - Edited by: tex
Reply
Greetings all -
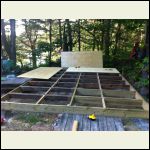
I have a few updates of this small project. We have completed the platform, but we will not be moving forward on a cabin.
Challenges faced due to permits, location options and general restrictions by local bylaws resulting in increase fee's, taxes and alike.
We have decided to look at a Yurt as an option.
It currently is a non permanent platform and with Yurt allows us to abide by local bylaws, no permits, or increases in taxes and fee's, while getting a four season structure for the forseeable use.
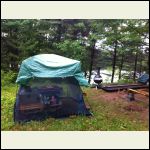
We currently will utilize the dome tent, platform and second deck to access the size and positioning of a Yurt that will be considered for next season.
This season we camp, but, with a setup now that adds more comfort.
Frankly without the worry, hassle and costs associated with the "cabin" dream, we can now spend the summer enjoying our lake property, which really is the main draw, not the small shelter.
Though I (we) will miss this journey to "our" small cabin, in many ways, I will not miss the worry and bylaw's affecting it.
Enjoy your summer all!
Keep the small cabin dream and website...alive!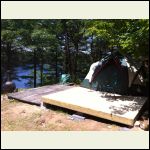
Practical Dreams...
| 
Cabin_foundation_2_0.jpg
|  |  |
|
|
tex
Member
|
# Posted: 6 Jul 2012 07:57pm
Reply
Update - > outdoor "summer" kitchen has been completed. 
Also may continue with a "shed" for storage and workshop...in the fall.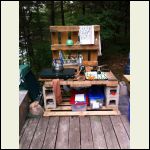
Outdoor Kitchen, Summer Kitchen
|  |  |  |
|
|
hattie
Member
|
# Posted: 6 Jul 2012 10:18pm
Reply
What a beautiful spot you have! Your outdoor kitchen looks great! Keep the photos coming!!! 
|
|
Anonymous
|
# Posted: 15 Jul 2012 12:23pm
Reply
Thanks will be looking at the site for the "shed"....soon.
|
|
Taiwin
Member
|
# Posted: 19 Aug 2012 04:03pm
Reply
Keep it coming
|
|
tex
Member
|
# Posted: 1 Oct 2012 09:09pm - Edited by: tex
Reply
Ok all - were back! 
And proud to say, that the additional "hut" is walled and roofed, and ready for insulation. After a few months of letting go of the 12'x16', permitted type design. We decided to go with the 108 sqft, designed hut.
The last windows and roof sections went in this past weekend, and I am proud to say, my friend and wife designed and built it well, with a day or two of my help, and gettingand delivering materials, and a a day or two helping with the roof and windows.
Other than that ...I supported the cause with most of the monies.
Go figure.
I will have pictures soon.
If anyone can give me tips on installing a small woodstove, piping and tricks to install it safely but economically, would be helpful.
Take care, I will be back with pictures, and design thoughts ,after Canadian thanksgiving weekend.
|
|
tex
Member
|
# Posted: 12 Oct 2012 09:05pm - Edited by: tex
Reply
Greetings Cabin fevers -
Through you, others and us, we built a shed-cabin.
Roof design
Window design
Floor design
Foundation design
Determined the location
This is not a hunting cabin, it is not a shed, it is not a cabin...
It is a journey into the woods.
If I could recommend anything beyond the design, location or personal touch's/accessories...it is to make sure you have an accurate and organized, supply/delivery of materials, and good tools, and if, you hire (any) of the build out, get it in writing what the scope and pay is.
Enjoy the pictures.
The wool insulation with fabric walls, goes in before the snow flies.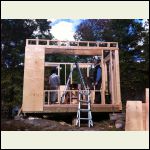
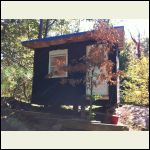
cabin north side
| 
cabin south side
| 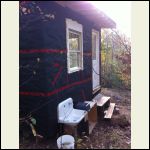
water collection-sink area
| 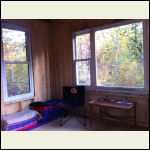
inside-windows
|
|
|
dstraate
Member
|
# Posted: 16 Oct 2012 02:33pm
Reply
Great site! Once you get it all tucked in, you won't be able to see it from the lake. Perfect if you value your privacy more than showing your status to passers by.
|
|
tex
Member
|
# Posted: 16 Oct 2012 08:24pm
Reply
Thank you for your observations.
The premise has been placed, as such, because of municipal setback rules, reasonable level location, that would, allow for protection from the northern winds, weather and closer to our unloading area.
The large window was placed on the south side, to allow for natural sunlight, that would allow for light and radiant heat.
|
|
jrbarnard
Member
|
# Posted: 10 Nov 2012 08:40am
Reply
I see a big problem with your construction, I hope you are not offended if I point it out.
I am not there.
Correct that and it will be perfect.
Oh.. and more fishing poles in the pictures...
R
*snicker*
|
|
tex
Member
|
# Posted: 12 Nov 2012 06:16pm
Reply
Snikers - please let us in on your wisdom!
|
|
tex
Member
|
# Posted: 12 Nov 2012 06:16pm
Reply
Please do...
|
|
oldbuddy
|
# Posted: 13 Nov 2012 08:19pm
Reply
Hello and congratulations on another really nice 12X16! Whatever you do....always plan for which way you'll have to go "when" you decide to build-on. We made it one year with the 12X16 but with four grandkids, I quickly realized that it needed to be bigger. Our bumpout for the bunkhouse is only 8X16, but it really opened the cabin up and put a lot more light into the entire cabin. Just think about it....maybe you don't have a large family and it will be fine but "think about it now" for down the road. That's just a suggestion. I think our add-on cost about two grand and I know that sounds like a lot of money for such a small space but it was done RIGHT!
Anyway.....enjoy your beautiful view and cabin. Stay in touch. My son and I (he's Old Buddy and I'm Old Old Buddy) are "the 12X16 on a hilltop in Ohio."
Take lots of pictures.....you'll never regret it. Old Old Buddy
|
|
| . 1 . 2 . >> |

