| . 1 . 2 . >> |
| Author |
Message |
beachman
Member
|
# Posted: 1 Oct 2011 07:16pm
Reply
We had a property by a beautiful lake that was getting old and infested with mice and other bugs and who-knows what. The place was not insulated but had a lot of charm so we decided to keep it, fix it up and build a new cottage that would suit our needs for more than just the summer season. There was an old bunkhouse that was dilapidated and needed to be removed. We started planning almost two years ago. We got serious and laid out the plot and started the plans ourselves about a year ago. I cut a few trees down that were too close to prepare the place for a 500sf cottage.
Our plans started with a basic 18' by 20' bunkhouse but soon expanded to 20' by 25'. Then we decided on a 4' by 12' jog to accommodate a kitchen area. There was a bathroom in the original plans but since there is no road access or electricity, the toilet and water became a challenge. We also expanded the roof area and provided for a loft with a dormer over the single bedroom.
We planned everything out quite carefully and researched this site and many others to get ideas on how to make things work off the grid. Our main energy would be propane, which we used and were familiar with in the old camp. I think we researched the toilet as much as anything and went with a Sunmar Centrix 2000 low water flush attached to a composter system. We have an outhouse with the old camp.
Over last winter we perfected our plans and started collecting the appliances and systems that we would use along with a gas generator that we would need during the building process. We ordered a Dometic propane refrigerator and a Premier propane range. Our design included an indoor shower. We had a small Zodi system for outside which worked well but we are getting older a fussy - besides it gets cold in Sept-Oct and might not warm up until late June. We ruled out using water systems in the winter as it gets mighty cold.
We planned to use a Bosch hot water heater for the shower. The water would be supplied by a 35 gal tank over the bathroom run with a 12v pump and accumulator tank - via plastic piping. The flush toilet and bathroom sink would run off the cold water feed from the overhead tank. We would fill the overhead tank with a Guzzler hand pump from and existing well with a long 1" hose. The kitchen sink would have a cast iron hand pump hooked up to a 1 1/4" pipe from the well - about 50' away.
We had to clear the lot from (large) stumps (by hand) in the spring before we could start - wanted to get down to the subsurface for a good foundation. We used cement blocks stacked for the foundation piers as we could not get any equipment in to dig and it was too rocky to put in tubes. The place will float but being sandy/rocky - hopefully not too much.
We started in early May and got started building in early June - lots of lugging of building materials by boat - luckily the wind was blowing out (rare) and no large incoming waves. The following are a couple of pictures of the start.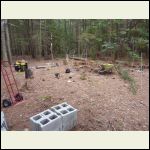
The site for the cottage
| 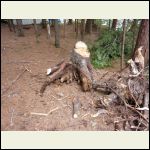
Removing stumps
| 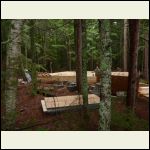
Starting the main floor
| 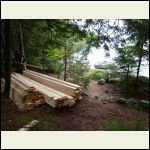
Lumber pile
|
|
|
neb
Member
|
# Posted: 1 Oct 2011 09:17pm
Reply
Very nic esetting you have there. Are you going to live there year around? Please keep us posted.
|
|
beachman
Member
|
# Posted: 2 Oct 2011 10:02am
Reply
Thanks neb. We could live there year round but with great difficulty. The drains to the sink and bathroom would be frozen solid and we would have to take alternative actions and probably use the old outhouse until things "warmed up" - around May or June here. Also, access by water is restricted during the freeze up and the thaw. We built it to be able to live there for three seasons and visits in winter.
OK - continuing with the project, we were able to get the floor up and have the place pretty well closed in within about two weeks.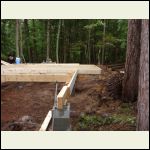
kitchen floor over hang
| 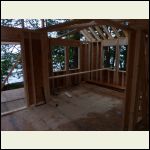
inside LR taking shape
| 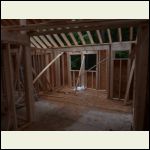
inside kitchen taking shape
| 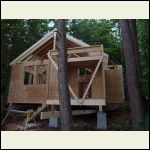
the front with the porch
|
|
|
Malamute
Member
|
# Posted: 2 Oct 2011 10:30am
Reply
Looks good.
Your framing work is good.
|
|
Montanan
Member
|
# Posted: 3 Oct 2011 04:06pm
Reply
Looking good! Sounds like you have very creative off-grid ideas. We're wondering how our water system will hold up this winter- hoping that we won't have anything freeze up. Looking forward to seeing photos of your progress.
|
|
beachman
Member
|
# Posted: 4 Oct 2011 06:50pm
Reply
Carrying on with the project, the framers suggested two upper front windows before finising the studs - glad we did this change. We installed a steel roof to avoid moss forming and to let the pine needles and leaves blow off easier. The shingles are a nice touch but application goes slow - very tedious. The inside is starting to get shaped up with rooms laid out and it is early August.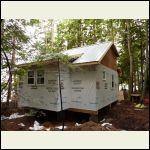
kitchen shot with steel roof
| 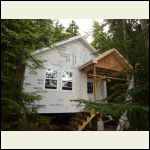
front with house wrap
| 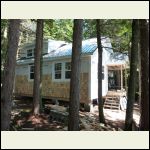
starting the outside shingles
| 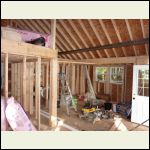
inside taking shape
|
|
|
hattie
Member
|
# Posted: 4 Oct 2011 09:33pm
Reply
This is looking great! Can't wait to watch your progress.
|
|
jrbarnard
Member
|
# Posted: 5 Oct 2011 06:46pm
Reply
Wow, super nice place! I have been looking at Hardiplank because it lasts a long time, I am told, but those shingles sure do look nice!
Russ
|
|
|
beachman
Member
|
# Posted: 5 Oct 2011 07:40pm
Reply
OK - August is getting on and September here and still working away. We thought we'd be in by now but there is a whole lot more to this than we both imagined. We will try to get as much done on the inside but will leave the project until next spring to finish the inside. We finished the shingling on the outside and the place is weather-proof now. The inside window trim and walls are mostly finished and we started putting the kitchen cabinets together - will not fully install until next year. As for the composter tiolet, the gas water heater, the shower and the sink in the bathroom with the 12v pump - all next year unfortunately, We will put in the appliances then also. Here are some pictures near the finish for this year. Will post a few pics of the old place and surroundings next time. There is a square in the floor for tile where the wood stove will go.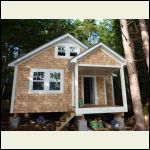
outside shingles just about done
| 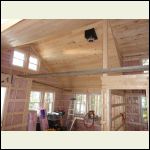
inside ceiling getting finished
| 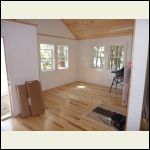
living room
| 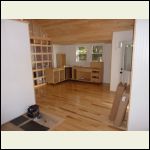
kitchen as we will leave it
|
|
|
trollbridge
Member
|
# Posted: 5 Oct 2011 08:41pm
Reply
Absolutely beautiful cottage! Love the exterior shakes and the interior floor and bead board. Nice and bright! Your floor looks a lot what we are going to install in our cabin. Your cabin is also close to ours in size. What is your total square footage? Your workmanship looks wonderful and I am excited to watch for future postings. I really like your front porch too-and the way the stairs come up the side. Nice design. Did you enjoy that part of the planning? We enjoyed our design stage and it is neat seeing it come together. It will be a long winter for you won't it?
|
|
hattie
Member
|
# Posted: 5 Oct 2011 09:32pm
Reply
I love the light coloured wood on the inside. It really keeps it open and bright!! What a beautiful place you have.
|
|
raisadan
Member
|
# Posted: 6 Oct 2011 02:23pm
Reply
Simple gorgeous ! You've done well ! If my place in Russia looks half as good as yours when I'm done, I'll be happy.
Cheers!
|
|
neb
Member
|
# Posted: 6 Oct 2011 02:58pm
Reply
Awesome. Man it looks good.
|
|
beachman
Member
|
# Posted: 6 Oct 2011 06:14pm
Reply
The cottage is about 500sf with another say 100sf for the loft and the dormer gives about 5-6.5ft headroom. There is also room over the bathroom for the tank and the pump and room to move around them - probably 35sf or so. We were lucky to get good help with the project from seasoned builders. We enjoyed the planning and spent much time with it until we thought we had what we wanted - happy with the results. Yes, it will be a long wait to spring as I am anxious to see how the water and bathroom items will work. Thanks all for the nice comments - and thanks to all for the great information and ideas in this forum. I am posting a few last pictures - of the simple solar set up to replenish the battery for the pump, the inside of the old camp, our deck out front and a walkway that we built out to a point at a brook. The walway took a few years to complete but is a nice addition.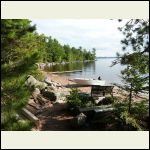
simple solar set up
| 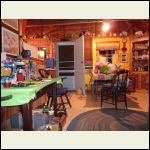
inside the old camp
| 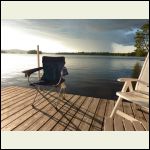
cloud passing by the front deck
| 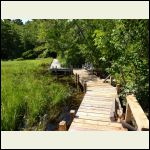
walkway to the brook
|
|
|
trollbridge
Member
|
# Posted: 6 Oct 2011 09:07pm
Reply
Wow,your land is so beautiful. I love the scenic shoreline and your old camp looks just like an old cottage that would be on a lake. It is very cute! Is this what you fixed up? What did you do to it? What will you do with it when your new place is done? The little scallop along the top edge of the wall is very charming. Do you happen to have an outside photo of your old cottage that you could post? I'll bet it is cute as a button!
|
|
Montanan
Member
|
# Posted: 7 Oct 2011 01:16pm
Reply
What a spectacular cottage in an absolutely stunning location!! I love the beadboard on the interior walls. Is this just a summer camp, or do you hope to be able to use it year round?
|
|
beachman
Member
|
# Posted: 12 Oct 2011 08:07pm
Reply
OK - couple of pictures of the "old" place. You can see why we are keeping it as is. It's in a great location. We are very lucky to have such a nice spot. As for te new place - it will make the spring and fall seasons more bearable and visits in the winter now possible. No year - round use as the facilities are restricted in the colder months.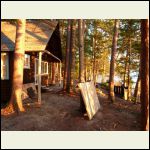
The front at opening time
| 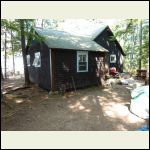
The back - 1
| 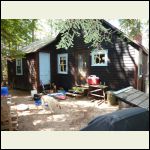
The back - 2
|  |
|
|
trollbridge
Member
|
# Posted: 12 Oct 2011 08:32pm
Reply
Wow and thanks. Classically beautiful!! The setting is gorgeous! Where is your new cabin in relation to the old?
|
|
Mark2011
Member
|
# Posted: 20 Oct 2011 09:14am
Reply
Hey, very nice cabin I have to say.
Can I ask you how you did the outside shakes? and the interior white walls? Where did you get that material?
I live in Ottawa and building up near fort coulonge quebec.
|
|
beachman
Member
|
# Posted: 20 Oct 2011 08:28pm
Reply
The new camp is about 40 - 50 feet down the "path" to the beach from the old place. There is a lot of famliy history with the old place so tearing down was not an option. We re-stained the outside shingles and levelled the foundation - quite a job! We will paint all of the trim and put a new roof on in a year or two - lots of moss forming on the old one. Thinking about a steel roof but everyone likes the sound of rain on the shingled roof.
As for the new place, the outside shakes are actaully cedar shingles with rows spaced at about 6". We used pre-base coated corner and trim boards 4 and 6" widths. We will stain the shingles transparent grey or maybe moss green - don't know yet. We will not leave them as they will blacken unevenly over time. The inside walls are done with 3/8' 4x8 sheets of beadboard that we got at Kent Bldg Supplies - probably can get them at Home Depot in Ottawa area - not sure if they have Kent in Quebec (Irving Company). We strapped the walls to minimize bowing of the beadboard. It did bow anyway here and there but not real noticeable - it is a camp! We will paint the beadboard some nice light color - maybe a darker off-set in the kitchen area.
Next year I will let you all know how the water and the bathroom works out. Hope it goes as planned. Thanks for all the nice comments.
|
|
marker2011
|
# Posted: 29 Oct 2011 08:02pm
Reply
Do you have any more pictures?
Can I ask where did you get the cedar for the siding and how much roughly did it cost say to do one side. Im still thinking on what to do for siding
|
|
old buddy
Member
|
# Posted: 30 Oct 2011 09:18am
Reply
Your cabin is beautiful! It looks like something you built to live in full-time. How long did your project take total to date? Isn't it funny how all those "little things" take up sooooooo much time?
We aren't limited as much by the weather at our cabin as we are by the geographical terrain of going up the hill in the winter. Once the ground has snow on it and then melts once or twice.....a 4X4 pickup sinks about 2-3 inches in the muck. That's why we're looking real hard about purchasing a 4-wheeler or side-by-side. Can't make up my mind. The side-by-side would be great in transporting tools and materials, but the 4-wheeler would go up the steep grades a lot easier.
I can't wait to see your pictures next spring. Good luck with your completion. Old Old Buddy
|
|
beachman
Member
|
# Posted: 7 Nov 2011 07:17pm
Reply
Marker - The shingles cost $30 per bundle and were all trimmed. Some were in boxes and I got them from someone who was going to use them on a house but didn't have the time to apply them. It can be tedious but certainly gives a nice effect. I think a side would take about 5 bundles. The front and back required much cutting and fitting as well as the dormer. I bought 50 bundles and used about 30 on the cabin.
Old Buddy - The cabin took about two weeks to get up and get roofed - really quick, but it dragged from there. We went without builders for about 6 weeks and then worked off and on until September to the point where we stopped for the year. We plan to finish the rest ourselves next spring. Really anxious to get in but need a break from building anxiety - and it is getting cold here. We were down to NYC last week and went through Conn. during the snowstorm - about a foot there and didn't get anything here from news when we returned. It will come soon enough! Thanks for the nice comments.
|
|
beachman
Member
|
# Posted: 4 May 2012 07:21pm
Reply
OK - Spring is here and I finally made it back to the "project". I brought the wood stove in the truck down to the lake, loaded into the boat, brought it to the beach, out of the boat and up and into the cottage. I am a hurtin' today! I made some measurements for the tile and my wife and I opened up the old camp and raked up several loads of pine needles and sticks from the winter. Anxious to get going with the toilet, water and shower hookup. Black flies were just starting to come out. Nice to be back!
|
|
trollbridge
Member
|
# Posted: 4 May 2012 08:30pm
Reply
So happy you are finally getting back to your place........those wood stoves are killer huh???? Just about killed us too!!!!
|
|
canadian girl
Member
|
# Posted: 27 May 2012 10:12pm
Reply
Love it !! You both must be so proud 
|
|
leonk
Member
|
# Posted: 19 Jun 2012 06:22pm
Reply
very nice place! where in ON is it?
|
|
cabingal3
Member
|
# Posted: 19 Jun 2012 06:49pm
Reply
so ver wonderful.love everything about this place...but i love all cabins!
|
|
beachman
Member
|
# Posted: 16 Jul 2012 06:12pm
Reply
Wow - been so busy with building, I have not had time to re-visit this forum. Yes, we both love it but it is way more work than we ver imagined. It is in NB - southwestern. We have put in the tile for the wood stove and have installed the stove and pipe. It works great! We finished the bedroom and the living area and I posting the pics so far.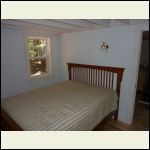
bed room just about ready
| 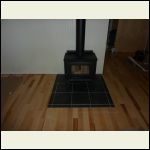
wood stove with tile base
| 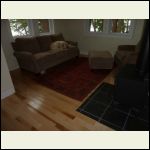
living area with furniture
|  |
|
|
beachman
Member
|
# Posted: 16 Jul 2012 06:20pm
Reply
OK onto the kitchen and plumbing. We have installed the bathroom plumbing - pex tubing (not pipe - there is a difference) with Whale fittings. Works pretty good - hope it doesn't leak. I have posted a couple of pics of he kitchen area in progress also. Put in the upper cupboards and doors and place and secured the lower cupboards - not as easy as the DIY shows and videos. Plan to put in the counter tops next weekend and finish the plumbing. The refrigerator works great and the stove is now hooked up. They are both propane.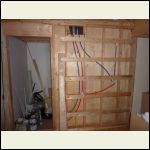
back of bathroom wall - plumbing
| 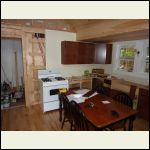
Kitchen in prog. - showing plumbing
| 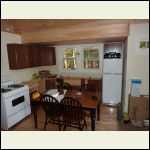
Kitchen in prog. with fridge
|  |
|
|
| . 1 . 2 . >> |

