|
| Author |
Message |
Vince P
Member
|
# Posted: 24 Mar 2011 12:45pm - Edited by: Vince P
Reply
I am finally putting a post together for the current state of this project that I mentioned in the following posts, which generated some interest and questions:
http://www.small-cabin.com/forum/3_401_0.html
http://www.small-cabin.com/forum/3_423_0.html
Here is brief summary of the toilet marathon:
1. Go in the woods- not convenient for large parties or my wife and three daughters
2. Outhouse with pit toilet- works OK when used with lime
3. Outhouse with sawdust toilet- works great, but wife hates outhouse in winter
4. Built an 4x8 "bathroom" addition with sawdust toilet – works good, but I'm always looking to improve.
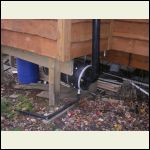
5. 1st generation rotating composting septic- worked perfect for over a year, but horizontal design is very prone to clogging with several people. Unplugging at the elbow is an unpleasant prospect.
6. 2nd generation composting septic: freestanding barrel with auger- current setup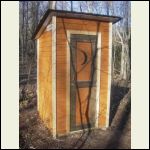
outhouse.JPG
| 
1st_generation_compo.jpg
|  |  |
|
|
Vince P
Member
|
# Posted: 24 Mar 2011 12:46pm - Edited by: Vince P
Reply
Here is a sketch of the plan and a basic parts list:
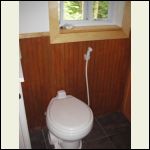
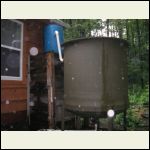
1. Sealand toilet- this is the only real $ I spent on this project. I believe I bought mine on eBay for half of the msrp. They offer many options with this toilet. I opted for a 1 pint flush design with hand sprayer to keep the bowl clean. The toilet is operated with a foot pedal, which is depressed to flush or lifted to fill the bowl even higher than the default volume. Using a flush toilet means you need a water supply. I tried gravity feed at first, but it was not optimal and now have an on-demand 12v pump feeding the toilet as well as two sinks from my cistern.
A regular household toilet would not work with my system.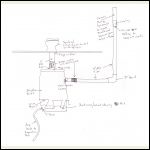
septic_plan.jpg
| 
toilet.JPG
| 
cistern.JPG
|  |
|
|
Vince P
Member
|
# Posted: 24 Mar 2011 12:49pm
Reply
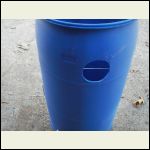
2. A barrel. I acquired several for free. When determining the size, I had to consider I needed a barrel with a removable top to access compost removal. I only had a 30 gal one; though I'm sure I could put in a 55 gal when I find one with a removable lid.
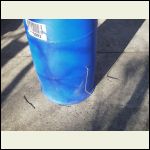
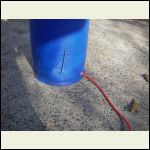
3. A 48" wire rod to be bent in a vise to resemble some sort of agitating device with a handle
4. A 1" barb and a hose that fits on it. A hole is drilled near the bottom of the barrel and the threaded barb is screwed in.
wire_auger_bent_into.jpg
| 
wire_auger_handle.JP.jpg
| 
barb_screwed_in.JPG
|  |
|
|
Vince P
Member
|
# Posted: 24 Mar 2011 12:50pm - Edited by: Vince P
Reply
5. A twelve foot section of 4" ABS pipe. This is what I had, 6" or pvc could have been used.
6. Flanges. The toilet came with a flange for the floor to connect the toilet to the pipe. I also installed a closet flange to connect the pipe to the barrel lid
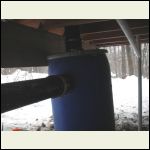
7. Two 4" rubber couplings. These were necessary to be able to remove the barrel from the toilet pipe and the "chimney". It helps to lube the inside with silicone for removal when necessary.
8. A 4" abs coupling with slip fit on one end and threads on the other. I cut a hole in the barrel then softened the plastic on the edges of the hole with a torch in order to screw in the coupling. Also used that method to screw in the barb above.
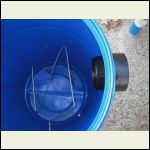
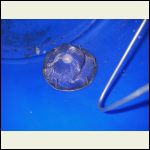
9. Added a screen (the kind used in a sink drain) to the inside of the barrel where the hose exits to keep from clogging.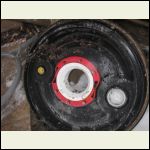
closet_flange_instal.jpg
| 
hole_cut_for_couplin.jpg
| 
coupling_installed_p.jpg
| 
drain_screen.JPG
|
|
|
Vince P
Member
|
# Posted: 24 Mar 2011 12:50pm - Edited by: Vince P
Reply
10. A 90 degree ABS bend for the chimney
11. A piece of no-see-um netting. A fine screen can be used, but this is what I had on hand. The purpose of this netting is to prevent insects from getting to compost chamber through the chimney.
12. A straight coupling to "trap" the netting near the top of the chimney and extend the overall length.
|
|
Vince P
Member
|
# Posted: 24 Mar 2011 12:51pm - Edited by: Vince P
Reply
I used a 50/50 mix of peat moss in the bottom few inches of the chamber. The idea is to add a couple handfuls of this mix every day or so, through the toilet.
Assembled the chamber and attached the chimney to a wall. I used pipe hangers. The rubber couplings are so I can disconnect the chamber.
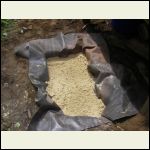
The hose is routed to an evaporation bed: a rectangular pit lined with an impermeable membrane (I used an old rubber pond liner) filled with sand, then stone, then a little soil. I planted ferns on the soil. The idea is to evaporate liquids coming from the barrel. The plants help with that too. The more use the system gets, the bigger the evaporation bed needs to be.
That's it. Hopefully I'll have a long-term usage report this summer.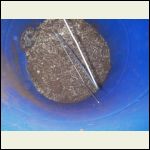
peat_moss_mix.JPG
| 
rubber_couplings_ins.jpg
| 
starting_the_evap_be.jpg
|  |
|
|
Anonymous
|
# Posted: 21 Aug 2012 01:47am
Reply
Any updates on how this worked?
|
|
Vince P
Member
|
# Posted: 19 Oct 2012 10:27pm - Edited by: Vince P
Reply
Quoting: Anonymous Any updates on how this worked?
It has worked very well. Better than expected in fact. The chimney is high enough to draft so that whenever the toilet is flushed, a vacuum is created that is strong enough to pull air from the toilet and keeps odors out. The wire agitator/auger is unecessary, so I would eliminate that from future versions. The only other change is that I lowered the barrel in the ground a few inches to allow for frost heaving... the top rubber coupling slides further up the drain as the barrel rises from the frost heave.
|
|
|
optimistic
Member
|
# Posted: 19 Oct 2012 11:34pm
Reply
This is really great info.. Why didn't you just do a "not allowed" diy septic? (I know the answer might be in the question)
|
|
Vince P
Member
|
# Posted: 20 Oct 2012 08:10am
Reply
Quoting: optimistic Why didn't you just do a "not allowed" diy septic?
Interesting reply.
Whether this is "allowed" depends on "where" you are. Having a barrel under an outhouse is not an uncommon setup.
|
|
optimistic
Member
|
# Posted: 25 Oct 2012 06:55pm
Reply
I read through your posts and this is a really fascinating concept.
How does the system face winter?
What if you build an insulation box for the drum and add those cheap reptile heating pads that use 10w to heat it up.. maybe on a timer so it doesn't it up all the time.
Also, so you are running a hose from the bottom of the drum into the ground? what if you didn't do that? Sun-mar doesn't do that.
|
|
Vince P
Member
|
# Posted: 26 Oct 2012 04:36pm
Reply
Limited use in winter.
The hose does not run into the ground. It runs into an evaporation bed and the set-up is completely self contained... read the above narrative carefully.
Sun-mar describes something similar to my evaporation bed here: http://www.sun-mar.com/PDF%20Files/RecyclingBed2004.pdf
|
|
optimistic
Member
|
# Posted: 27 Oct 2012 08:55pm
Reply
Even better then... so, excuse me but, the pee is evaporated?
What is your thought about another another adjustment of - insulation +adding a heat element (reptile pad?)
|
|
optimistic
Member
|
# Posted: 28 Oct 2012 10:36pm
Reply
I just finished reading that document... Then this is basically going to be poured into the ground - in a bedding area. This is no good for me then. It is the same, from the authority stand point, as dumping sewage.
I thought I could use this system in a way that if an inspector shows up and asks questions - I can prove that I am not putting anything into the ground and that it is all composted. But if I am putting something in the ground he can treat this as sewage dumping.
How about those urine diverting inserts? Then move it into a separate container and either let it really evaporate or add it into the compost toilet which will save on the added pint of water every time you go to the bathroom.
|
|
Vince P
Member
|
# Posted: 30 Oct 2012 01:15pm - Edited by: Vince P
Reply
Quoting: optimistic I just finished reading that document...
Again, it doesn't sound like you've read this thread or the Sun-Mar document thoroughly enough. The evaporation bed is lined with rubber and thus, self contained. The Sun-mar method is lined with a plastic liner and thus, self contained.
Feel free to modify as you wish for your paticular situation. This thread was meant as a follow-up to other threads mentioned in the first post, not to solve anyone's particular potty problems... if it doesn't fit your state of affairs, then the obvious choice would be not to use it, rather than continuing these "pessimistic" posts.
|
|
optimistic
Member
|
# Posted: 30 Oct 2012 07:00pm
Reply
hhh..
Yeah. I actually spoke with sunmar and they explained about how it works. It is actually a great fix to my plan. It is a famous method that was invented by this professor. You can actually use it for grey water as well if you build it big enough.
You wrote that the augur was not necessary. Why?
You are adding the peat into it through the toilet, right?
How do have a sense if you are adding enough?
I will emulate your system in some form or another.
|
|
optimistic
Member
|
# Posted: 30 Oct 2012 07:47pm
Reply
what do you think about this toilet - http://www.ecrater.com/p/8816546/dometic-302310071-model-310-white-rv-china?gps=1#
|
|
off of it
|
# Posted: 24 Dec 2012 01:54pm
Reply
From a professional builder point of view (before the market collapse), this is a great cost effective system for a small house/cabin, or even a conversion in a permanent travel trailer on your land.
I have to mention to all those who are paranoid about these set ups that if you have land that is rural and not constrained by 'city limit' laws, you usually can get away with anything in most counties. After all, whats the difference of just going behind a bush or the other 'animals' including your dog, as long as it's on your property? Sewage isn't a 'sewage dump' unless it's from a 'sewage system'.
Most building code permit applications deliniate a new dwelling permit. the electrical, plumbing, and septic system are all seperate. In other words, you don't have to have them in your house. Like the Amish don't have electricity. If you build a house and don't want a toilet because you go outside to an out house or one of those porta-potties like at a construction site, then you don't have indoor pluming and they can't 'inspect' it. In otherwords your electricity is only 'inspected' for safety, if you hire a contractor and put it in. 12 volt and solar systems are usually not coded. If you have rural property, you can build a 'garage' that doesn't even subsribe to the 'dwelling' code in many counties. The G has us all getting paranoid but remember their motivations. It's not really 'safety'. they could care less and thats what home insurance is for. They care only about permit and inspection fees. Bottom line is that if you live quietly on your own land and pretty much out of sight of the passing cars, you shouldn't have to worry about 'inspectors' in any case. They can't just 'tresspass' on your land. In some states, like Wisconsin, which have the Castle Doctrine law, Which seems to have done a whole lot more for our land owner privacy rights than even the Constitution, you would never have have a sherriff deputy do any casual 'inspecting' if nothing humongously bad on view or call in was happening. Building code inspectors get paid too much to be that stupid, at least around these here parts! Thanks for the article Professor!
|
|
adevil
Member
|
# Posted: 4 Mar 2013 02:59pm
Reply
I am putting together this project. I picked up a couple of barrels from the car wash last week.
|
|
optimistic
Member
|
# Posted: 4 Mar 2013 07:28pm
Reply
I will also do this in a few weeks. Have the barrels already. Add your pics adevil. I think Vince actually took this apart... I am not sure
|
|
Vince P
Member
|
# Posted: 1 Aug 2013 08:54am - Edited by: Vince P
Reply
This project has come full circle and now is as simple as it gets. Rather than have the chimney-vent come out the side of the barrel, it now comes out of the lid. Also the drain at the bottom now has a screw-on cap.
These two simple changes allow more versatility:
1. The barrel can be removed to haul compost away by capping with an intact lid and closing the drain. This is the best option if disposing of it on your land is not an option.
2. The capacity is much higher with the vent coming out of the lid.
We tried this system out this summer for a family of five and it worked perfectly. No odors, no inconvenience. I simply uncap the drain when we leave so that compost inside will dry out... drying is what needs to happen in order to have all waste turn to compost. I replace the cap when we are there so that there is no odor from the drain.
Unfortunately, it looks like the story will end here. We are putting up our cabin for sale in order to find something a bit closer to home. Contact me through this site if interested.
|
|
madovsky
Member
|
# Posted: 26 Feb 2014 04:48pm
Reply
thanks for your sharing Vince.
how do you put the evaporation pipe to the evap bed ?
is the pipe must be underground with the evap bed ?
can you put the barrel away from the cabin if the slope is more than 10 degrees ?
thanks
|
|
Vince P
Member
|
# Posted: 26 Feb 2014 05:20pm
Reply
If you look at the bottom of the barrel, you will see a small white pipe. I used to connect a flexible tube to this, which led to the evaporation bed, but now I have the evaporation bed right under the barrel, so it just drains right out of the white pipe.
|
|
creeky
Member
|
# Posted: 28 Feb 2014 08:11am
Reply
I use a centrex composting toilet which is essentially the same thing but with a fancier box. It has performed well for three years, including two winters. Only one user for most of the winter tho when it acts as a holding tank. The centrex came with flexible pipe and this winter in particular I've had fairly substantial frost heave without issue.
I too use an evaporation bed. One change I made was to run the "liquids" into a 5 gallon pail stuffed with straw. I appear to be getting good digestion of the straw and no noticeable odors. I prefer this to the evaporation bed as it appears to compost the waste and removing and replacing the pail should be fairly easy. This system has been in place for only one summer/fall season. Looking forward to seeing what happens when the spring thaw occurs.
There's been some mention of Bokashi composting. Anyone looking to do off grid waste management would do well to look into this.
|
|
|

